
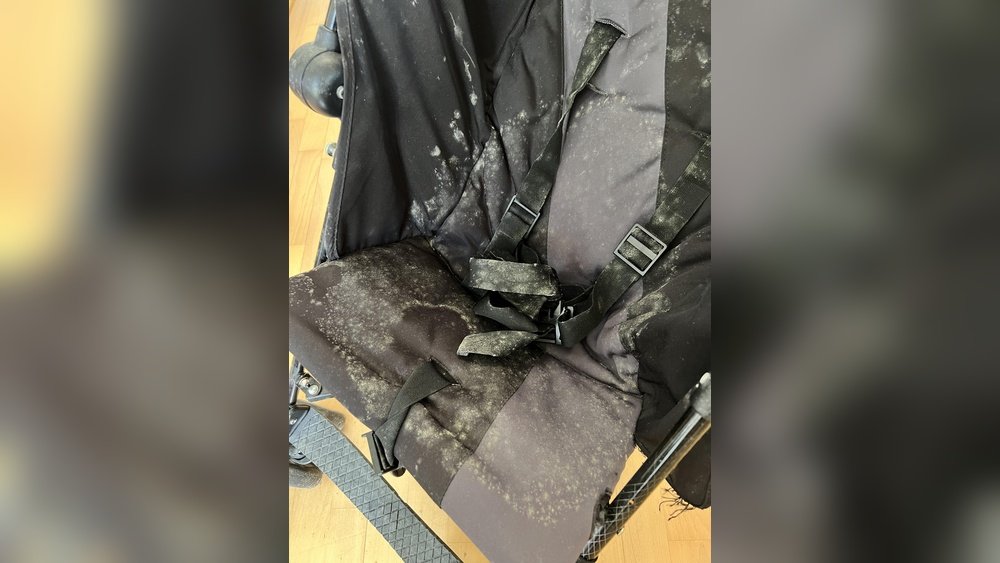
Mold on a stroller is far more than a cosmetic nuisance. Those black, green, or fuzzy spots can trigger allergic reactions, asthma flare-ups, and respiratory irritation in babies and young children, whose immune systems are still developing. Worse, left untreated, mold can degrade fabric, corrode metal frames, and weaken plastic components, forcing you to replace a stroller that may have cost $100 to over $1,000. The good news? You don’t need harsh chemicals or professional cleaning services to remove it. With a few simple, baby-safe steps, you can eliminate mold, protect your little one, and extend your stroller’s lifespan for years to come. According to the U.S. Environmental Protection Agency, prompt mold removal is critical to avoid long-term health risks for young children mold cleanup guidelines.
 Common mold growth on a stroller's fabric seat, often caused by trapped moisture from spills or rain.
Credit: www.reddit.com
Common mold growth on a stroller's fabric seat, often caused by trapped moisture from spills or rain.
Credit: www.reddit.com
What Causes Mold to Grow on Strollers?
Before diving into cleaning, it helps to understand why mold takes hold in the first place. Mold spores are present everywhere in the air, but they only grow when they land on a damp, organic surface with access to warmth and limited airflow. Strollers are perfect breeding grounds for these spores: they’re often exposed to rain, snow, spilled juice and snacks, sweat from your baby’s back, and puddles from wheel wells. Storing a damp stroller in a basement, garage, or humid closet, or leaving it folded tightly with bunched-up fabric, traps moisture and creates the dark, still environment mold thrives in. In humid climates, mold can even start growing on a slightly damp stroller in as little as 24 hours. You can also read our guide on baby stroller sitting tips expert guidelines.
Step 1: Inspect Every Part of the Stroller for Mold
Mold rarely stays limited to the obvious spots. In practice, most people only notice mold on the seat fabric, but the most common hidden growth sites are under storage baskets, inside wheel wells, around hinge joints, and under cushion inserts. A thorough inspection ensures you catch all growth before cleaning, so mold doesn’t return a week later.
Fabric & Upholstery
Check the seat, canopy, strap padding, and any removable fabric inserts for dark discoloration (black, green, or gray fuzzy patches) or a faint earthy, musty smell—mold can grow under the top layer of fabric even if you don’t see visible spots at first. Press your finger along seams and under cushions to check for dampness, a key sign of active mold growth. You can also read our guide on how to fold dream on me stroller.
Frame & Joints
Inspect the metal or plastic frame, especially hinge crevices, the underside of the handlebar, and areas where plastic meets metal. Mold here looks like powdery or fuzzy spots, and may smear if you wipe it with a dry cloth. Check for rust as well, which often develops alongside mold on metal frames.
Wheels & Storage Baskets
Remove wheels if your stroller has quick-release mechanisms, and check the tread, plastic hubs, and wheel wells for mold growth. Don’t forget the storage basket: if it has a fabric liner, check both the liner and the plastic basket itself for spots, and clear out any leftover crumbs or damp items that could feed mold. You can also read our guide on how to get a free stroller. Honest trade-off: If mold covers more than 25% of a fabric panel, or has caused significant rust on the metal frame, it may be more cost-effective to replace that component rather than spend hours cleaning, especially if the stroller is over 3 years old.
Step 2: Gather Safe, Effective Cleaning Supplies
Using the right supplies ensures you remove mold without damaging your stroller or exposing your family to harsh chemicals. Prep all items before starting to avoid interruptions, and work outside to avoid spreading mold spores indoors.
Personal Protective Equipment
Wear nitrile gloves (avoid latex if you have skin allergies) to keep mold spores off your hands, an N95 mask if you’re sensitive to respiratory irritants, and safety glasses if you’ll be working with liquid cleaners to avoid splashes.
Cleaning Tools
Gather a soft-bristled brush (an old toothbrush works for small crevices, a soft scrub brush for fabric), microfiber cloths, a bucket, a hose with sprayer (optional), clean dry towels, and a drop cloth or old sheet to place under the stroller while cleaning. A HEPA filter vacuum is ideal for removing loose spores without blowing them back into the air, but a standard vacuum with a brush attachment works in a pinch.
Cleaning Solutions
Stick to mild, baby-safe options to avoid damaging stroller materials:
- Natural options: White distilled vinegar (5% acidity), baking soda, mild baby laundry detergent, and 3% hydrogen peroxide. These kill mold effectively without harsh chemical residues.
- Commercial options: A mold-specific cleaner labeled safe for fabrics and plastics, if you’re dealing with widespread growth. Avoid bleach entirely: it can discolor fabric, weaken plastic and metal, and leave residues that irritate your baby’s skin, per current 2026 stroller care guidelines from major manufacturers. A common mistake: Using wire brushes or abrasive scouring pads, which scratch plastic, tear fabric, and create tiny grooves where mold can grow back later.
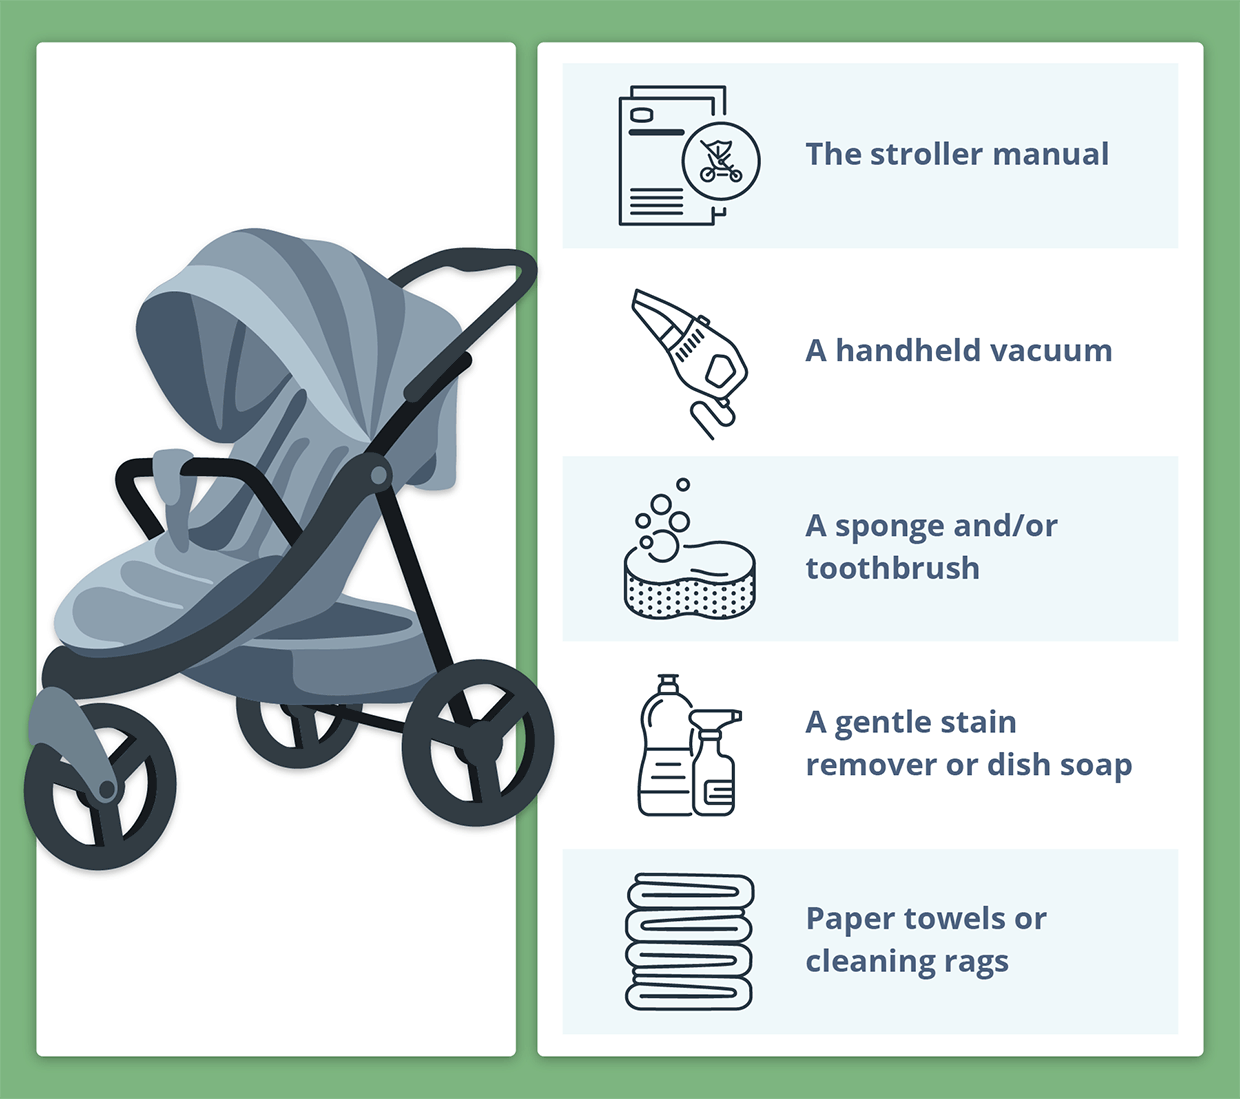 All necessary cleaning supplies laid out before starting mold removal to keep the process efficient.
Credit: www.chiccousa.com
All necessary cleaning supplies laid out before starting mold removal to keep the process efficient.
Credit: www.chiccousa.com
Step 3: Prep the Stroller for Cleaning
Proper prep makes the cleaning process faster and more effective, and prevents mold spores from spreading to other areas of your home. First, move the stroller to a shaded, well-ventilated outdoor area (direct sun can fade fabric during cleaning, so save sun exposure for drying later). Next, remove all removable parts: seat fabric, canopy liners, cushion inserts, storage basket liners, cup holders, and any detachable accessories. Shake all fabric pieces vigorously outside to dislodge loose mold spores before bringing them indoors. Use a soft brush to brush off all loose mold and debris from the stroller frame, wheels, and non-removable fabric before applying any liquid cleaners—this stops spores from spreading when you add water. If you have a HEPA vacuum, run it over all frame crevices, wheel wells, and fabric surfaces to pick up remaining spores and dust. Finally, check the stroller’s care label or user manual for brand-specific cleaning instructions. Most stroller brands (including Uppababy, Baby Jogger, and Chicco) specify which fabrics are machine washable and which require spot cleaning only. If you own an Uppababy Vista, our guide to Uppababy Vista disassembly makes removing fabric panels for cleaning quick and easy. Always test any cleaning solution on a small, hidden spot (like the underside of the seat) first to ensure it doesn’t discolor or damage the fabric. For general baby product cleaning safety guidance, refer to the U.S. Consumer Product Safety Commission's baby product care recommendations.
Step 4: Clean Mold from All Surfaces
Different stroller materials require different cleaning approaches to avoid damage. Work from the top of the stroller down to avoid spreading spores to already-cleaned areas.
Removable Fabric Parts
If fabric inserts are machine washable, launder them on the gentle cycle with warm water and mild baby detergent, adding 1 cup of white vinegar to the rinse cycle to kill residual mold spores. For non-machine-washable fabric, mix 1 part white vinegar with 2 parts warm water, plus a squirt of mild detergent. Spray or dab the solution onto moldy spots (don’t soak the fabric, just dampen the affected area) and let it sit for 10–15 minutes. Scrub gently with a soft-bristled brush, then rinse with a damp microfiber cloth. For stubborn stains, make a paste of baking soda and water, apply it to the spot, let sit 30 minutes, then scrub and rinse. Press out excess water with a clean towel—never wring fabric, as this can stretch or tear it. Always follow fabric care best practices to avoid damaging delicate stroller materials during cleaning.
Non-Removable Fabric & Padding
For non-removable fabric or foam padding that can’t be taken out, mix 1 part 3% hydrogen peroxide with 2 parts warm water. Spray the solution lightly onto moldy spots, let sit 10 minutes, then blot with a clean, dry towel. Do not soak the padding, as it can take 2–3 days to dry fully and will grow more mold if left damp.
Hard Plastic & Metal Components
Spray a solution of equal parts white vinegar and water onto moldy plastic or metal parts, let sit 10 minutes, then scrub crevices with an old toothbrush to dislodge growth. Wipe clean with a damp microfiber cloth, then dry metal parts immediately with a dry towel to prevent rust. Avoid harsh all-purpose cleaners, which can degrade plastic finishes over time.
Wheels
Remove wheels if possible, and scrub the tread, hubs, and wheel wells with the vinegar solution and old toothbrush. Rinse thoroughly, then dry completely before reattaching. If your stroller has fabric wheel well liners, clean them the same way you clean removable fabric parts.
 Gently scrubbing moldy fabric with a soft-bristled brush to avoid damaging the material.
Credit: www.youtube.com
Gently scrubbing moldy fabric with a soft-bristled brush to avoid damaging the material.
Credit: www.youtube.com
Step 5: Rinse and Dry Thoroughly (The Most Critical Step)
Rinsing and drying is the most important part of the mold removal process—rushing this step is the most common reason mold returns within a week. Trapped moisture is the #1 cause of mold regrowth, so take the time to dry every part of the stroller completely.
Rinse Off Cleaning Solution
Use clean water (a hose or damp microfiber cloth) to wipe away all soap, vinegar, or cleaning solution residue from every surface. Leftover cleaning agents can attract dirt and moisture later, leading to new mold growth.
Remove Excess Water
Shake out all fabric parts vigorously to dislodge trapped water, then press them between two clean, dry towels to absorb as much moisture as possible. For non-removable padded areas, use a wet/dry vac to suck up excess water if you have one, speeding up drying time significantly.
Dry Completely
Hang all removable fabric parts in direct sunlight for 2–4 hours—UV rays kill residual mold spores and speed up drying. For the stroller frame and non-removable parts, leave the stroller fully open in a sunny, well-ventilated area for at least 24 hours. If you live in a humid climate or it’s raining, use a portable fan or place the stroller near a dehumidifier to speed up drying. For brand-specific drying tips, our guide to brand-specific cleaning tips for Graco strollers outlines safe drying methods for all model types.
Verify No Trapped Moisture Remains
Before storing or using the stroller again, run your fingers along all seams, folds, under cushions, inside wheel wells, and the storage basket to check for dampness. Even a small amount of trapped moisture can lead to new mold growth in 24–48 hours.
Step 6: Prevent Future Mold Growth
Once you’ve removed mold, a few simple habits will keep it from coming back, saving you time and protecting your stroller’s lifespan.
Proper Storage Habits
Always store the stroller completely dry, in a cool, dry, well-ventilated area—avoid basements, garages, or closets with high humidity. If you must store it in a damp space, place a silica gel pack or small portable dehumidifier in the area to absorb excess moisture. Don’t store the stroller folded tightly with fabric bunched up; leave it partially unfolded to allow airflow. If you leave your stroller outside temporarily, use stroller sun protection covers that are breathable to avoid trapping moisture while shielding fabric from UV damage.
Regular Cleaning Routine
Wipe down the stroller seat, frame, and wheels with a damp cloth and mild detergent every 1–2 weeks, especially after rainy days or spills. Empty the storage basket regularly, and never leave leftover snacks, damp clothes, or sippy cups inside it, as these create moisture and organic material for mold to feed on. Incorporate mold checks into your monthly stroller safety checks to catch small spots before they spread.
Moisture Control Tips
If the stroller gets wet from rain or spills, dry it as soon as possible—don’t leave it damp in a car or hallway for hours. In warm weather, use warm-weather stroller care techniques like breathable mesh liners to absorb sweat and reduce moisture buildup in fabric. If you live in a very humid climate, wipe down the stroller with a 50/50 vinegar and water solution once a month as a preventive measure; it’s safe, non-toxic, and kills mold spores before they can grow. Mold growth is especially common in winter, when wet snow and ice get trapped in stroller wheels and folds, so pairing regular stroller cleaning with proper seasonal baby clothing keeps your little one dry and reduces moisture buildup. If you run errands while your baby naps, avoid leaving the stroller in a hot, humid car—our tips for managing early baby schedules can help you plan trips that avoid exposing the stroller to excess moisture. With a few inexpensive household supplies, you can clean mold off your stroller for a fraction of the cost of new affordable baby care tools. Strollers can cost anywhere from $100 to over $1,000, so cleaning mold instead of replacing it saves you money for baby crib comfort items and other essentials.
Frequently Asked Questions
Can mold on a stroller make my baby sick?
Yes. Mold spores can trigger allergic reactions, skin rashes, asthma attacks, and respiratory irritation in babies and young children, whose immune and respiratory systems are still developing. Prompt removal and thorough drying are critical to avoid long-term exposure.
Is bleach safe to use to remove stroller mold?
No. Bleach is not recommended for any stroller component: it can discolor fabric, weaken plastic and metal parts, and leave harsh chemical residues that irritate your baby’s skin and lungs. Stick to mild detergent, vinegar, or hydrogen peroxide-based cleaners instead.
How do I remove mold from non-removable stroller padding?
Mix 1 part 3% hydrogen peroxide with 2 parts warm water, spray lightly onto moldy spots, let sit 10 minutes, then blot with a clean, dry towel. Do not soak the padding, as it will take days to dry and can grow more mold. If mold is embedded deep in the foam, you may need to replace the padding insert for safety.
How long does the entire mold cleaning process take?
For small, surface-level mold spots, the process takes 1–2 hours of active cleaning, plus 24 hours of drying time. For widespread mold, allow 2–3 hours for cleaning, and up to 48 hours for drying in humid weather. Working outside and prepping supplies ahead of time will speed up the process.
How can I tell if mold is completely removed?
After cleaning and drying, all previously moldy spots should be gone, and there should be no musty, earthy smell. If you still see faint spots or smell mildew, repeat the cleaning process. Monitor the stroller for 2 weeks after cleaning to ensure no new mold grows, which would indicate there’s still trapped moisture somewhere.
Will cleaning mold damage my stroller?
As long as you use mild, stroller-safe cleaners, soft brushes, and avoid soaking fabric or using harsh chemicals, cleaning mold will not damage your stroller. Always test cleaners on a small hidden spot first, and follow the manufacturer’s care instructions to avoid voiding any warranty.
Final Takeaway
Cleaning mold off your stroller is a simple, cost-effective way to protect your child’s health and extend the life of a major baby gear investment. The key to success is catching mold early, using gentle, baby-safe cleaners, and—most importantly—drying every part of the stroller completely before storage or use. Pair regular cleaning with proper storage and moisture control habits to keep mold from coming back for good. If you’re in the market for a replacement, our guide to durable stroller options can help you choose a model that resists mold and wear long-term. For a full stroller care routine, check out our guide to full stroller cleaning routine to keep it safe, fresh, and mold-free all year long.
Sophia Linda is a freelance writer and Certified Health Coach based in the Newbury Park, CA. Passionate about healthy living, she focuses on helping families stay active and connected to the outdoors. Together with her husband and their three young children, Sophia spends much of her time traveling, hiking, and camping. Her work has been featured on the bestbabycart blog, and she brings a practical, real-world perspective to reviewing baby products for parents.