Are you ready to make the most out of your Graco car seat as your child grows? Transitioning from a car seat to a booster can seem like a daunting task, but it doesn’t have to be.
Imagine the peace of mind you’ll feel knowing your child is safe and secure, while also comfortable in their seat. In this guide, you’ll discover simple, step-by-step instructions to convert your Graco car seat into a booster. By the end, you’ll feel empowered to make this change confidently.
So, let’s dive in and make this transition smooth and stress-free for you and your little one.

Safety Precautions
Converting a Graco car seat to a booster is crucial for your child’s safety. Making the transition requires attention to detail and specific safety precautions. Not following these guidelines can lead to unsafe conditions during travel.
Understanding The Importance Of Safety
Safety comes first when adjusting car seats. Make sure the seatbelt fits snugly across the child’s shoulder. Avoid loose straps; they can cause injuries in sudden stops.
Inspecting The Car Seat
Examine the car seat for any wear or damage. Broken parts can compromise safety. Make sure all buckles and fasteners work correctly. Regular checks ensure reliability.
Checking Manufacturer Guidelines
Each Graco model has specific instructions for conversion. Follow the manufacturer’s guidelines closely. Incorrect installation can lead to accidents. Keep the manual handy for reference.

Ensuring Proper Fit
The booster seat must fit your child. Ensure the seatbelt fits across the chest and lap. Do not allow the seatbelt to touch the neck or stomach. Correct fitting prevents injuries.
Positioning The Booster Seat
Place the booster seat in the back seat. Avoid the front seat for safety reasons. The back seat provides maximum protection during accidents.
Regular Safety Checks
Perform regular checks to ensure the booster seat remains secure. Adjust straps if they become loose. Consistent checks maintain safety and comfort.

Tools Needed
Converting a Graco car seat to a booster is simple. Having the right tools makes it easier. This section explains what you need for the job. Gather these tools before starting. It will save time and effort.
Basic Tools
You only need a few basic tools. A screwdriver is essential. It helps in unscrewing parts. Ensure it fits the screws on your car seat. A flathead or Phillips screwdriver should work. Check your car seat manual to confirm. A soft cloth is useful too. It keeps the car seat clean during conversion.
User Manual
The user manual is a valuable tool. It provides specific instructions for your model. Keep it handy while converting. It helps avoid mistakes. If you don’t have it, download it from the Graco website. Manuals are available for most models.
Safety Check
Safety is crucial when converting a car seat. Inspect the seat for wear and tear. Look for any broken parts. Replace them if necessary. Ensure all parts are secure before use. A faulty seat can be dangerous.
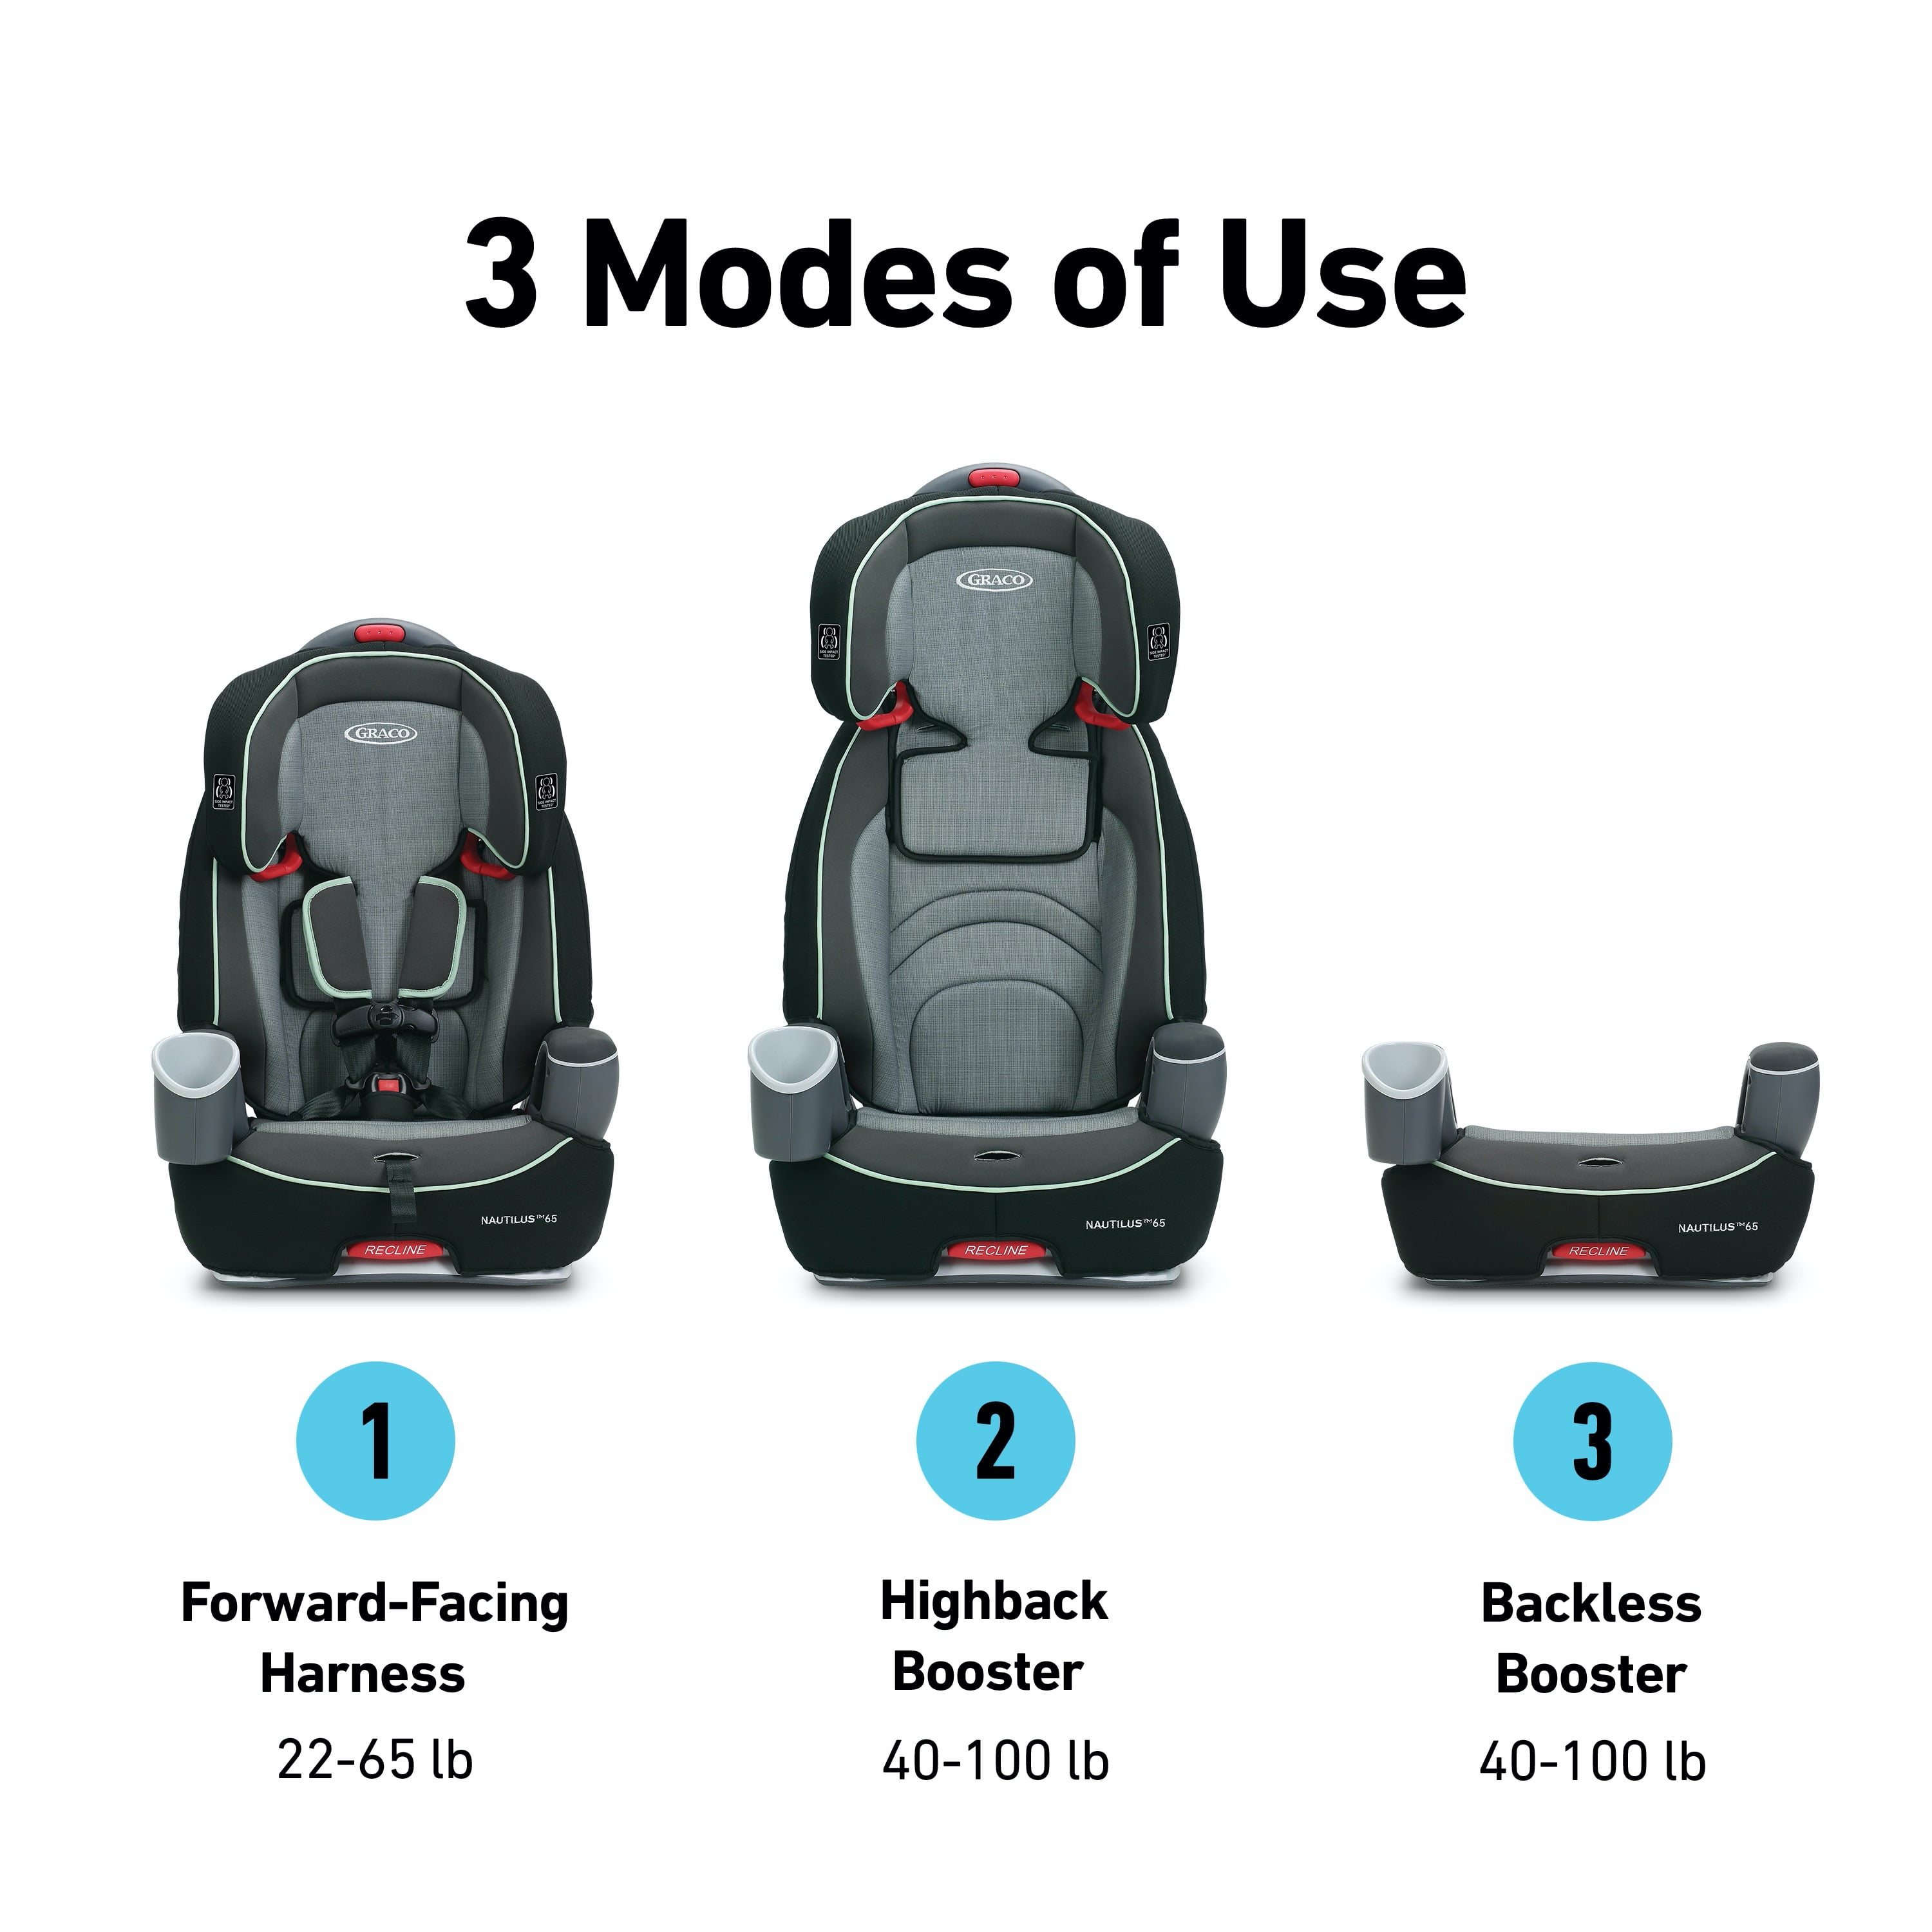
Identify The Car Seat Model
Before converting your Graco car seat to a booster, identify the car seat model. This step is crucial for ensuring a safe and proper transition. Graco offers various car seat models, each with unique features. Knowing your car seat model helps you follow the correct conversion steps. It also ensures you use the appropriate accessories and instructions.
How To Find The Model Number
The model number is usually on a label on the car seat. Check the underside or the back of the seat. Sometimes, it’s also on the side of the seat. The label will show the model number, manufacture date, and expiration date. This information helps in getting the right user manual.
Understanding The Model Types
Graco car seats come in different types. Convertible seats, 3-in-1, and all-in-one models are popular. Each type has different conversion methods. Convertible seats change from rear-facing to forward-facing. 3-in-1 and all-in-one models offer more stages, including booster mode.
Check The User Manual
After identifying the model, check the user manual. It contains specific instructions for your seat model. The manual provides detailed steps for converting to a booster. If you lost the manual, download it from Graco’s website using the model number.
Consult Graco’s Customer Support
If you’re unsure about the model, contact Graco’s customer support. They can assist with identifying the model and provide guidance. Having the right model information ensures a safe transition to booster mode. It also ensures compliance with safety standards.
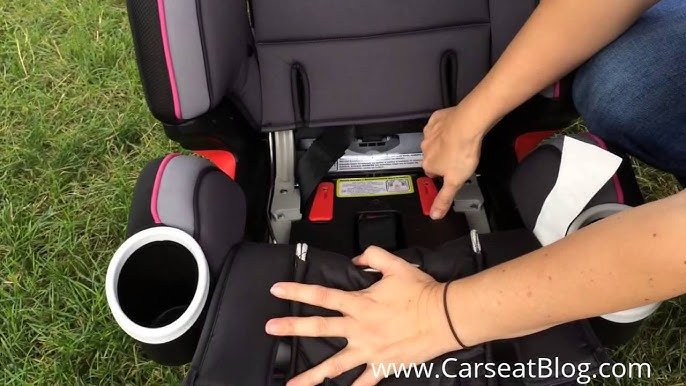
Remove The Harness System
Converting a Graco car seat to a booster involves removing the harness system. This step is crucial for ensuring the car seat fits the growing child. The harness system is designed to securely hold younger children. As they grow, they require more space and freedom. Switching to a booster allows for this transition. Follow these steps to safely remove the harness system.
Remove The Harness Straps
Begin by locating the harness straps. These are usually attached to the back of the seat. They help keep the child securely in place. To remove them, find the metal clips securing them. Pull these clips out gently. This will release the straps from the seat.
Detach The Buckle
Next, focus on the buckle located at the bottom of the seat. It connects the straps together. Unfasten the buckle by pressing the release button. Once undone, you can take out the buckle entirely. This step is crucial for transforming the seat into a booster.
Remove The Harness Pads
The harness pads provide comfort to the child. They are attached to the harness straps. Once the straps are removed, detach the pads. Simply slide them off the straps. Set them aside, as they are no longer needed for a booster seat.
Inspect The Seat
After removing the harness system, check the seat thoroughly. Ensure there are no loose parts left. All components should be securely stored away. This ensures the seat is ready to be used safely as a booster.
Adjust The Headrest
Converting a Graco car seat to a booster seat involves several steps. One of the most important steps is adjusting the headrest. A properly adjusted headrest ensures your child’s comfort and safety. Understanding how to adjust it can make a significant difference. Let’s explore the process of adjusting the headrest in detail.
How To Locate The Headrest Adjustment Lever
Begin by finding the headrest adjustment lever on the seat. It’s usually at the top or back of the car seat. This lever lets you move the headrest up or down. Check the manual if you have trouble locating it.
How To Adjust The Headrest Height
Press the lever to release the headrest lock. Gently slide the headrest to the desired height. Ensure it sits just above your child’s shoulders. This position provides optimal support and safety.
How To Secure The Headrest In Place
Once adjusted, release the lever to lock the headrest. Make sure it clicks securely into place. A secured headrest prevents unwanted movement. Double-check to confirm it’s firmly locked.
How To Check The Headrest Position
Have your child sit in the seat to test the headrest. Ensure it’s comfortable and aligned with their head. A properly aligned headrest offers maximum protection. Adjust if necessary for better fit.
Attach The Seat Belt Guide
Attaching the seat belt guide is crucial for converting your Graco car seat into a booster. This guide ensures the seat belt fits your child securely. It also helps maintain proper belt positioning for safety. With this guide in place, your child remains comfortable and protected during every journey. Follow these steps to attach the seat belt guide correctly.
1. Locate The Seat Belt Guide
Find the seat belt guide in your Graco car seat package. It is a small, detachable piece. Usually, it is stored in a compartment on the seat. Check the instruction manual if you can’t locate it easily.
2. Position The Guide
Place the seat belt guide at your child’s shoulder level. This ensures the belt crosses the shoulder correctly. The guide should not be too high or too low. Adjust the seat height if necessary.
3. Attach The Guide To The Seat
Secure the seat belt guide onto the car seat. Most guides clip onto the side of the seat. Ensure it is firmly attached and doesn’t move. Test it by gently pulling to check stability.
4. Thread The Seat Belt
Pass the car’s seat belt through the guide. Ensure the belt lies flat without twists. The belt should cross your child’s chest and lap securely. Avoid leaving any slack in the belt.
5. Check For Proper Fit
Inspect the seat belt’s position on your child. It should fit snugly across the shoulder and chest. The lap belt should sit low on the hips. Adjust the guide if the belt isn’t positioned correctly.
6. Ensure Comfort And Safety
Make sure your child is comfortable with the seat belt guide. Ask if they feel any discomfort. A well-positioned guide enhances both comfort and safety. Regularly check the guide’s position as your child grows.
Position The Booster Seat
Converting a Graco car seat to a booster is a crucial step. It ensures your child’s safety as they grow. Proper positioning of the booster seat is essential. It provides maximum protection in case of a crash. Learning how to do this correctly is important for every parent.
Start by placing the booster seat on the vehicle’s back seat. Ensure the seat is flat and stable. Check that it does not wobble or tilt. Stability is vital for your child’s safety. A secure booster seat minimizes risks during sudden stops.
Align The Booster Seat
Position the booster seat so it’s centered on the vehicle seat. Proper alignment ensures comfort and safety. The seat belt should easily fit over your child’s shoulder. This reduces the chance of injury in accidents.
Adjust The Seat Belt
Thread the seat belt through the booster seat guides. Ensure the belt rests on your child’s shoulder. It should cross the chest, not the neck. A correctly positioned seat belt offers better protection. Adjust if necessary for a snug fit.
Check The Booster Height
Ensure the booster seat height suits your child’s size. The seat belt should fit comfortably without pressing. Height adjustments may be needed as your child grows. Regular checks can prevent discomfort and ensure safety.
Test The Stability
Press down on the booster seat to test its stability. It should not shift or slide easily. A stable booster seat is less likely to move in a crash. Regular checks can help maintain this stability.
Credit: resilientventures.org
Secure The Booster In The Car
Securing the booster seat in your car is crucial for safety. Ensuring it’s properly installed minimizes risks during travel. Follow these steps to keep your child secure and comfortable.
Position The Booster On The Vehicle Seat
Start by placing the booster seat on the vehicle seat. Ensure it’s flat and stable. The booster should not wobble or shift when touched. A stable base is essential for effective protection.
Use The Vehicle’s Seat Belt
Thread the vehicle’s seat belt through the booster’s guide. This secures the booster to the seat. Make sure the seat belt is not twisted. A twisted belt can reduce safety and comfort.
Check The Seat Belt Fit
Ensure the seat belt fits snugly over the booster. It should lie flat across the child’s shoulder and chest. Avoid positioning it across the neck. This ensures the seat belt functions correctly.
Confirm The Booster’s Stability
Once installed, push the booster from side to side. It should remain firm without tipping. Adjust as needed to achieve this stability. A firm booster provides better protection in case of sudden stops.
Regularly Inspect The Booster Setup
Check the booster setup before each trip. Look for loose belts or misalignment. Regular checks ensure continued safety for your child. Consistency in inspection boosts peace of mind.
Check For Stability
Ensuring the stability of your Graco car seat when converting it to a booster is crucial. A stable booster seat enhances safety and confidence during travel. This section focuses on checking for stability in a simple, straightforward way.
Check The Base
Begin by examining the base of the car seat. Make sure it sits flat against the vehicle seat. The base must not wobble or shift with ease. Firmness is key for a secure fit.
Verify The Seatbelt Path
Inspect the seatbelt path for correct alignment. Ensure the belt threads smoothly through the designated slots. Loose or tangled belts can affect stability. Adjust to maintain a snug fit.
Test The Harness
Ensure the harness remains tight and secure. Check for any slack in the straps. Tighten if necessary to improve stability. A firm harness helps keep the seat steady.
Secure The Backrest
Make sure the backrest is locked in place. Press gently to confirm it does not move. A secure backrest supports the child and keeps the seat stable.
Assess Movement
Give the booster a gentle push. Observe if it shifts excessively or stays put. Minimal movement indicates good stability. Recheck all parts if the seat moves too much.
Review Manufacturer Guidelines
Always consult the manufacturer’s guidelines for best practices. They provide insights on securing the booster effectively. Follow these instructions to ensure optimal stability.
Credit: www.henrycountyymca.org
Maintenance Tips
Maintaining your Graco car seat ensures safety and longevity. Regular care keeps the seat functional and clean. Convert your Graco car seat to a booster with confidence. Follow these maintenance tips to keep your booster seat in top shape.
Check For Wear And Tear
Inspect straps and buckles for signs of wear. Replace any damaged parts immediately. Look for cracks or weak spots in the plastic. Ensure the booster seat stays safe for your child.
Keep It Clean
Regularly clean the car seat cover. Use mild soap and water for washing. Avoid harsh chemicals that can damage the fabric. Dry thoroughly before reassembling the seat.
Store Properly When Not In Use
Store the booster seat in a dry, safe place. Avoid direct sunlight to prevent fading. Keep away from sharp objects to avoid damage.
Regularly Check Installation
Ensure the booster seat is securely installed. Follow the manufacturer’s instructions for proper setup. Adjust the seat as your child grows for continued safety.
Replace After Accidents
Replace the booster seat after any car accident. Even minor accidents can compromise safety. Check the manufacturer’s guidelines for specific instructions.
Frequently Asked Questions
How Do You Convert A Graco Car Seat?
To convert a Graco car seat to a booster, remove the harness system. Adjust the headrest to fit your child’s height. Ensure the seatbelt fits snugly across the shoulder and lap. Always refer to the Graco manual for detailed instructions to ensure safety and proper installation.
When Is A Graco Car Seat Ready For Conversion?
A Graco car seat is ready for conversion when your child outgrows the harness system. Typically, this is when your child weighs at least 40 pounds. They should also be mature enough to sit properly without slouching. Always check the specific guidelines in the Graco manual.
Are All Graco Car Seats Convertible?
Not all Graco car seats are convertible to boosters. Some models are designed specifically as car seats or boosters. Always check the model specifications and the Graco manual. Convertible models will have clear instructions for transitioning from car seat to booster mode.
What Tools Are Needed To Convert A Graco Seat?
Converting a Graco car seat to a booster usually requires no tools. The process involves removing the harness and adjusting the seat. Always follow the specific instructions in the Graco manual. If tools are needed, the manual will specify which ones.
Conclusion
Converting a Graco car seat to a booster is simple. Follow the steps carefully. Ensure the seat is correctly installed for safety. Check all straps and latches. Make sure everything fits securely. Your child’s safety depends on it. Regularly inspect the booster seat for wear.
Adjust the straps as your child grows. Always prioritize comfort and protection. Refer to the manual if needed. Converting the seat properly ensures peace of mind. Now your child is ready for the road. Enjoy safe and happy travels.

Emma Grace is a devoted mother and passionate content writer at BestBabyCart.com. With firsthand parenting experience and a love for research, she creates helpful guides and honest reviews to support parents in choosing the best for their babies. Her goal is to make parenthood easier, one article at a time.