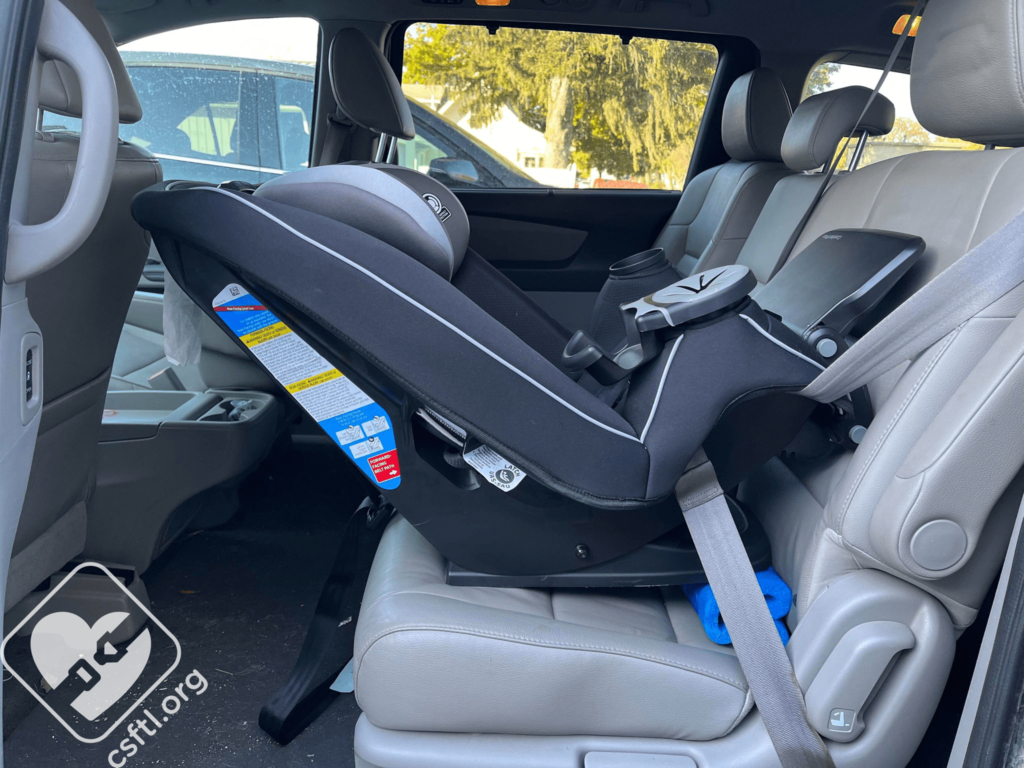
Installing a rear-facing Safety First car seat correctly is one of the most protective actions you can take for your child. Done right, it can reduce the risk of injury in a crash by as much as 71% for infants. Doctors and safety experts agree: keep your little one rear-facing for as long as the seat allows, often well after the first birthday.
But a car seat only protects when it’s installed properly. It needs to be tightly anchored, correctly reclined, and the harness must fit snugly against your child’s body. This guide walks you through every step—from reading the manual to doing the final tug test—so you can drive away with full confidence. The process is straightforward once you know what to look for, and you’ll become an expert after just one installation. You can also read our guide on how to convert graco 4ever car seat to backless booster.
Why Rear-Facing Matters So Much
Rear-facing isn’t just a boring rule—it’s physics. When a vehicle crashes forward, the child’s body is pressed back into the seat. The shell distributes crash forces across the entire head, neck, and spine, which are still fragile in young children. In a forward-facing seat, the harness would anchor the torso while the head flings forward, putting immense strain on the neck. That’s why the American Academy of Pediatrics recommends keeping kids rear-facing to the maximum weight or height limit of the seat. You can also read our guide on best diapers for chunky babies.
There’s Even More Than You Expect
A rear-facing seat can hold a baby’s head because the head does not flail forward; the seat cradles it. That means the neck and spinal cord—still soft and vulnerable—receive minimal force. Even after age two, the structural strength of the spine is not ready for the abrupt stops, so extending rear-facing use is best practice. You can also read our guide on best convertible child safety car seats for ultimate comfort and protection.
How Firm Should It Be?
You have to be able to move the seat less than an inch side-to-side or front-to-back after installation. That’s the gold standard. But don’t just tighten until it feels secure—actually give it a strong shake at the base. A car seat that feels firm at rest can still shift under weight without a proper tightening. We’ll show you exactly how to verify. You can also read our guide on can you put seat covers on heated car seats.
Step 1: Read Your Safety First Manual First
Before anything else, open the car seat’s instruction manual. Yes, truly—open it. Every Safety First model uses a slightly different LATCH route, recline adjuster, or harness slot system. A generic approach will always be less safe than the manufacturer’s exact instructions. You can also read our guide on best dog car booster seat.
- Find your specific model number (on the label under the seat)
- Note the weight and height for rear-facing use (upper limit)
- Check the seat’s expiration date (it’s typically printed on the plastic side)
If your manual is missing, Safety First provides more PDFs online, but only download from an official manufacturer domain. You can also read our guide on best diaper pail for odor control.
Step 2: Choose the Installation Location
Place the child’s safety seat in the backset—never the front, especially if you have a passenger-side airbag. The rear middle seat is generally the safest when you have it, because it’s farthest from intrusion points. If you’re using the LATCH anchor points, they are normally located in the backseat. You can also read our guide on how to put a car seat on a shopping cart.
Installing the Base with LATCH
- Locate the vehicle’s lower anchors; they’re between the seat cushions, marked with an icon.
- Attach the connector hooks from the seat basefirm to those anchors.
- Press down on the base with your knee while pulling the LATCH straps tight.
- Continue alternating pulling and pressing until you cannot pinch any slack.
If your vehicle lacks LATCH features (pre-2003 cars) or your childhas surpassed the lower anchors’ weight limit, switch to a seat-belt installation. You can also read our guide on best head support for infant car seat top picks for safety comfort.
Installing with a Standard Seat Belt
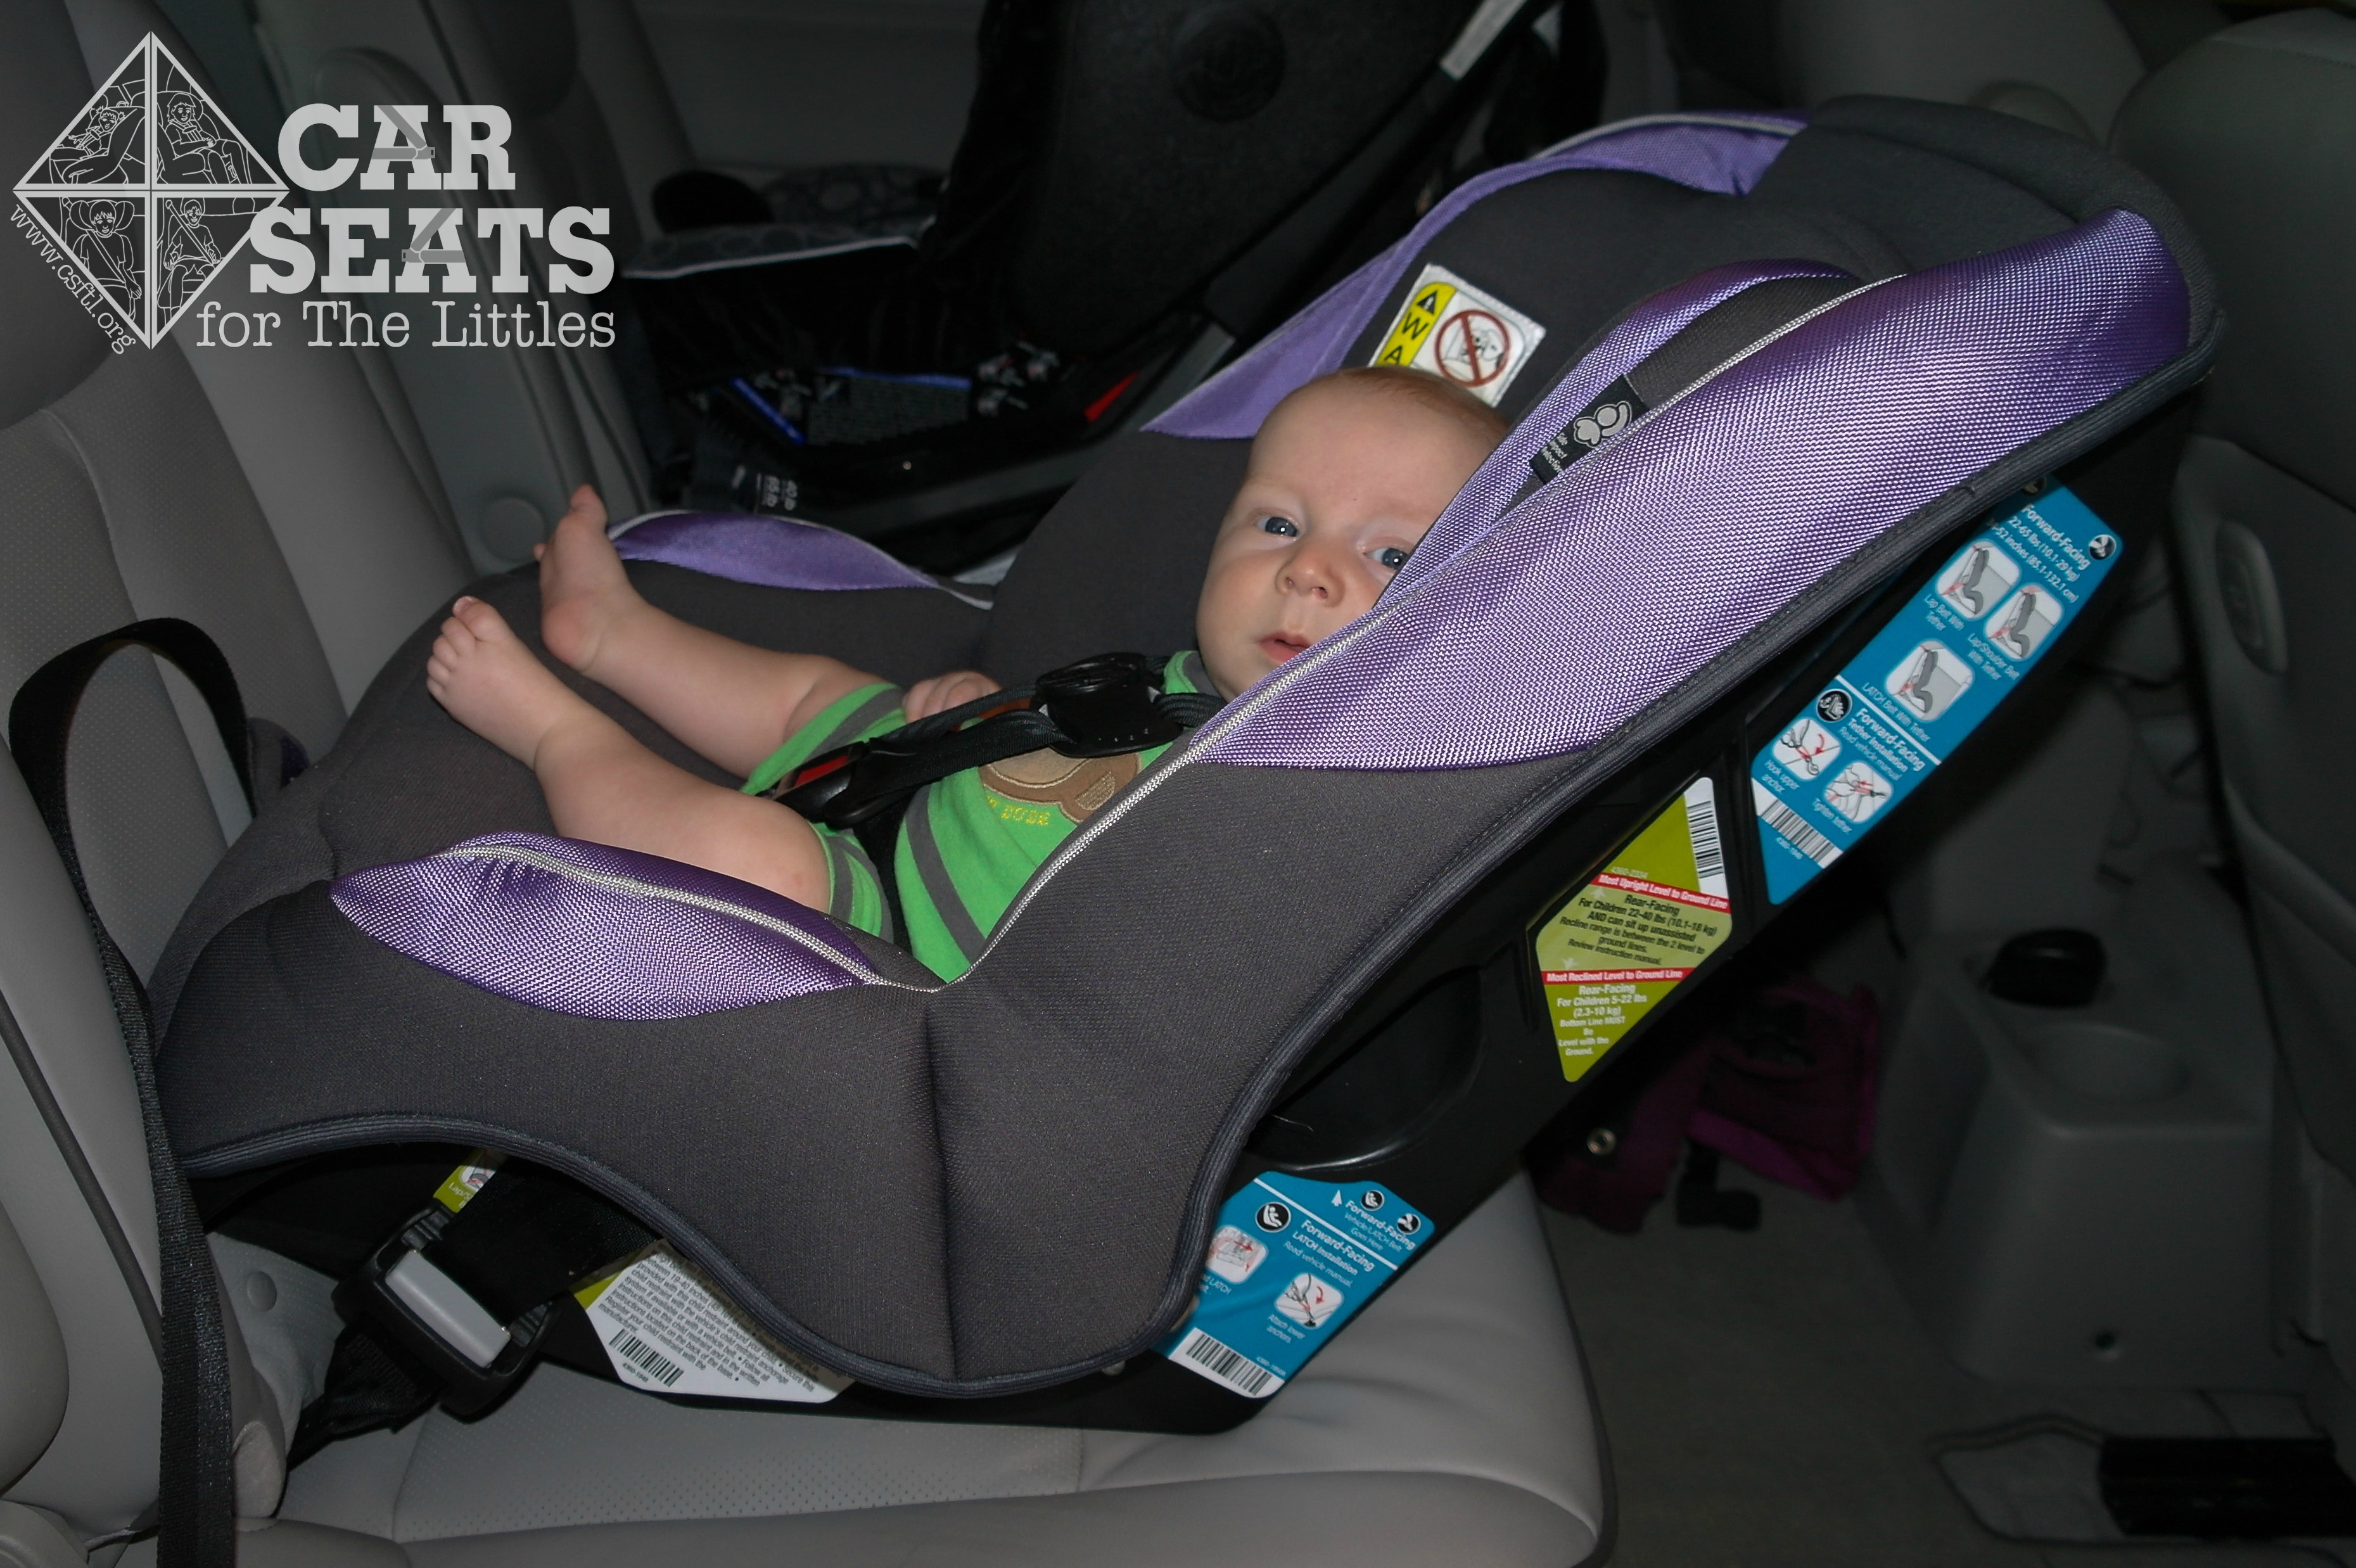
- Thread the lap-and-shoulder belt through the rear-facing belt path (check the manual for the correct route).
- Buckle the belt, then pull it fully out and retract it slowly. This activates the seat belt’s locking mechanism.
- While pressing down on the base, tighten the belt until it’s snug.
- For seat belts with a manually adjustable version, seek the mechanism as per the manual.
Credit: csftl.org
Step 3: Set the Correct Recline Angle
Most Safety First seats have built-in trust bubbles or an angle indicator. A rear-facing seat should be too upright—around a 30–45° recline for a rearwardly angled base. For infants and young babies, the seat must support the head fully, avoiding slump or chin-to-chest asphyxiation. You can also read our guide on best memory foam car seat cushion.
- Room: With the base flat, adjust the foot or center of the base’s recline foot to match the indicator’s level.
- If the seat has no indicator, use the “angle tape” method: place a folded towel under the base if the seat is too far standing. The best angle is when the seat back rests against the car’s seat while the base keeps the child from flopping forward.
Common mistake: Using a pool noodle under the base compresses the material and can affect force distribution. Only use approved leveling rods or the seat’s own adjuster. You can also read our guide on best car seat dolly for airport.
Step 4: Position the Seat Correctly
The rear-facing seat must rest naturally against the vehicle’s seat back, with minimal gaps. If you feel the seat tip forward, the harness behind will be too angled. You can also read our guide on best in child safety car seats for ultimate protection and comfort.
The “Master’s Check” for Front-to-Back
- After tightening, plant your knees onto the base (not on the seat) and give it a firm shove. If it moves more than 1 inch (2.5 cm) in any direction, you must redo.
Step 5: Secure Your Child
Now place your child in the seat. For rear facing, the harness straps should be at or below the child’s shoulders (slightly odd, but safe). You can also read our guide on best booster car seat with harness top picks for safety and comfort.
and a secure harness:
- Fit a clean diaper, remove bulky outer jackets (they add thickness).
- Place harness straps over the shoulders, no twist, sit smoothly.
- Buckle the crotch for and chest clip.
- Pull the harness webbing to get as snug as you can pinch a vertical fold of the strap between your thumb and finger—if you are able to pinch any material, it’s not tight enough.
The Pinch Test
- Push your fingers under the strap at the collarbone.
- Try to pinch the straps—you should not be able to pinch any fabric if it is truly snug.
- The chest clip should be at armpit level; the harness should not lift up off the shoulder.

Credit: www.youtube.com
Step 6: Double-Check Everything (Ever Time)
Each trip: make sure the cloth is not twisted, the chest clip is at armpit, and you don’t forget to pull the rings.
Check the Angle Indicator
Modern Safety First models have a built-in level to indicate the range. If the indicator is outside, re-adjust. Also, after adding a towel (if allowed), recheck. You can also read our guide on can you put a car seat in a shopping cart.
Arm-Strapping Tips
- Place your free hand on the top of the seat while tightening.
- Use one hand to push to base down while pulling the belt or LATCH. This eliminates slack hidden in the recline.
Common Mistakes and How to Avoid Them
Even an experienced installer can make these mistakes:
Set it and ignore it? No, the seat can loosen over time. Recheck monthly.
- ⚠️ Using Both LATCH and Seat Belt — choose only one method unless the manual specifically allows the “belt plus LATCH” combination.
- ⚠️ Using the wrong belt path — rear-facing and forward-facing have a completely separate path. Always locate the red/rear-facing path.
- ⚠️ Not removing stuffing—the chest clip improves seat geometry, keep it in place.
- Placing the seat in front of an airbag – a passenger airbag can hit the seated child’s face, resulting in severe injury.
When to Switch to Forward-Facing
Keep your child rear-facing until the seat’s absolute max weight or height limit—every extra month of rear-facing allows your child’s collarbones and vertebra to harden. The seat model should have a rear-facing weight of 40-50 lbs, and at that point you’re ready. You can also read our guide on best booster car seat with back top picks for safety and comfort.
Once they outgrow, the same tutorial will work for a forward-facing, but the harness should be at or above the shoulders, and your angle needs to be near 0°. You can also read our guide on how to turn car seat into booster.
Cleaning and Long-Term Care
- A car seat—marked with a 6–10 years lifespan? Check the plastic. Sunlight, heat, and vibration break materials.
- Always do a "missed event" — car seats must be discarded after a moderate crash (check NSCA guidelines).
- Clean with baby-safe wipes. Avoid drying instead of full soak, buckles stay dry to avoid friction loss.
Wrap-Up: Your Installation Is Your Best Installation
The real skill is not the first installation but the 58 outdoor checks. Every car trip is in a sense a static exercise. Once you memorize the target rule (base ≤ 1 inch, pinch test, then your child stays safe). You can also read our guide on best car seat automotive seat protector top picks for ultimate protection.
“You can practice installing in your parking lot before the day you need.” For the specific details about advances, keep a copy of the instruction book in the glove compartment. You can also read our guide on how to convert a graco car seat to a booster.
Finally, consider getting your seat checked by a certified Child Passenger Safety Technician at a nearby police station or fire department. Many stations offer free car seat checks—they’re there to help, not to judge. You can also read our guide on best seat protector for car seats ultimate protection for your vehicle upholstery.
Ready to get on wheels? Once the seat is fully secure, you’re going to hit the road just knowing you’ve done everything possible to keep that child safe. Start by having the child eat the seat—a perfectly stable base. You can also read our guide on how to recline safety first car seat.
Frequently Asked Questions
How to install Safety First car seat as a rear-facing infant with a base?
- Attach infant to seat using LATCH belts
But you should still expect a manual base that sits inside the car, many bases support rear__.
What if my child’s head is better?
The harness is at or below the child’s shoulders; the head is 1.0 cm below the top of the seat.
Can I install a rear-facing seat with a belt even with LATCH?
No—tired the manual. Traditional LATCH has lower anchors; some vehicles allow both if the total weight of the two carries is below the limit, your seat will state whether LATCH is allowed for heavier kids. You can also read our guide on lower car seat adapters icandy peach.
Should I put â baby in a heavy coat in the seat? No, bulky garments prevent being tight enough; the coat wraps synthesize a loose harness. Use a normal parka that zips over a secure harness, or tuck the coat away for the trip.
When should I go turn forward-facing?
Only when your child hits the max weight/height printed on the label. That could be 3, 4, or soon. More time in beef keeps them protected. You can also read our guide on how to install front car seat covers with hooks.
Final thought: You’ve installed it—make sure you spend two minutes practicing the angle once a week before you drive. Your child’s life doesn’t depend on a stable measurement—it depends on the work you put in. Keep this guide at hand and always refer to the Safety First official manual for your model. You can also read our guide on what age do you switch from infant car seat.

Sophia Linda is a freelance writer and Certified Health Coach based in the Newbury Park, CA. Passionate about healthy living, she focuses on helping families stay active and connected to the outdoors. Together with her husband and their three young children, Sophia spends much of her time traveling, hiking, and camping. Her work has been featured on the bestbabycart blog, and she brings a practical, real-world perspective to reviewing baby products for parents.