
You're three hours postpartum, the baby's asleep, and you're staring at a tangle of flanges, valves, and a pump body you've never set up. A generic manual breast pumps checklist reads like a parts list. It says rinse and dry.
It doesn't say what to do when suction feels wrong or output drops to half an ounce. Most lists stop right there. That's where the real work begins.
CDC food-safety guidance caps room-temperature milk storage at four hours. Medela and Avent specs call for valve swaps every four to six weeks, a detail most lists skip. What follows is the condition-aware version of this checklist, the one you'll run at 2 a.m. when you need to figure out whether it's a flange fit, a tired valve, or a supply dip.
Quick Answer
A manual breast pumps checklist runs through five stages. Prep, pump, post-pump care, clean, and swap parts. Rinse within four hours.
Swap valves every four to six weeks. Cool and label milk right after each session.
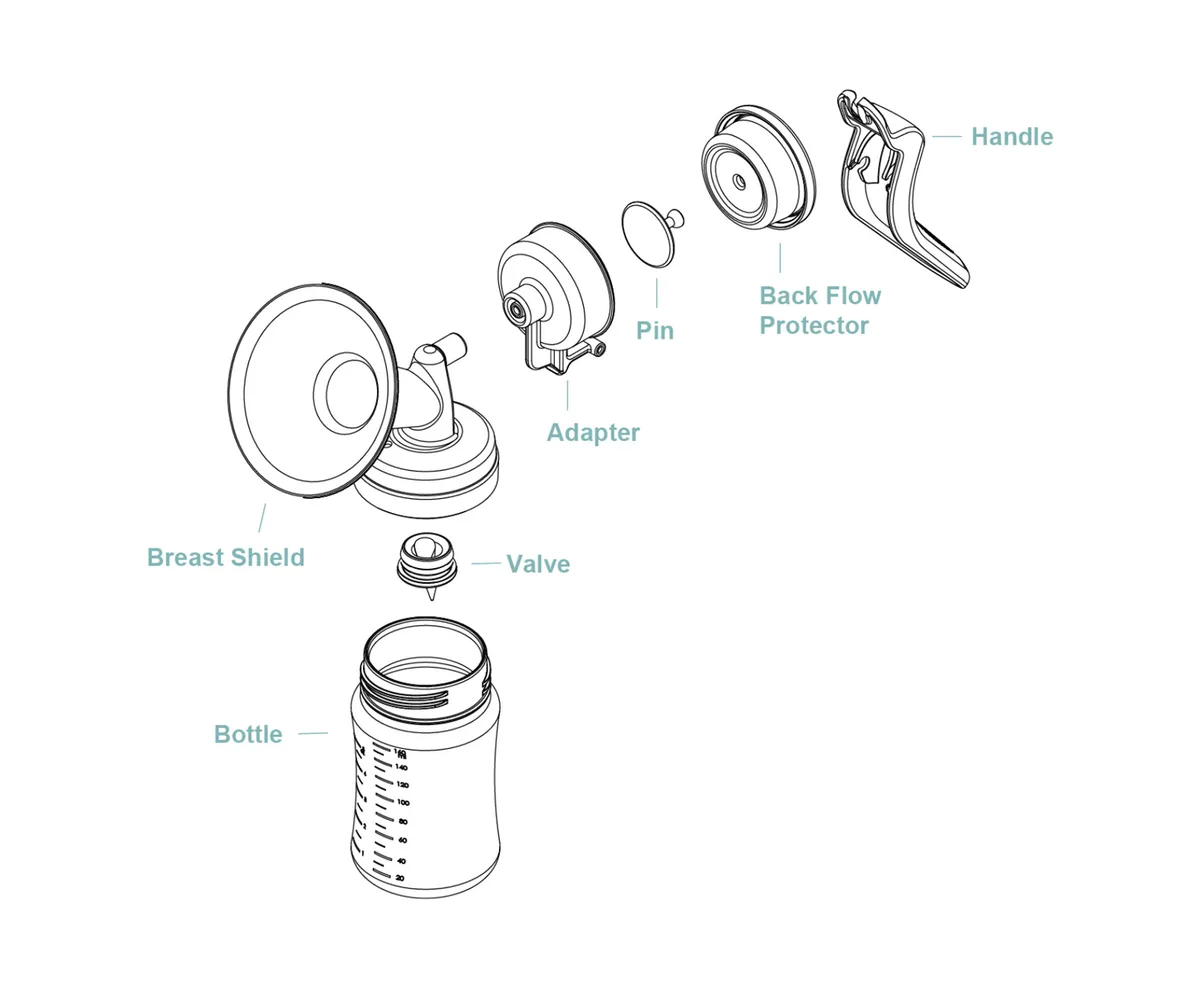
Image source: Bing (Web (fair-use with source credit))
Why a Flat "Clean the Parts" Checklist Fails You at 2 a.m.
What you're actually looking for (and what most lists miss)
A flat checklist tells you to wash the flange, clean the valve, dry everything. Fair enough. But it treats every session as identical, and they're not.
If your breast is engorged on day four, your prep is a warm compress and gentle massage. If you're on a NICU q3h protocol, your prep is setting a phone alarm and skipping the massage. If it's a routine spot pump at week six, you go straight to the flange.
That conditional branching is what a real manual breast pumps checklist needs. It's the difference between a static list and a workflow you can actually follow while half asleep.
You'll also notice most generic lists bury the one question that drives everything else: is your flange the right size? Manufacturer specs from Medela and Philips Avent both note that a flange two sizes too small causes canal flaring, redness, and a drop in output that looks exactly like a "supply problem." It isn't. It's fit.
As of 2026, the most common complaint in lactation support forums tracked by AWHONN still centers on flange mismatch, not pump quality.
If your baby's overnight waking pattern has you up every three hours, you'll run this workflow four or five times a night. The whole point is making each pass fast, conditional, and repeatable without rereading a twelve-step essay.
Before You Pump: Four Decisions That Change Every Step
Engorged, routine, NICU, or first-time? The fork that sets your prep
Before your hand touches the plunger, answer one question: what's the state of the breast right now?
- Engorged or clogged: Warm compress for five minutes. Gentle massage toward the nipple. Then pump. Skip this and you'll hit a hard, tender breast that barely lets milk through.
- Routine and healthy: No warm-up needed. Go straight to flange and bottle setup.
- NICU q3h protocol: Set the alarm. Express every three hours, day and night. Don't stretch the window to four. Hospital lactation teams flag that missing a three-hour mark can cut overnight supply by ten to fifteen percent.
- First 48 hours postpartum: You're likely on hand expression or a hospital-grade electric. A manual pump is a backup here, not the primary tool.
Flange check, part count, and the 30-second visual inspection
Grab a flange sizer (a ruler or brand template) and measure your nipple at full erection. Typical range sits between 13 and 18 millimeters. Match that to the closest flange size in your kit.
Then do the 30-second visual pass. Count your parts before you disassemble anything. You should have six to twelve pieces per side depending on the model.
Look for:
- Cracks or white stress lines on the flange tip
- Valve discoloration (yellowing, pink tint, warping)
- Bottle clouding or base scratching
- Tubing kinks or split seams (if your model uses short tubing)
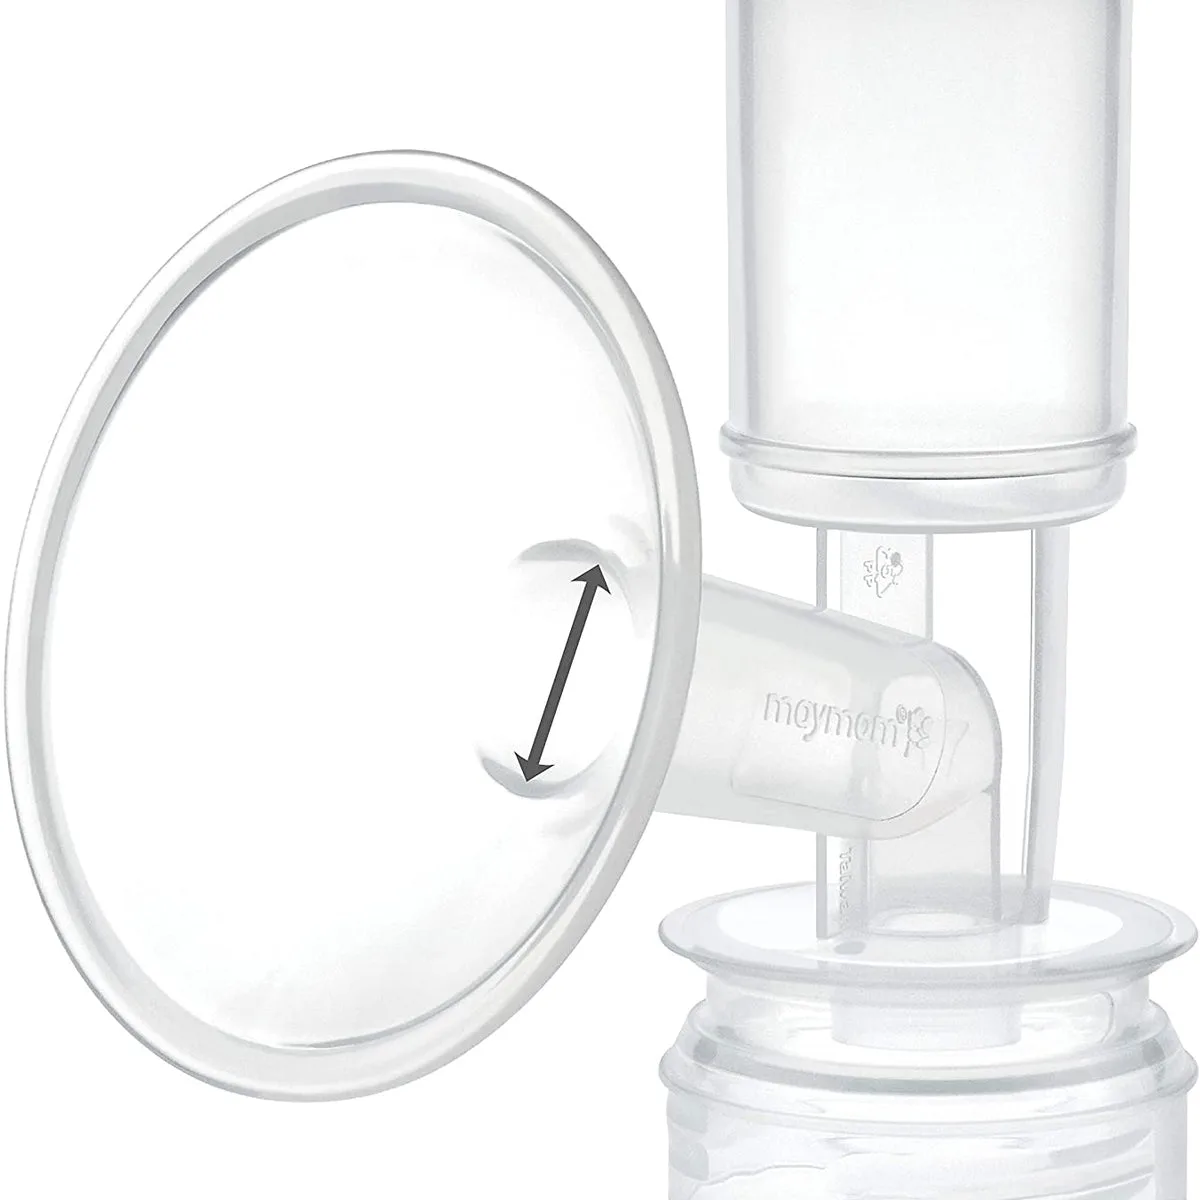
Image source: Web (Bing) / anawiz.com (Web image (fair-use with source credit))
If any part fails that visual, swap it before you start. A cracked valve won't seal, and you'll spend ten minutes cranking a pump that's leaking suction instead of milk. Just like you'd check expiration dates on a diaper stash before a long trip, a quick pass on your pump parts catches worn pieces before they cause a problem.
If your collection bottle pairs with a feeding system you already own, the glass versus plastic bottle decision matters. PP (polypropylene) bottles handle dishwasher cycles better. Glass is heavier but doesn't leach.
Match the two so you're not running a mixed kit.
The 15-Minute Session: Stimulation, Expression, and the "Stop When" Rule
Stimulation phase vs. expression phase (and why the rhythm matters)
You don't pump at one speed for 15 minutes. The first one to two minutes are fast, light strokes, about two per second. This is the stimulation phase.
You're triggering the let-down reflex, the myoepithelial contraction that moves milk from the lobules to the ducts.
After the stream starts (you'll see a thin spurt line in the bottle), shift to the expression phase. Slow to one to one-and-a-half strokes per second. Deeper pull.
Think gentle, steady, no grinding.
Side-switch timing, hand-express finish, and when "zero output" is normal
Switch to the other breast when the stream thins to a trickle, not when it fully stops. A trickle still carries residual milk. You'll catch another 0.25 to 0.5 ounces by switching early.
When both sides are done, do a two-minute hand-express on each breast using the palm method. Press the base of the breast toward the nipple. You'll often get another 0.1 to 0.25 ounces the pump missed.
If you pull less than 0.25 ounces on both sides after a full 10-minute session, that's not automatically a supply problem. In the first two weeks postpartum, output is low and erratic. If you're managing a preterm or NICU baby and a consistently low yield, call the lactation team before adjusting your schedule.
If the baby's latching is strong and you're only spot-pumping, a 0.5-ounce yield is normal. Don't crank harder. More pressure on a manual pump doesn't mean more milk.
It means more bruising.
Image source: Web (Bing) / shopee.ph (Web image (fair-use with source credit))
Post-Pump: Label, Cool, Disassemble, and Clean Without Drowning in 24 Parts
Milk storage timelines and the cooler-bag shortcut
Label the bottle before it leaves your hand. Date, time, volume, baby's name if multiple caregivers are involved. Then get it cold.
Per CDC food-safety guidance, expressed milk is safe at room temperature for four hours. That's your hard ceiling. If you can't refrigerate within that window, a cooler bag with two ice packs buys you the full four hours in a car or a friend's house.
| Storage method | Safe window |
|---|---|
| Room temp (77 °F / 25 °C) | 4 hours |
| Refrigerator (40 °F / 4 °C) | 4 days |
| Freezer (0 °F / −18 °C) | 6 months optimal, 12 months acceptable |
| NICU / preterm milk | 2 days fridge, 3 months freezer (confirm with your hospital) |
Rinse, wash, air-dry, store: the 12-minute cleaning loop
You have 12 to 24 pieces to deal with. Here's the loop that keeps it under twelve minutes:
- Disassemble fully. Count parts against your kit card before you start.
- Rinse all pieces under warm water within four hours. Milk protein sets fast.
- Wash flanges, valves, and bottle on the dishwasher top rack or by hand with a narrow-neck brush.
- Air-dry on a rack. Don't towel-dry silicone. It traps moisture and grows bacteria.
- Store the dried kit in a zip bag or pouch, valve-side up.
- If you're packing this for a day out, wipe the inside of your diaper bag compartment so milk residue doesn't set into the fabric.
When you're reheating stored milk for a bottle feed, a dedicated bottle warmer beats the microwave every time. Microwave kills lactoferrin and creates hot spots. A warm-water bath at 104 °F (40 °C) keeps the protein intact.
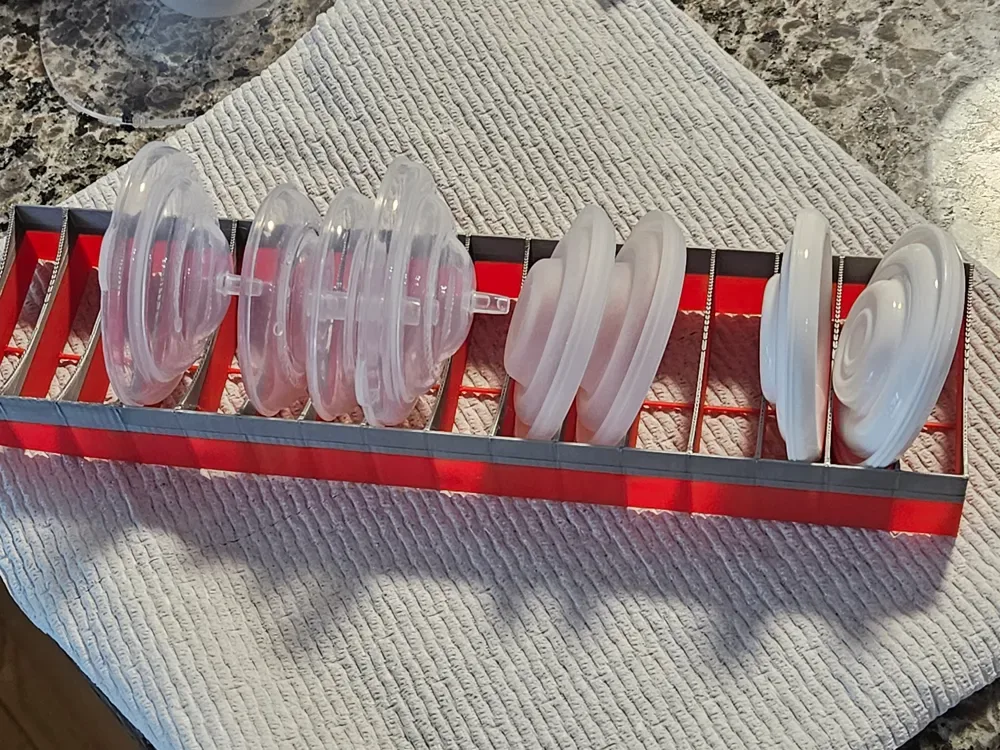
Image source: Bing (Web (fair-use with source credit))
Troubleshooting Branches: What to Do When Output, Fit, or Skin Is Off
Flange fit misalignment, valve fatigue, and the 48-hour bruising rule
If your nipples look red, flared, or "battered" after a session, stop and recheck the flange size. A flange that's too small pinches the nipple canal. A flange that's too big creates a suction gap.
Both cause trauma. Manufacturer fit charts from Medela, Avent, and Lansinoh all recommend remeasuring at two weeks postpartum, when the nipple has returned closer to its non-pregnant length.
If the flange is correct but suction still feels weak mid-session, you're likely hitting valve fatigue. A silicone diaphragm valve loses its spring after four to six weeks of daily use. Swap it.
It costs about four dollars and takes ten seconds.
Here's the rule: if redness or bruising hasn't faded in 48 hours, the fit or suction is still wrong. Reduce your stroke depth. Recheck the flange.
If it's not resolving, call an IBCLC (board-certified lactation consultant) before you keep pumping through the pain.
Mastitis red flags: when "just pump through it" is the wrong answer
A wedge-shaped hot patch on one breast, a fever above 101 °F (38.3 °C), and flu-like aches aren't "engorgement." They're mastitis until proven otherwise. Keep pumping gently to keep milk moving, but this is a medical situation, not a checklist item. See your provider within 24 hours.
Antibiotics may be needed.
A clogged duct (localized lump, no fever, no flu symptoms) is different. You can work it: warm compress, massage, gentle expression, and a five-minute spot pump on that side. If the lump persists past 48 hours, escalate to a clinician.
AWHONN postpartum care guidelines make that 48-hour threshold explicit.
Part Replacement and the 6-Week / 3-Month / Monthly Cadence
What to swap when (valve, flange, bottle, tubing) and how to spot the deadline early
The valve is your weakest link. Manufacturer specs from both Medela and Philips Avent list four to six weeks as the replacement window for silicone diaphragm valves. Past that, the material loses elasticity.
You'll notice the tell: suction feels soft mid-session, or you're cycling faster to get the same output. Don't wait for performance to drop. Mark the calendar.
Flanges last two to three months. The tip deforms slowly. If you see a visible bulge or a white stress line on the silicone, swap it out.
Bottles go when they cloud or scratch at the base. Tubing, if your model has it, hits its limit at one to two months.
Weekly and monthly inspection checkpoints
Run a quick visual once a week. Hold each flange up to the light. Check the valve for discoloration or warping.
Flex the bottle base to catch early cracks. Monthly, do a full disassembly pass. Count every part against your kit card.
If a piece is missing, order the replacement before your next session, not after.
If you're on a NICU q3h protocol, the cadence tightens. Daily inspection. Weekly full deep-clean and sterilize.
Per FDA infant product safety guidance, breast pump parts are Class I medical device components. Cross-contamination between mothers is a real risk. Never share a kit.
FAQs: The Questions That Actually Come Up in the Kitchen at Midnight
Is 0.5 oz per breast too low on a manual pump?
Not in the first two weeks postpartum. Manual pumps typically yield 0.5 to 1.5 ounces per breast in an established supply. At day four, half an ounce is completely normal.
If you're past week four and consistently under 0.25 ounces on both sides, that's the signal to call an IBCLC, not to pump harder.
Do I really need to clean the pump after every single session?
Yes, but "clean" has a floor and a ceiling. Rinse within four hours is the non-negotiable minimum. A full soap-and-water or dishwasher wash is ideal within 24 hours.
If you skip the rinse and just store the wet parts, milk protein sets into the silicone and breeds bacteria overnight.
Can I reuse a valve that just looks slightly yellow?
No. Yellowing is polymer degradation. The valve won't seal at full suction.
You'll lose 20 to 30 percent of your output in the last five minutes of every session. A fresh valve costs about four dollars. The session doesn't.
How do I know if my flange is the wrong size?
You'll see two tells. Nipples flare past the flange rim after pumping, or the areola gets sucked into the flange channel. Either one means the size is off.
Remeasure at two weeks postpartum when the nipple returns closer to its resting length. The flange sizing chart on your manufacturer's website is the reference point.
Will a manual pump ever replace my electric for full feeds?
For most established supplies, no. A manual pump pulls 0.5 to 1.5 ounces per session. A handheld electric hits 1.5 to 2.5.
The manual is your spot-pump, your travel backup, and your clogged-duct tool. It's not a full-feed replacement unless your supply is very small or you're doing targeted expression on one breast.

Taslima Khanam Sultana, a loving mom of three, founded BestBabyCart.com to help new parents navigate the world of baby products with ease. Her passion for making parenting simpler shines through delivering honest, unbiased reviews on must-haves like diapers, strollers, and feeding gear. Taslima’s mission is to empower families with expert tips, ensuring every product is safe and top-quality for your little one. Drawing from her own parenting journey, she’s dedicated to supporting yours!