
If you’ve ever fumbled with a release lever while rushing to transfer a wiggly toddler from the car to a stroller, you’re not alone. Safety 1st infant car seats are designed for quick, tool-free removal from their bases, but the release mechanism can feel unintuitive if you’re unfamiliar with it, especially for older base models or when you’re working in a dimly lit parking lot. This guide covers step-by-step removal for all current and recent Safety 1st base models, common mistakes to avoid, and critical safety checks to ensure the seat is properly reinstalled every time. All steps align with 2026 guidance from the National Highway Traffic Safety Administration (NHTSA) and the Insurance Institute for Highway Safety (IIHS) to keep your child protected on every trip.
Why Proper Removal Matters
According to the National Highway Traffic Safety Administration, nearly half of all child car seats are installed incorrectly, an error that increases injury risk in even low-speed crashes. Improper removal is a common root cause of this mistake: forcing the release lever, damaging the LATCH connectors, or skipping post-removal safety checks can all lead to an unstable installation when you put the seat back. The Insurance Institute for Highway Safety confirms that properly installed infant car seats reduce fatal injury risk for babies by 71% in passenger cars, making correct removal and reinstallation a non-negotiable safety step. You can review IIHS child car seat crash test ratings to confirm your Safety 1st model meets current safety standards, and refer to NHTSA child car seat safety resources for official installation guidance.
Pre-Removal Prep (2 Minutes or Less)
Proper prep prevents damage to your car seat or base, avoids losing small parts, and minimizes the risk of dropping the seat on a hard surface or your child. Follow these quick steps before you start:
Clear the Surrounding Area
Park your car on a level, well-lit surface, away from traffic if you’re in a parking lot. Remove any loose items from the back seat that could get in the way: toys, snack containers, diaper bags, or loose change that could jam the release mechanism. If you’re removing the seat to transfer to a stroller, have your stroller ready and within arm’s reach to minimize the time your child is out of the secured seat. If you’re prepping for a quick outing with a sleepy infant, prepping for outings with a sleepy infant can help you avoid rushing and making preventable mistakes during the removal process.
Gather Your Tools (No Special Equipment Needed)
You don’t need any special tools to remove a Safety 1st car seat from its base – it’s intentionally designed for tool-free removal for travel and convenience. The only optional supplies you may want are a soft, dry cloth to wipe away crumbs or debris from the release mechanism if it’s stuck, and your car seat’s user manual (if you have it handy) for model-specific instructions. Avoid using lubricants on the release mechanism unless the manufacturer specifically recommends it, as this can attract dirt and cause the latch to stick over time. If you need to clean the mechanism, use a damp cloth only, and refer to safe cleaning practices for baby gear for guidance on non-toxic cleaning products safe for your child’s contact with the seat. You can also often find discounts on travel gear and car seat accessories during seasonal baby sales events.
Visually Inspect the Base First
Before you touch the release lever, look at the base to make sure it’s securely installed in the vehicle. Wiggle it side to side and front to back – it should move less than 1 inch in any direction per NHTSA standards. If the base is loose, you’ll need to reinstall it first before removing the seat, as a loose base can cause the release mechanism to jam or fail to disengage properly. Also check for any obstructions around the release lever: crumbs, small toys, or even a stray strap from the seat’s harness can block the lever from moving fully.
Step-by-Step Removal for All Safety 1st Base Models
Safety 1st produces three main base types for infant and convertible seats: the standard LATCH-only base, the SnugLock LATCH + seatbelt base, and the older OnBoard 35/40 series bases. The release process is nearly identical for all, with only minor differences in lever location:
Step 1: Locate the Release Lever
The release lever is almost always located at the front of the car seat, where the seat’s footrest meets the base. On most Safety 1st infant seats (including the OnBoard 35, OnBoard 35 LT, and SnugLock models), it’s a gray or black plastic lever that sticks out slightly from the base, right between the two LATCH connectors. On older models, it may be a small recessed button instead of a lever. If you can’t find it, run your hand along the front edge of the seat where it connects to the base – you’ll feel the lever or button as a raised or recessed point. If you’re adding a removable car seat cover, check out our guide to installing front car seat covers with hook systems to avoid blocking the release mechanism. If you’re still stuck, your user manual will have a diagram of the release mechanism for your exact model, and you can compare it to guides for similar brands like removing a Chicco booster seat from a vehicle to spot differences in release lever placement.
Step 2: Disengage the Latch System
With one hand, hold the car seat firmly by the carry handle (this prevents it from tipping forward when you release the latch). With your other hand, pull the release lever upward (or press the button, depending on your model) firmly until you feel a click. This click means the latch connectors under the seat have disengaged from the base. If you don’t feel a click, the lever is not fully disengaged – adjust your grip and try again, and never force it, as this can break the lever mechanism. The LATCH connectors that lock the seat to the base are located at the rear of the car seat’s bottom, and if you experience back pain during long car rides, you may want to check out top-rated car seat cushions for back support to improve comfort for adult passengers.
Step 3: Lift the Seat Straight Up
Once you feel the click, lift the car seat straight up off the base in one smooth motion. Don’t tilt it forward or backward as you lift, as this can catch the latch connectors on the base and cause damage. If the seat feels stuck, double-check that the release lever is fully disengaged before applying gentle upward pressure – never yank or force the seat, as this can break the plastic connectors or the base itself.
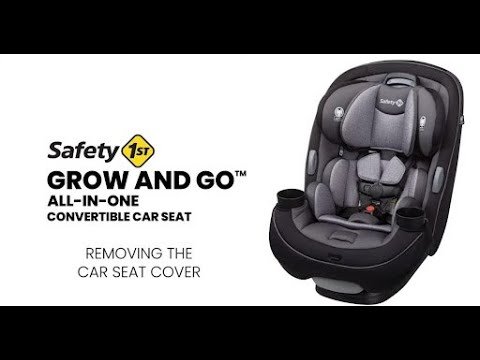
 This is the standard Safety 1st OnBoard LT infant seat and base, the most common model requiring this removal process.
Common Mistakes to Avoid (And How to Fix Them)
Even experienced parents make these errors, which can damage your car seat or compromise its safety performance:
Forcing the Release Lever
A common mistake, especially when you’re in a hurry, is yanking or forcing the release lever if it feels stuck. This almost always breaks the lever mechanism, which requires a full base replacement. If the lever won’t move, first check for obstructions: crumbs, a stuck harness strap, or a toy wedged under the lever are the most common causes. Clear the obstruction with a soft cloth, then try again. If it still won’t budge, don’t force it – check your user manual for model-specific troubleshooting, or contact Safety 1st customer support for assistance.
Removing the Seat With the Harness Buckle Attached
Many parents forget to unbuckle the harness before removing the seat, which causes the buckle to catch on the base and can damage the buckle or the base’s latch points. Always unbuckle the harness and tuck the buckle and straps into the seat’s storage pocket (if your model has one) before attempting to remove the seat. For more guidance on proper car seat installation, you can reference common car seat ejection risks from improper installation, which covers common errors that lead to seat failure in crashes.
Reinstalling the Base Incorrectly After Removal
If you removed the base to clean it or reinstall it in another vehicle, don’t skip the level check. The base’s built-in level indicator (usually a blue or green bubble in a small window on the side of the base) must be perfectly level for the seat to protect your child in a crash. If the bubble is off-center, adjust the base’s recline foot until it’s level. Many parents remove the Safety 1st seat from the base to click it into a compatible stroller for quick trips, so if you’re using the seat with a stroller, check stroller travel system compatibility to confirm your stroller works with your Safety 1st model.
Reinstalling the Car Seat Correctly
Reinstalling the seat is just as important as removing it, as an improperly installed seat provides almost no crash protection. These steps apply whether you’re putting the seat back into the same base, a new base in the same vehicle, or a base in a different vehicle:
Align the Seat With the Base
Line up the two latch connectors on the bottom of the car seat with the corresponding slots on the base. The connectors should slide into the slots smoothly – if you have to force them, the base is not aligned correctly. Most Safety 1st seats have alignment markers (small arrows or notches) on the side of the seat and base to help you line them up properly. If you’re unsure if your Safety 1st seat is the right fit for your child’s current age and size, refer to our car seat recommendations by age and weight to ensure you’re using the correct seat for your little one.
Lock the Seat Into Place
Push down firmly on the car seat’s carry handle until you hear a loud, clear click. This click confirms the seat is locked into the base. To test, tug the seat side to side and front to back – it should move less than 1 inch in any direction, per NHTSA guidelines. If it moves more than that, unlock it and try again, making sure the connectors are fully seated in the base. Just like you would secure a pet booster seat to keep your furry family member safe on the road, always tug the car seat firmly after installation to confirm it’s locked in place, a standard outlined in guides for secure pet travel gear.
Adjust the Harness and Fit
Once the seat is locked, reattach the harness straps and buckle, making sure they’re at or just above your child’s shoulders (for rear-facing seats) or at the shoulders (for forward-facing seats). Avoid bulky winter coats, which can compress in a crash and leave too much slack in the harness; for guidance on proper cold-weather car seat layering, check out proper cold-weather car seat layering to keep your child safe and comfortable. Safety 1st infant seats meet all current NHTSA safety standards, and if you’re looking to upgrade to a convertible seat as your child grows, check out our top-rated convertible car seats for long-term use for options that grow with your child.
 Watch this short video demonstration if you’re a visual learner and need to see the release process in action.
Post-Removal Safety Checks
Every time you remove and reinstall the car seat, run through these quick checks to ensure it’s safe for your child:
- Base stability test: Wiggle the base side to side and front to back – it should move less than 1 inch.
- Seat lock test: Tug the car seat firmly at the base of the carry handle – it should not detach from the base, and should move less than 1 inch.
- Harness fit test: Buckle your child into the seat, pull the harness tight so you can’t pinch any horizontal slack at the shoulder, and make sure the buckle clip is at armpit level.
- Recline check: For rear-facing seats, ensure the base’s recline angle is correct for your child’s height and weight – the base’s built-in angle indicator will show if it’s properly reclined.
- Damage inspection: Check the seat, base, and harness for any signs of wear, fraying, or cracks, especially if the seat was dropped or jostled hard during removal. Regular safety checks are just as important for your child’s car seat as they are for top-rated 3-in-1 car seats for growing families, ensuring the seat performs as intended in the event of a crash.
 Always verify the base level bubble is centered before reinstalling the car seat to ensure correct crash protection.
Frequently Asked Questions
How do I know if my Safety 1st release lever is disengaged?
You’ll feel and hear a distinct click when the lever is fully pulled up (or button pressed) and the latch connectors have released. If you don’t hear a click, the lever is not fully disengaged – adjust your grip and try again. For SnugLock models, you may also hear a second click when the seat lifts clear of the base’s locking tabs.
Can I remove the Safety 1st base from the vehicle entirely?
Yes, you can remove the base if you need to transfer it to another vehicle or store it. To remove the base, unbuckle the LATCH connectors from the vehicle’s lower anchors (or unthread the seatbelt, if you used a seatbelt installation), then lift the base straight up. Always recheck the base’s level indicator when reinstalling it in a new vehicle.
What if the release lever is broken?
If the release lever breaks from forcing it or normal wear and tear, you will need to order a replacement base from Safety 1st customer support. Do not attempt to remove the seat by forcing the connectors or prying them apart, as this can damage the seat’s bottom and compromise its crash protection.
Is it normal for the car seat to feel tight on the base?
Yes, a tight fit is intentional – it prevents the seat from moving unexpectedly while driving. If you have to force the seat onto the base, double-check that the alignment markers are lined up, and that the base is not warped or damaged.
Can I use the Safety 1st seat without the base?
Yes, most Safety 1st infant seats can be installed using the vehicle’s seatbelt without the base, for travel or if the base is unavailable. Refer to your user manual for seatbelt installation instructions, as the process is different from base installation.
Conclusion
Removing a Safety 1st car seat from its base is a simple, 10-second process once you know where to find the release lever and avoid common mistakes. The most important part of the process is not the removal itself, but the post-removal safety checks: always verify the base is stable, the seat is locked firmly, and the harness fits your child correctly before every trip. If you’re ever unsure about your installation, you can get a free, no-appointment car seat inspection at most local fire stations, police departments, or pediatrician offices, where certified car seat technicians can check your setup for free. If you found this guide helpful, share it with other caregivers in your life, and browse our library of parent-tested resources for more tips to simplify life with little ones. For more recommendations on safe travel gear for your family, check out our top-rated booster car seats for safe road trips to keep your child protected as they grow.

Sophia Linda is a freelance writer and Certified Health Coach based in the Newbury Park, CA. Passionate about healthy living, she focuses on helping families stay active and connected to the outdoors. Together with her husband and their three young children, Sophia spends much of her time traveling, hiking, and camping. Her work has been featured on the bestbabycart blog, and she brings a practical, real-world perspective to reviewing baby products for parents.