

Stepping into a car with faded, stained, or lumpy factory seats can drag down the whole feel of your vehicle, but custom seat covers from auto shops often cost $150 or more per seat—and they rarely fit perfectly. If you’re looking to protect your upholstery, personalize your interior, or repair worn seats without breaking the bank, learning to sew your own car seat covers is a rewarding, accessible project. We’ve walked through this DIY process dozens of times for personal vehicle refreshes and small auto upholstery side projects, so we know the common pitfalls that trip up first-timers, from ill-fitting patterns to fabric choices that wear out in months. This guide walks you through every step, from material selection to final installation, to create covers that look tailored, hold up to daily use, and match your personal style.
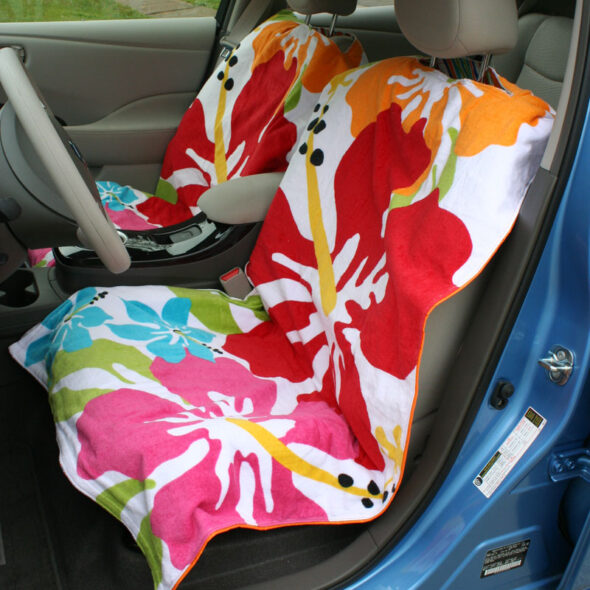 Custom-fit DIY seat covers protect factory upholstery while adding personal style
Credit: www.chicaandjo.com
Custom-fit DIY seat covers protect factory upholstery while adding personal style
Credit: www.chicaandjo.com
Why DIY Car Seat Covers Beat Store-Bought Options
Before diving into the steps, it’s helpful to understand the benefits of making your own covers versus buying pre-made options. First, cost: a full set of custom-fit covers from a professional upholsterer runs $400 to $800, while a DIY set costs $20 to $60 in materials, depending on the fabric you choose. Second, fit: store-bought universal covers often gap, slip, or block seat controls, while a custom-sewn cover hugs every contour of your seat for a polished, factory-like look. Third, customization: you can pick exactly the fabric, color, and extra details (like padding or embroidery) that match your style, rather than settling for the limited pre-made options available. Finally, DIY covers protect your car’s original upholstery, which helps maintain its resale value down the line. You can also read our guide on how to sew seat covers for car.
Critical Pre-Project Safety Notes
Skipping safety checks can lead to covers that interfere with your car’s safety features, so address these points before you cut any fabric. Most modern vehicles have side airbags built into the seat bolsters, which deploy outward in a crash to protect your torso. If you cover these panels, the airbag may not deploy correctly, creating a serious hazard. Check your car’s owner’s manual for the location of side airbags, usually marked with an "SRS" or airbag icon on the side of the seat, and leave these areas uncovered or cut small slits in the cover to allow deployment. For more detailed guidance on safe car interior modifications, refer to official NHTSA guidance on safe car interior modifications. Additionally, make sure your cover does not block seat belt anchorage points or buckle receptors, and avoid adding thick padding to seats used for child safety seats, as this can change the seat’s height and affect the fit of car seats.
Choosing the Right Materials for Long-Lasting, Stylish Covers
The fabric you pick will make or break your project, so prioritize durability and function alongside style. We’ve tested dozens of automotive fabrics over the years, and the best choice depends on your vehicle’s use case and climate. You can also read our guide on best dog car booster seat.
Fabric Types & Best Use Cases
- Cotton canvas: Breathable, soft, and easy to sew, making it ideal for daily drivers in mild climates. It holds up well to daily wear but is not waterproof, so it’s not the best choice for vehicles used for beach trips or with pets that track mud.
- Oxford cloth: A heavy-duty, tightly woven fabric with a natural stain-resistant finish, perfect for families with kids or pets. It’s machine washable and resists tearing, even with heavy use.
- Neoprene: Waterproof, wipe-clean, and stretchy, making it ideal for work trucks, off-road vehicles, or cars used for water sports. It resists stains and mildew, but is less breathable than woven fabrics, so it can feel hot in direct sun.
- Automotive vinyl: Matches the look and feel of factory upholstery, and is extremely easy to wipe down. It’s a great pick if you want a seamless, OEM-style look, but it can feel sticky in hot weather and is prone to cracking over time if exposed to constant UV light.
- Mexican blanket fabric: A trendy, durable woven fabric with bold patterns, popular for boho-style interiors. It’s thick, stain-resistant, and holds up well to daily use, making it a great pick if you want a statement look. For more ideas for durable, stylish fabric options, check out our roundup of popular durable fabric picks.
Color & Pattern Selection Tips
Neutral shades like gray, beige, and black match almost any car interior and hide stains and dirt far better than light colors. If you want to add personality, bold colors or subtle patterns (like stripes or small geometric prints) add visual interest without overwhelming a small car interior. Avoid very dark colors if your car is parked in direct sun most of the time, as they fade faster than lighter shades. For a cohesive look, pick a fabric that complements your car’s existing interior trim, or use a contrasting pattern for a fun, customized feel.
Durability Must-Haves
No matter the fabric you choose, prioritize these features to make your covers last 3+ years with regular use:
- A thread count of 200 or higher for woven fabrics, which resists tearing and pilling
- Built-in UV resistance to prevent fading from sun exposure, especially if you park outside
- Stain-resistant treatment (you can apply a product like Scotchgard at home after sewing for extra protection)
- If you live in a hot climate, opt for a breathable fabric to avoid sticking to seats in the summer; for recommendations, see our guide to hot-weather fabric recommendations.
Tools & Supplies You’ll Need
You don’t need a professional upholstery kit to make great seat covers, but having the right tools on hand will save you time and frustration. We’ve split these into core essentials and optional upgrades for beginners. You can also read our guide on best car seat cushion for back pain top picks for ultimate comfort.
Core Sewing Tools
- A heavy-duty sewing machine that can handle 2-3 layers of thick fabric (a common mistake is using a basic domestic machine that jams or skips stitches on automotive-weight material)
- Polyester all-purpose thread (stronger and more fade-resistant than cotton, ideal for high-wear projects)
- Dedicated fabric scissors (dull or multipurpose scissors fray fabric edges, leading to uneven cuts)
- A seam ripper for fixing mistakes (every sewist makes errors, so don’t skip this)
- Fabric clips or sharp pins (pins work for most woven fabrics, while clips are better for vinyl or neoprene to avoid leaving permanent holes)
Measuring & Marking Tools
- A flexible cloth measuring tape (rigid metal tapes give inaccurate readings for curved seat bolsters)
- A clear 12-inch ruler or yardstick for marking straight edges
- Air-soluble fabric chalk or a fabric marker (permanent markers can leave stains on fabric or your seats)
Optional Time-Saving Upgrades
- A rotary cutter and self-healing cutting mat for perfectly straight fabric cuts
- An overlock/serger machine to create professional, fray-resistant finished edges
- An iron with steam for pressing seams flat as you sew (this reduces bulk and makes the final cover fit much better)
How to Measure Your Car Seats for a Perfect, Snug Fit
Accurate measurements are the most important step in creating covers that fit perfectly—ill-fitting covers gap, slip, or block seat controls, which is frustrating and can even be a safety hazard. We recommend taking 15 minutes to measure carefully, rather than rushing and wasting fabric later.
Step 1: Map Your Seat’s Features First
Start by noting if your seat is a bucket seat (individual, contoured seat for each passenger) or a bench seat (flat, shared seat). Note any protruding features: headrest posts, armrests, built-in side bolsters, seat belt ports, or heated seat controls. If your car has side airbags, mark their location on the seat so you don’t cover them during installation. You can also read our guide on how to turn car seat into booster.
Step 2: Take 3 Core Measurements Per Seat Section
Use a flexible cloth measuring tape, and add 1 inch to each measurement to account for seam allowance:
- Overall width: Measure the widest point of the seat (including bolsters) from side to side
- Overall length: Measure from the top of the seat back to the bottom of the seat base
- Depth: Measure from the front edge of the seat cushion to the back edge where it meets the seat back For contoured bucket seats, take 2-3 additional width measurements at the top, middle, and bottom of the seat back to account for curves. A common mistake is only taking 1-2 measurements, which leads to covers that are too tight or too loose in key areas.
Step 3: Measure Special Features
If your seat has headrests, measure the diameter of the posts and their height above the seat. For seats with built-in armrests, measure the width and height of the armrest to cut corresponding openings in the cover. If your car has heated seats, make sure your cover is thin enough to allow heat to pass through, and avoid covering heating elements; for more tips, see our guide to heated seat compatibility tips. You can also read our guide on best booster car seat for sleeping top picks for comfortable travel.
Pro Tip for Accuracy
Take a photo of each seat from the side and front, and label all measurements next to the corresponding part of the photo. This eliminates confusion when you’re drafting your pattern later, and helps you catch any missed features before you start cutting fabric.
Drafting & Cutting Your Custom Pattern
You don’t need advanced pattern-drafting skills to create a perfect fit—we recommend two beginner-friendly methods, depending on your comfort level. You can also read our guide on best memory foam car seat cushion.
Drafting the Paper Pattern
Option 1 (easiest for beginners): Direct seat tracing Lay a large sheet of craft paper, an old bed sheet, or even a dollar-store tablecloth over the seat, smoothing it into all contours and curves. Trace the outline of the seat (and any openings for headrests, armrests, or airbags) with a fabric marker, then add a ½ inch seam allowance all the way around the outline. Label each piece clearly (e.g., "driver seat back", "driver seat base") to avoid mixing up parts later. Option 2 (more precise for experienced sewists): Measurement-based drafting Use your recorded measurements to draw the pattern on pattern paper, adding ½ inch seam allowance to all edges. For curved seats, use a curved ruler to draw smooth, accurate lines rather than sharp angles. Before cutting fabric, lay the paper pattern on the seat to check for fit, and adjust as needed. You can also read our guide on best convertible child safety car seats for ultimate comfort and protection.
Cutting Fabric Precisely
First, pre-wash any natural fabrics (cotton, linen) to prevent shrinkage after sewing. Lay your fabric on a flat, clean surface, and ensure the fabric’s grain line (the direction of the woven threads) runs parallel to the length of the seat—this prevents stretching and warping later. Pin the paper pattern securely to the fabric, then cut with sharp fabric scissors, following the pattern edge exactly. Cut all fabric pieces first before sewing to avoid mistakes, and double-check each piece against the pattern before moving on.
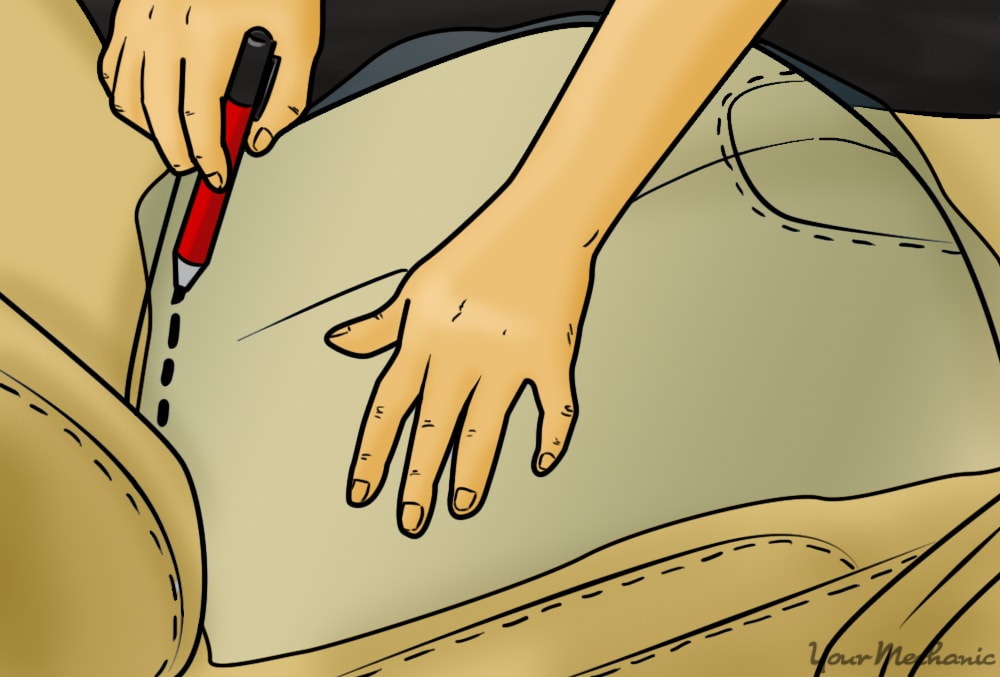
Step-by-Step Sewing Process for Pro Results
Once your fabric is cut, follow these steps to sew durable, well-fitting covers, even if you’re a beginner.
Prep Your Pieces First
First, serge or zigzag stitch all raw fabric edges to prevent fraying, especially for loose-weave fabrics like cotton. Mark all seam lines, fastener positions, and cutout locations (for headrests, seat belts, airbags) with air-soluble fabric chalk so you don’t lose your place while sewing. You can also read our guide on best car seat cushion for long distance driving.
Sew the Core Seams
Start by sewing the front and back pieces of each seat section together, right sides facing, using a ½ inch straight stitch for strong, durable seams. For curved edges (like seat bolsters), use a narrow zigzag stitch to allow stretch, so the cover doesn’t pucker when pulled over the seat. Press each seam open with an iron as you go—this reduces bulk and makes the final cover fit much more smoothly. If you’re working with thick fabric like oxford cloth or vinyl, use a denim or leather needle on your sewing machine to avoid skipped stitches.
Add Fasteners & Cutouts
For headrest cutouts: fold the edge of the cutout under ¼ inch, then sew a narrow zigzag stitch around the edge to prevent fraying. For fasteners, we recommend heavy-duty Velcro straps that tuck under the seat, or elastic loops that hook around headrest posts—avoid buttons or snaps, which can come loose and cause discomfort while driving. If you’re adding extra cushioning, sew a thin layer of memory foam between the front and back fabric layers before closing the seam, for extra comfort on long drives. Test the fit as you go by draping the partially sewn cover over the seat to check for gaps before adding final fasteners. You can also read our guide on best car seat dolly for airport.
Finishing Touches for a Professional, Durable Cover
These small steps will take your cover from homemade to tailored, and extend its lifespan significantly.
Trimming & Finishing Edges
Trim any excess seam allowance to ¼ inch to reduce bulk, then topstitch ⅛ inch from the edge of all seams for a clean, professional look and extra durability. If you used vinyl or neoprene, use a leather needle and a longer stitch length (3mm) to avoid cracking the material.
Adding Custom Details
Add contrast piping along seat edges for a high-end, tailored look. Sew on small fabric patches, embroidered initials, or your favorite sports team logo for personalization. If you want extra protection for your underlying seats, add a thin layer of fleece or padding between the fabric layers for added comfort. You can also read our guide on best infant car seat covers for winter.
Final Fit Test
Drape the finished cover over the seat, smooth out all wrinkles, and secure all fasteners. Sit on the seat to test for comfort, and check that the cover doesn’t shift when you move, doesn’t block seat belt buckles, and doesn’t interfere with airbag deployment. Trim any excess fabric at the edges if needed for a clean, flush fit. To add an extra layer of protection for your factory seats underneath the cover, consider using a an extra layer of seat protection under your DIY cover for high-traffic vehicles.
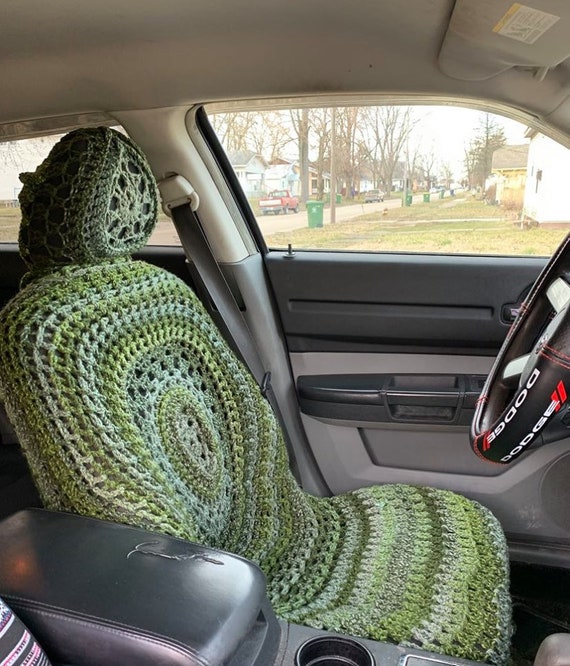 Handmade covers can include custom details like embroidery or contrast piping for a unique look
Credit: www.etsy.com
Handmade covers can include custom details like embroidery or contrast piping for a unique look
Credit: www.etsy.com
Installing & Maintaining Your DIY Seat Covers
Proper installation and care will keep your covers looking great for years.
Installation Tips for a Secure Fit
Start by tucking the front edge of the cover between the seat back and seat base first, then pull the rest of the cover over the seat back to avoid bunching. Secure all straps under the seat, tightening them just enough to hold the cover in place without stretching the fabric—over-tightening causes premature wear and tearing. For bucket seats with deep side bolsters, tuck excess fabric into the gap between the seat and the door panel to avoid slipping when you get in and out of the car. If your car has features to account for during fitting like heated seats or built-in lumbar support, double-check that the cover doesn’t block any controls or vents. You can also read our guide on how to keep newborn head up in car seat.
Long-Term Care & Maintenance
- Vacuum your covers weekly to remove dirt and crumbs that can abrade the fabric over time
- For machine-washable fabrics, use cold water and mild detergent, and air dry completely (avoid the dryer, which shrinks fabric and breaks down elastic fasteners). For specific cleaning guidance for different fabric types, refer to proper cleaning methods for different fabric types
- Spot clean stains immediately with a fabric-safe cleaner, testing on an inconspicuous area first to avoid discoloration
- Reapply stain-resistant treatments every 6-12 months, depending on how often you use your car
- Rotate front and back covers (if you made a full set) every 3 months to distribute wear evenly
- Store unused covers in a dry, cool place to avoid mildew and fabric degradation
Common First-Timer Mistakes to Avoid
We’ve made all of these errors in past projects, so you can skip the frustration by avoiding them:
- Skipping pre-washing for natural fabrics: Unwashed cotton, linen, or canvas shrinks after the first wash, making your finished cover too small to fit. Always pre-wash and dry natural fabrics on the same settings you’ll use for future cleanings before cutting.
- Using thin, low-quality fabric: Cheap $5-per-yard fabric will tear within 6 months of regular use, especially with kids or pets. Invest in a heavy-duty fabric with a thread count of 200+ for long-lasting results.
- Not accounting for airbags: Covering side airbag panels can prevent deployment in a crash, a serious safety risk. Always leave these areas uncovered or cut slits to allow air to escape.
- Forgetting seam allowance: Cutting fabric exactly to your seat’s measurements leaves no room for seams, leading to a cover that’s too small or has raw, fraying edges. Always add ½ inch to all edges for seam allowance.
- Using cotton thread for heavy fabrics: Cotton thread breaks easily under stress, especially for thick fabrics like oxford cloth or vinyl. Use polyester thread for all automotive projects for maximum durability.
Frequently Asked Questions
Can I sew car seat covers without a sewing machine?
Yes, but it will take 3 to 4 times longer than using a machine. Use a heavy-duty hand sewing needle and waxed thread for best results, and focus on straight seams first. Avoid thick fabrics like oxford cloth or vinyl if sewing by hand, as they are difficult to puncture and sew through manually.
How much fabric do I need for a full set of 4 seat covers?
For standard bucket seats, you’ll need 2 to 3 yards of 60-inch wide fabric per seat, so 8 to 12 yards total for a full 4-seat set. For a bench seat, you’ll need 4 to 5 yards per bench. Always buy 10% extra fabric to account for cutting mistakes or pattern matching. You can also read our guide on how to protect baby from sun in stroller.
Will DIY seat covers interfere with my car’s airbags?
Only if you cover the side airbag panels, which are usually marked with an "SRS" or airbag icon on the side of the seat. Cut small slits in the cover over these panels, or leave them completely uncovered, per official NHTSA safety guidelines. You can also read our guide on best in child safety car seats for ultimate protection and comfort.
How long does a DIY car seat cover last?
With proper care, a well-made cover from heavy-duty fabric will last 3 to 5 years, compared to 1 to 2 years for cheap store-bought universal covers. You can also read our guide on can you dry car seat covers.
Conclusion
Sewing your own car seat covers is a low-cost, high-reward DIY project that lets you personalize your interior, protect your factory upholstery, and avoid the high cost of custom professional covers. While it does require patience and attention to detail, especially when taking measurements and sewing thick fabric, the final result is a set of covers that fit perfectly, match your style, and hold up to daily use for years. Follow the safety guidelines, take accurate measurements, and don’t be afraid to make mistakes—every sewist, even experienced ones, uses a seam ripper from time to time. If you’re looking for more easy DIY projects to upgrade your car’s comfort and style, check out our guide to upgrading your car's comfort features. Once you’ve finished your covers, share your creations with friends—you might just inspire them to tackle their own DIY auto projects. You can also read our guide on best car seat automotive seat protector top picks for ultimate protection.

Emma Grace is a devoted mother and passionate content writer at BestBabyCart.com. With firsthand parenting experience and a love for research, she creates helpful guides and honest reviews to support parents in choosing the best for their babies. Her goal is to make parenthood easier, one article at a time.

 Custom-tailored seat covers fit snugly over seat contours without slipping
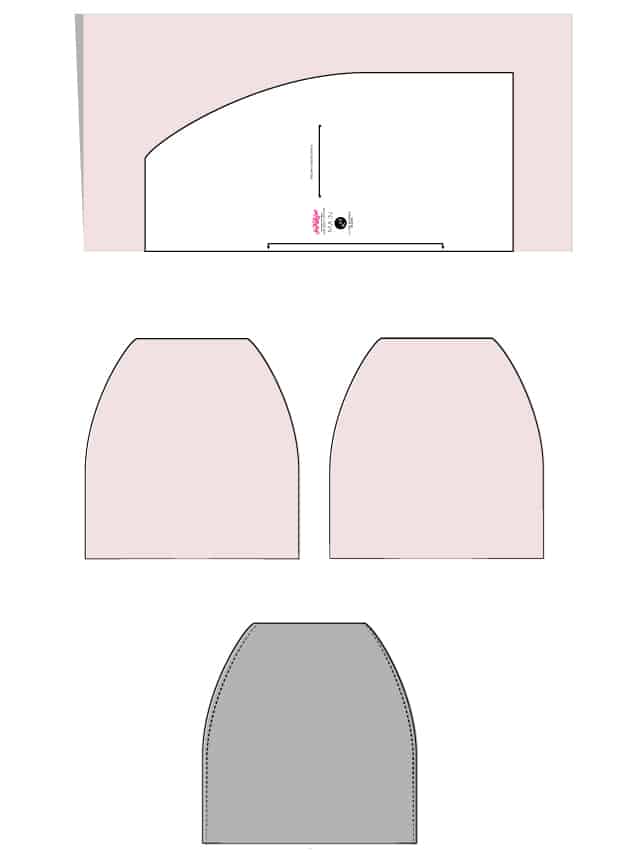 A walking foot attachment helps sew thick fabric evenly without bunching