Imagine stepping into your car and being greeted by a fresh, stylish interior that perfectly reflects your taste. Creating your own car seat covers not only enhances your vehicle’s aesthetic but also offers a personal touch that store-bought options simply can’t match.
If you’ve ever thought about upgrading your car’s look without breaking the bank, you’re in the right place. Learning how to sew car seat covers is easier than you might think, and with a little guidance, you can transform your car into a reflection of your personality and style.
Dive into this article to discover step-by-step instructions that will empower you to create custom car seat covers, protect your seats, and make every drive a more enjoyable experience. Your car deserves this makeover, and you deserve to enjoy the process!
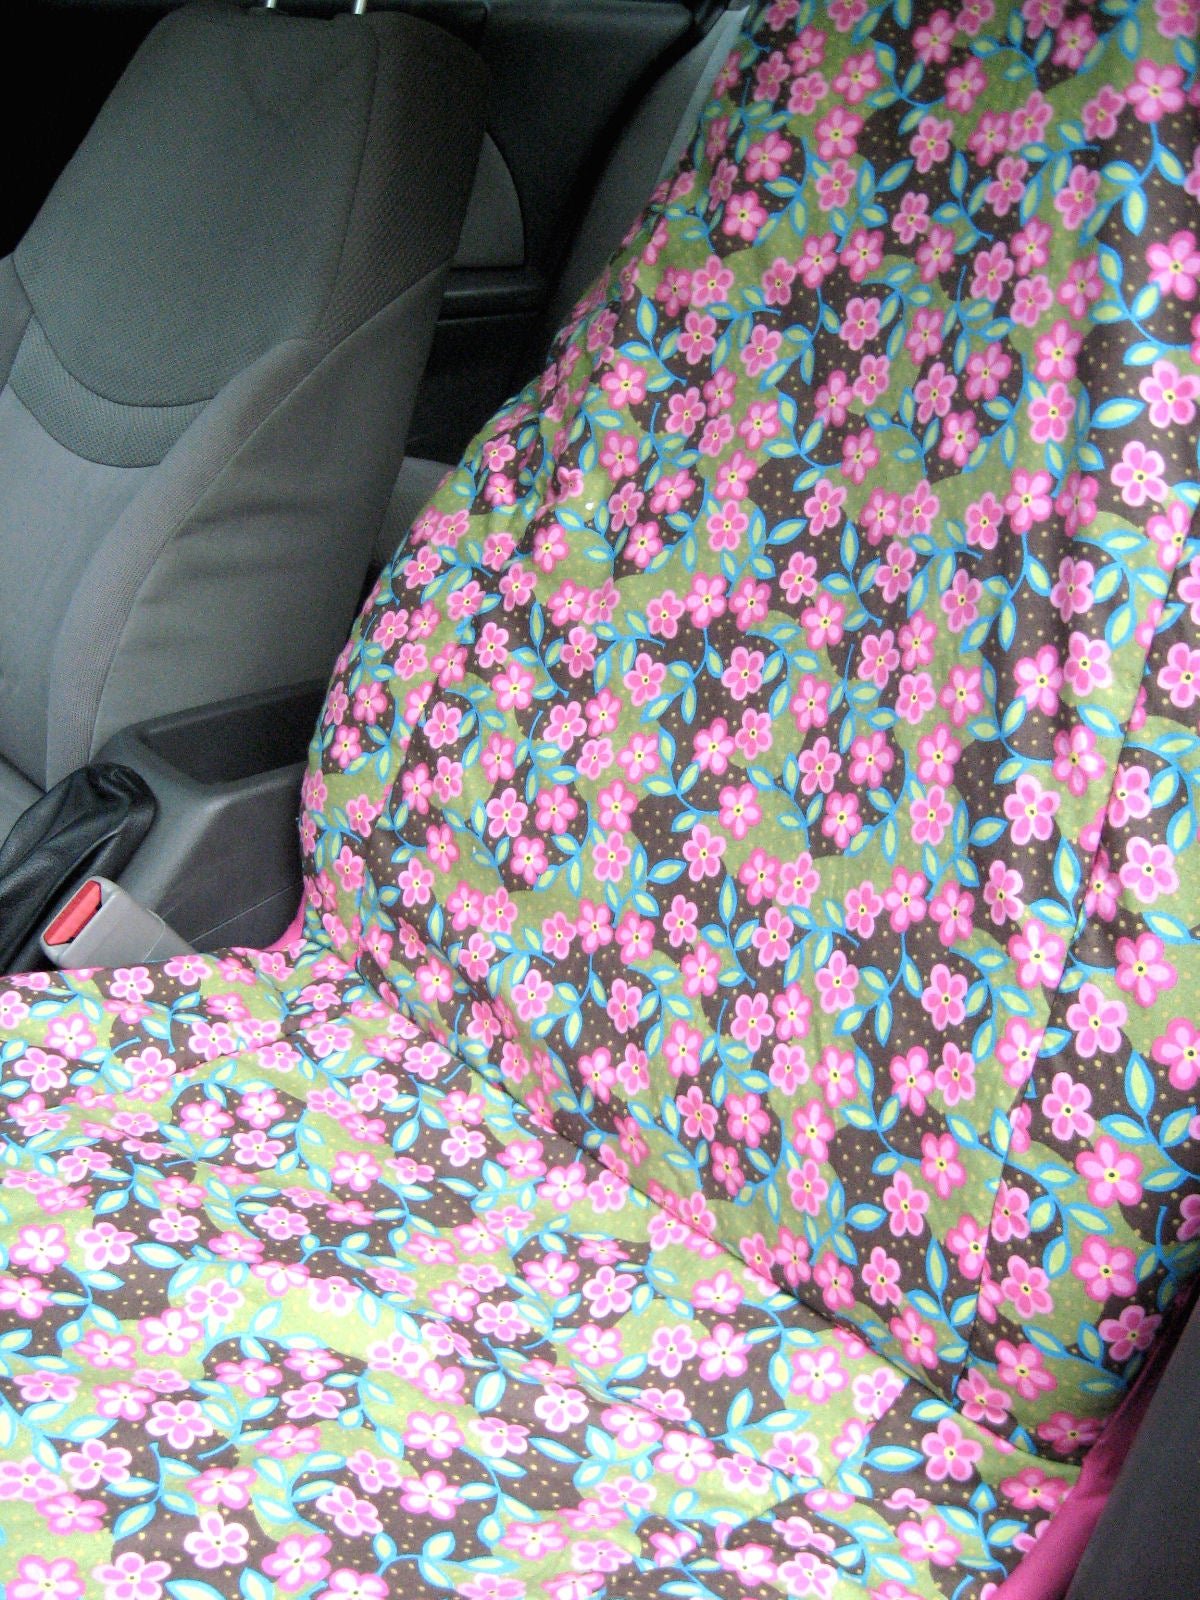
Credit: www.chicaandjo.com
Choosing Materials
Choosing the right materials for sewing car seat covers is crucial. It affects the look, feel, and longevity of your project. This section will guide you through selecting the best materials.
Fabric Types
Different fabrics offer varied benefits. Cotton is breathable and soft. Polyester is durable and easy to clean. Leather gives a luxurious feel but requires maintenance. Vinyl is waterproof and affordable. Consider what matters most for your needs.
Color And Pattern Selection
Colors and patterns set the style of your car interior. Neutral colors like gray and beige match most car interiors. Bold colors make a statement and add personality. Patterns like stripes or checks give a unique touch. Choose what reflects your style.
Durability Considerations
Durability ensures your seat covers last long. Heavy-duty fabrics resist wear and tear. Look for materials with high thread counts. They withstand daily use better. Consider materials treated for stain resistance. This keeps them looking new longer.
Gathering Tools
Creating car seat covers requires gathering essential tools. Scissors, fabric, measuring tape, and a sewing machine are key. Needle and thread are also needed for detailed work. Having these items ready ensures a smooth sewing process.
Gathering the right tools is key to sewing car seat covers. Proper tools ensure smooth sewing and the best finish. Let’s explore the necessary tools for this project.
Essential Sewing Tools
You’ll need a reliable sewing machine. It should handle thick fabric well. Choose strong polyester thread for durability. A good pair of fabric scissors is crucial. They should cut through heavy material easily. Keep a seam ripper handy for mistakes. Pins or clips will help hold fabric in place.
Measuring Instruments
Accurate measurements ensure a good fit. A flexible measuring tape is essential. It helps measure curves and angles. Use a ruler for straight edges. Chalk or a fabric pencil is great for marking measurements. These tools help in cutting the fabric precisely.
Safety Equipment
Safety is important while sewing. Wear safety glasses to protect your eyes. A thimble can protect your fingers from needles. Keep a first aid kit nearby for small injuries. Safety ensures a smoother sewing experience.
Measuring Seats
Before sewing car seat covers, precise measurements are essential. Accurate measurements ensure a snug fit and a professional look. Measuring seats correctly can save time and prevent fabric waste. Understanding the process is key to a successful project.
Taking Accurate Measurements
Start by examining the seat’s shape and size. Use a measuring tape to gauge length, width, and depth. Measure from the top to the bottom of the seat. Note the width at the widest point. Ensure measurements are taken at various angles for accuracy.
Adjusting For Different Seat Types
Seats vary in design and size. Bucket seats need detailed attention to contours. Measure the curves and angles carefully. Bench seats are simpler but require length and width measurements. Check for headrests or armrests as they affect fabric needs.
Recording Measurements
Keep a detailed record of all measurements. Use a notebook or digital device for storage. Label each measurement clearly. Include notes on seat features like curves or attached parts. Organized records help in cutting fabric efficiently.
Creating Patterns
Crafting patterns for sewing car seat covers involves measuring and tracing the seats accurately. Select durable fabric and cut it according to your pattern. Finally, sew the pieces together, ensuring a snug fit for a sleek look.
Creating patterns is essential in sewing car seat covers. Patterns guide the fabric cutting and sewing process. They ensure the covers fit the seats perfectly. Without accurate patterns, the covers might not fit well. This section explores how to draft and cut patterns.
Drafting Patterns
Start by measuring each part of the car seat. Use a flexible measuring tape for accuracy. Write down each measurement. Consider the seat’s curves and angles. Use these measurements to create a paper pattern. Lay out pattern paper on a flat surface. Draw the seat shape using the measurements. Check twice to avoid mistakes. Cut out the paper pattern carefully.
Cutting Fabric
Place the paper pattern on the fabric. Choose fabric that is durable and easy to clean. Pin the pattern securely to the fabric. Use sharp scissors for cutting. Cut along the edges of the pattern. Ensure the fabric pieces match the pattern size. Double-check the cuts for precision.
Marking Seam Allowances
Seam allowances are extra fabric around the pattern edges. They are crucial for sewing the pieces together. Use a fabric marker to draw seam lines. Typically, seam allowances are about half an inch. Mark around all edges of the fabric pieces. This ensures the covers will fit snugly. Keep the seam lines visible during sewing.
Sewing Basics
Sewing car seat covers at home is a rewarding project. It saves money and allows customization. Understanding sewing basics is essential before starting. It involves selecting the right thread, choosing stitch types, and learning sewing techniques.
Thread Selection
Thread plays a crucial role in sewing. Choose strong, durable thread for car seat covers. Polyester thread is popular because it resists wear and tear. Cotton thread is soft but not as durable. Consider the fabric color when picking thread. Matching colors give a clean look.
Stitch Types
Several stitch types are ideal for car seat covers. Straight stitch is simple and strong. It holds fabric layers together firmly. Zigzag stitch offers flexibility and stretch. It’s useful for seams that need movement. Overlock stitch finishes edges neatly. It prevents fraying and enhances durability.
Sewing Techniques
Mastering sewing techniques ensures quality results. Start with measuring fabric accurately. This avoids waste and ensures a perfect fit. Pinning fabric securely keeps it steady during sewing. Use a sewing machine for precision and speed. Hand sewing is useful for intricate areas.
Constructing Covers
Constructing covers for car seats can be a rewarding project. You get to choose your own fabric and customize your car’s interior. This process involves several key steps. Let’s dive into assembling the pieces, joining seams, and adding fasteners.
Assembling Pieces
First, gather all your cut fabric pieces. Lay them out to check for any mismatched edges. Ensure that each piece aligns with its counterpart. Pin the pieces together to keep them in place. This helps avoid slipping during sewing.
Joining Seams
Begin sewing the pinned pieces together. Use a straight stitch for strong seams. Check your sewing machine tension settings. Adjust if the fabric puckers or loosens. Press each seam with an iron. This ensures a neat and professional finish.
Adding Fasteners
Fasteners help attach the cover to the seat. You can use Velcro, zippers, or buttons. Decide which type suits your design. Position the fasteners where they won’t be visible. Sew them securely to avoid wear and tear. Test the fit once fastened.
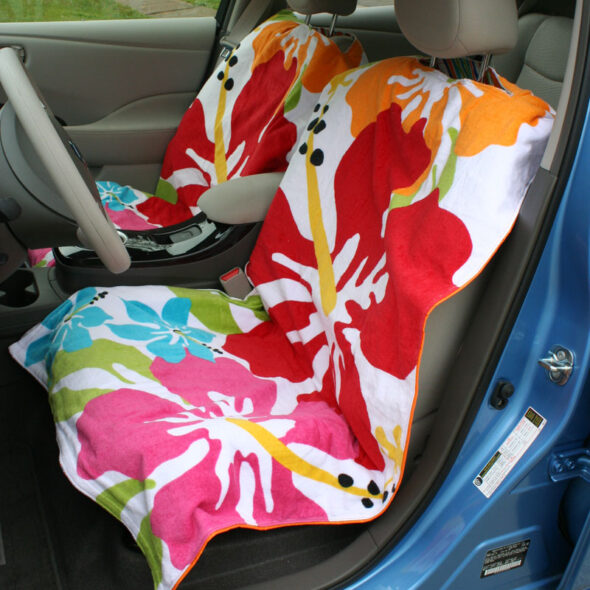
Finishing Touches
After crafting your car seat covers, the final touches matter. These details enhance aesthetics and ensure functionality. Let’s explore some crucial finishing steps.
Trimming Excess Fabric
First, cut away any extra material. Use sharp scissors for clean edges. This step prevents bulkiness and uneven seams. A neat finish gives a professional look. Double-check for any leftover threads.
Adding Decorative Elements
Consider adding stylish touches. Sew on patches or appliques for flair. Choose elements that reflect your personality. Embroidery adds elegance and texture. Use contrasting colors for visual interest.
Ensuring Fit And Comfort
Place the cover on your car seat. Adjust for a snug fit. Check for wrinkles or loose areas. Ensure seams are secure. Feel the fabric for comfort. Test the seat by sitting down. Make adjustments if needed.
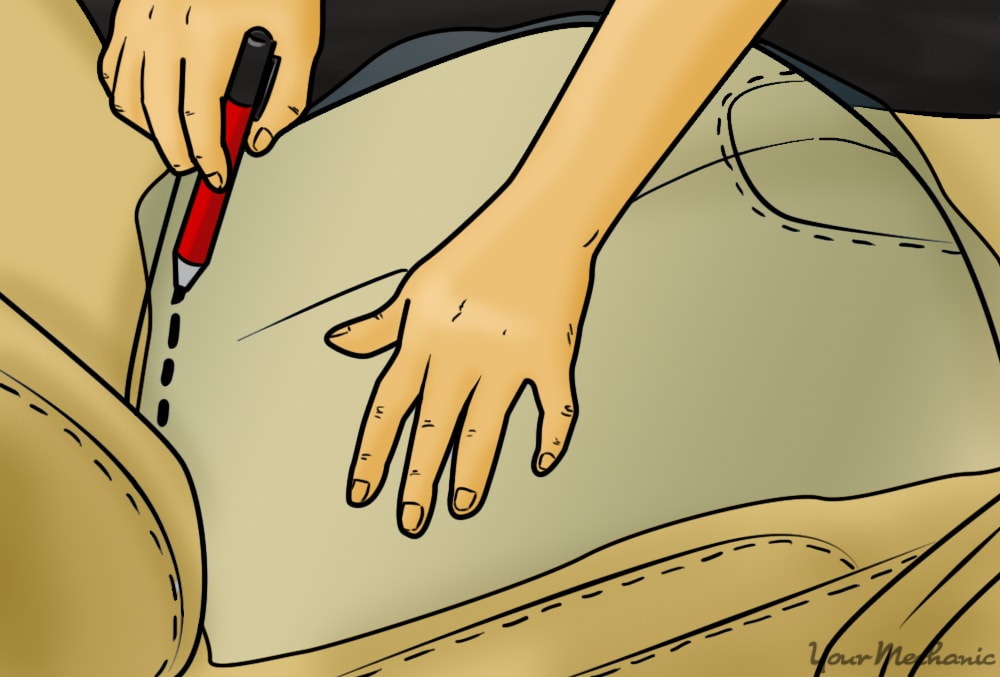
Credit: www.yourmechanic.com
Installing Covers
Installing car seat covers can transform your vehicle’s interior. This process involves fitting, securing, and adjusting for a perfect look. It’s essential to follow each step carefully for a snug fit. Proper installation ensures the covers stay in place and look great.
Fitting Over Seats
Begin by placing the cover over the seat. Start from the top and work your way down. Ensure the cover aligns with the seat’s contours. Smooth out any wrinkles for a neat appearance. Check that the cover fits all areas of the seat evenly.
Securing In Place
Once fitted, secure the cover using straps or ties. These usually attach under the seat or around the back. Make sure they are tight but not overly stretched. This keeps the cover stable during use. Properly secured covers reduce movement and wear.
Adjustments And Tweaks
After securing, make small adjustments. Check for loose areas or excess fabric. Tuck away any protruding parts for a clean look. Adjust the cover to ensure it doesn’t interfere with seat functions. Regular tweaks can maintain a smooth fit over time.
Maintenance Tips
Sewing car seat covers can keep them looking fresh and protect against wear. Start by choosing durable fabric to ensure longevity. Use a sewing machine for precise stitches, and measure carefully to fit snugly over seats.
Maintaining your car seat covers ensures they stay fresh and durable. Whether you’ve crafted them yourself or bought them, proper care can prolong their life. Here are some essential tips to keep your seat covers in top condition.
Cleaning And Care
Regular cleaning helps prevent dirt buildup and stains. Use a vacuum to remove dust and crumbs weekly. For deeper cleaning, check the fabric type. Some fabrics are machine washable; others require hand washing. Always use mild detergent and cold water. Avoid bleach or harsh chemicals. They can damage the fabric. Dry them in shade to avoid fading. Ironing is not recommended.
Repairing Damage
Small tears or holes should be fixed immediately. Use fabric glue or patches for quick repairs. Needle and thread work well for sewing larger tears. Ensure the color matches for a seamless look. Check seams regularly. Tighten loose threads before they unravel. This prevents further damage.
Longevity Strategies
Rotate seat covers to distribute wear evenly. This avoids excessive wear in one spot. Use sun shades to protect from UV rays. They can weaken fabric over time. Keep sharp objects away from seats. They might puncture or tear the covers. Store unused covers in a dry place. Moisture can lead to mold growth. Regularly inspect them for signs of wear. Early detection helps maintain their quality.
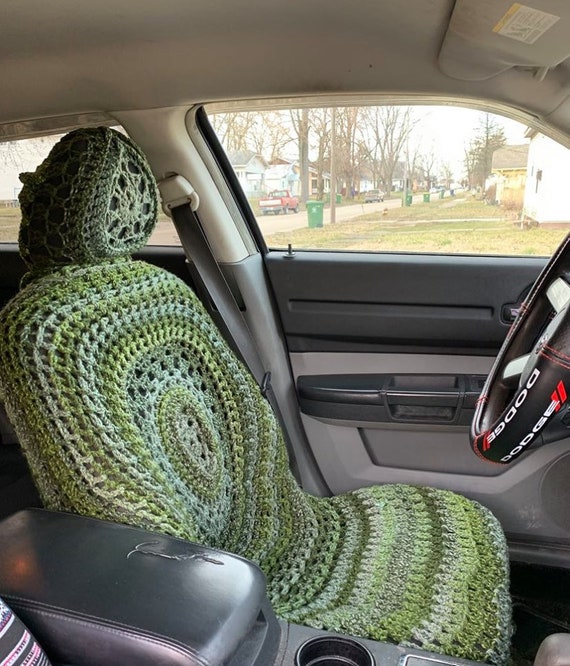
Credit: www.etsy.com
Frequently Asked Questions
How Do I Choose Fabric For Car Seat Covers?
Selecting the right fabric is crucial for durability and comfort. Opt for materials like neoprene or vinyl for waterproofing. Consider breathable fabrics like cotton blends for comfort. Ensure the fabric complements your car’s interior. Always check for UV resistance and ease of cleaning when choosing fabric.
What Tools Do I Need To Sew Car Seat Covers?
Basic tools include a sewing machine, fabric scissors, and measuring tape. You’ll also need pins, needles, and thread matching your fabric. Consider purchasing a seam ripper for mistakes. Using a rotary cutter can help with precise cuts. A fabric marker is useful for marking measurements.
Can Beginners Sew Car Seat Covers?
Yes, beginners can sew car seat covers with patience and practice. Start with simple designs and gradually tackle complex patterns. Use tutorials or instructional videos for guidance. Ensure you have the right tools and materials. Take accurate measurements for a snug fit and avoid common sewing mistakes.
How Do I Measure My Car Seats?
Accurate measurements ensure a perfect fit for your seat covers. Measure the width, height, and depth of each seat. Consider any contours or special features, like headrests. Use a flexible measuring tape for precision. Record measurements clearly to avoid errors during cutting and sewing.
Conclusion
Sewing car seat covers is a rewarding project. You personalize your car’s interior. The process involves simple steps. Choose fabric, measure seats, and cut patterns. Sewing requires patience and practice. Use a sewing machine for neat stitches. Hand sewing works for small adjustments.
Ensure covers fit snugly over seats. Protects seats from wear and stains. Adds style and comfort to your ride. Follow the guide for best results. Happy sewing and enjoy your refreshed car interior. Share your creations with friends. Inspire others to sew their own covers.
Feel proud of your handmade work.

Emma Grace is a devoted mother and passionate content writer at BestBabyCart.com. With firsthand parenting experience and a love for research, she creates helpful guides and honest reviews to support parents in choosing the best for their babies. Her goal is to make parenthood easier, one article at a time.