Are you tired of looking at the worn-out seat covers in your car? Do you want to breathe new life into your vehicle’s interior without breaking the bank?
Replacing your seat covers is a simple and affordable way to transform your car’s look and feel. Imagine sliding into your car and feeling that fresh, new fabric beneath you. Not only does it enhance your driving experience, but it also boosts your car’s value and charm.
In this guide, you’ll discover just how easy it is to replace your car seat covers yourself, even if you’ve never done it before. You’ll learn step-by-step instructions, insider tips, and the best materials to choose for durability and style. By the end of this article, you’ll have the confidence and knowledge to give your car a stunning makeover, making every drive more enjoyable. So, let’s dive in and revamp your ride’s interior!
Credit: www.theseatshop.com
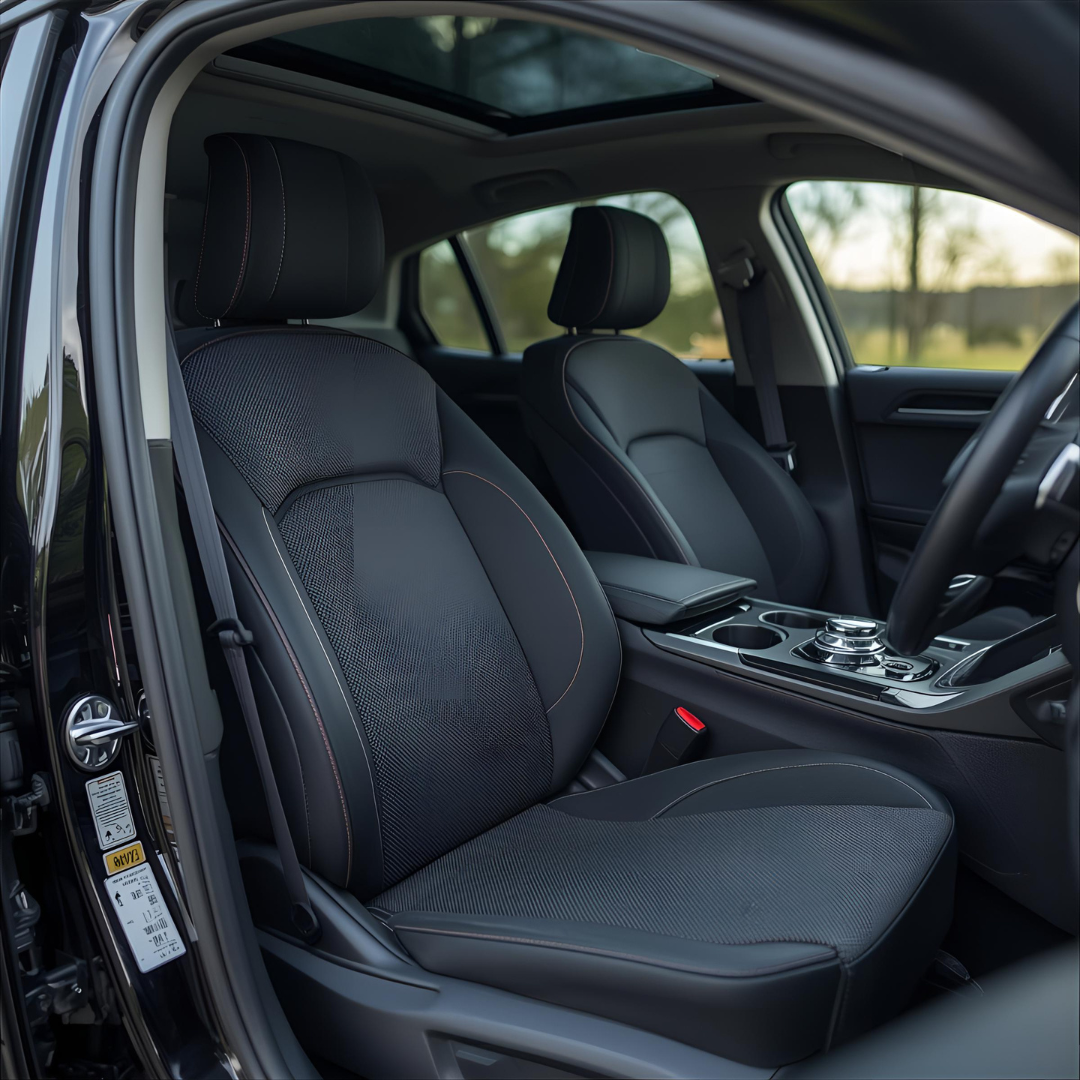
Choosing The Right Seat Covers
Choosing the right seat covers can transform your car's interior. It enhances comfort and style. The right seat covers protect your seats from wear and tear. They also offer an opportunity to express personal style. With many options available, it’s essential to make informed choices. Let’s explore the key factors to consider.
Material Options
Material is a crucial factor in choosing seat covers. Leather offers a luxurious feel. It is durable and easy to clean. Fabric covers provide a soft touch. They come in various patterns and colors. Neoprene is water-resistant and perfect for an active lifestyle. Consider your needs and preferences when selecting materials.
Color And Design
Color and design reflect your personality and style. Neutral tones like black and grey are versatile. They suit most car interiors. Bold colors can make your car stand out. Patterns add a unique touch. Ensure the design complements your car’s interior. This maintains a cohesive look.
Measuring For Fit
Proper fit is essential for seat covers. Measure your seats carefully. Note the length, width, and height. Check for special features like armrests or headrests. Custom-fit covers provide the best results. They prevent slipping and ensure comfort. Always verify measurements before purchasing.
Gathering Necessary Tools
Replacing seat covers in a car is an exciting project. To ensure success, gather the right tools first. This step saves time and reduces stress during the process. Having everything ready makes the task smooth and efficient. Below is a guide to what you need.
Basic Tool List
For a start, you’ll need some basic tools. A screwdriver set is essential. It helps remove and install screws. Pliers are needed to grip and twist. Scissors are important for cutting fabric. A wrench set is useful for tightening bolts. A staple gun might be needed to attach fabric securely. These tools are usually available at home. If not, they are easy to find at a local store.
Optional Accessories
Some extra accessories can make the process easier. Consider using a fabric steamer. It helps remove wrinkles from the new seat covers. A seam ripper can assist in taking off old covers. Protective gloves keep your hands safe. A measuring tape ensures precise cutting of fabric. These accessories can enhance your overall experience.
Preparing The Car Interior
Preparing the car interior is crucial before replacing seat covers. A clean and organized space makes the process smoother. It also ensures new covers fit perfectly. Follow these simple steps for a better outcome.
Cleaning The Seats
Start by vacuuming the seats thoroughly. Remove dust and debris from all corners. Use a gentle upholstery cleaner to tackle stubborn stains. A clean surface helps new covers adhere better. Ensure the seats are completely dry before proceeding. Moisture can lead to mold or odors.
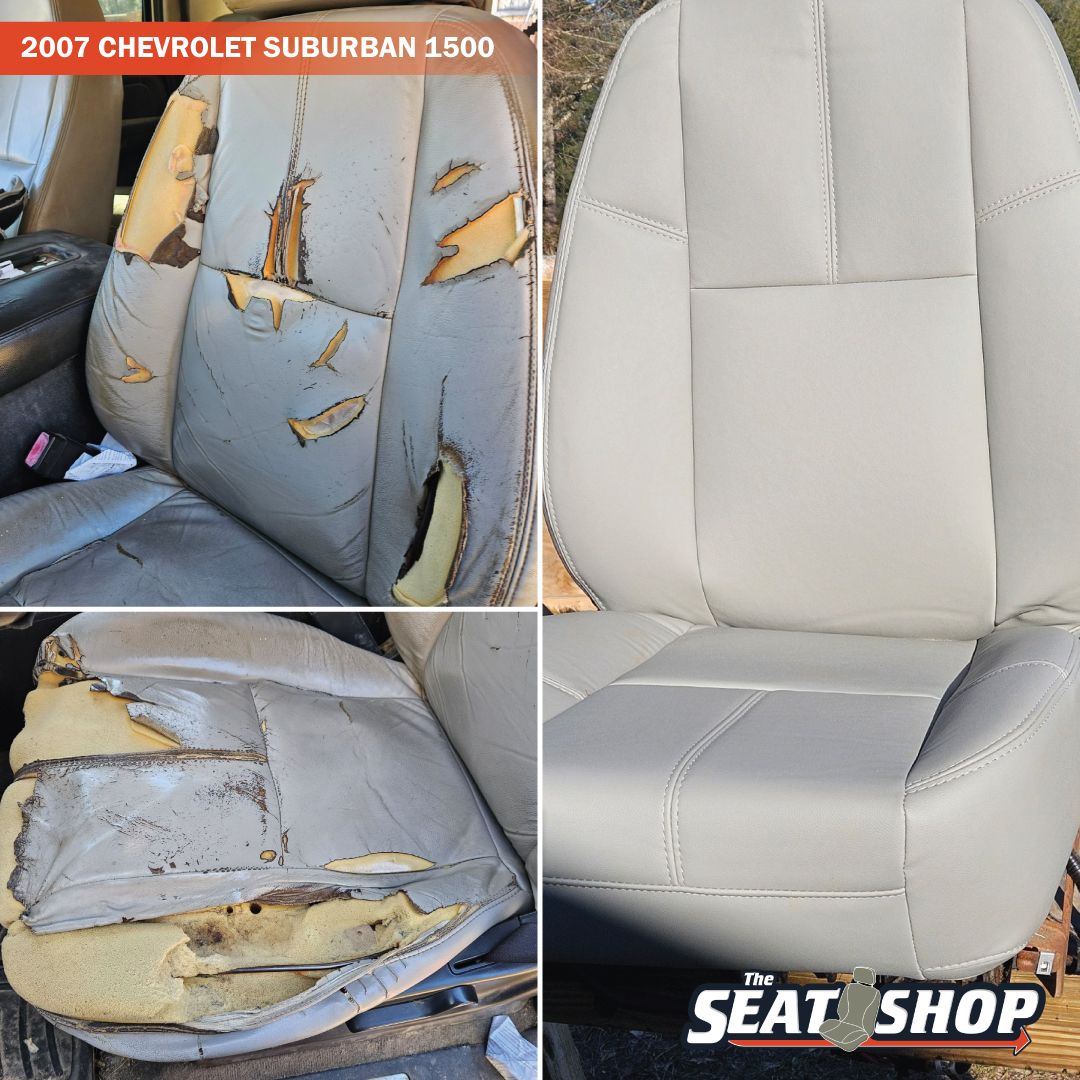
Removing Old Covers
Carefully remove the old seat covers. Check for any fasteners or ties holding them in place. Gently undo these without causing damage. Some covers may require cutting if stubborn. Be cautious to avoid harming the seat fabric underneath. Dispose of the old covers responsibly.
Installing New Seat Covers
Installing new seat covers can refresh your car's interior. It’s a simple task that adds style and protection. Before you start, gather your tools and have your new covers ready. This guide will help you position and secure them properly.
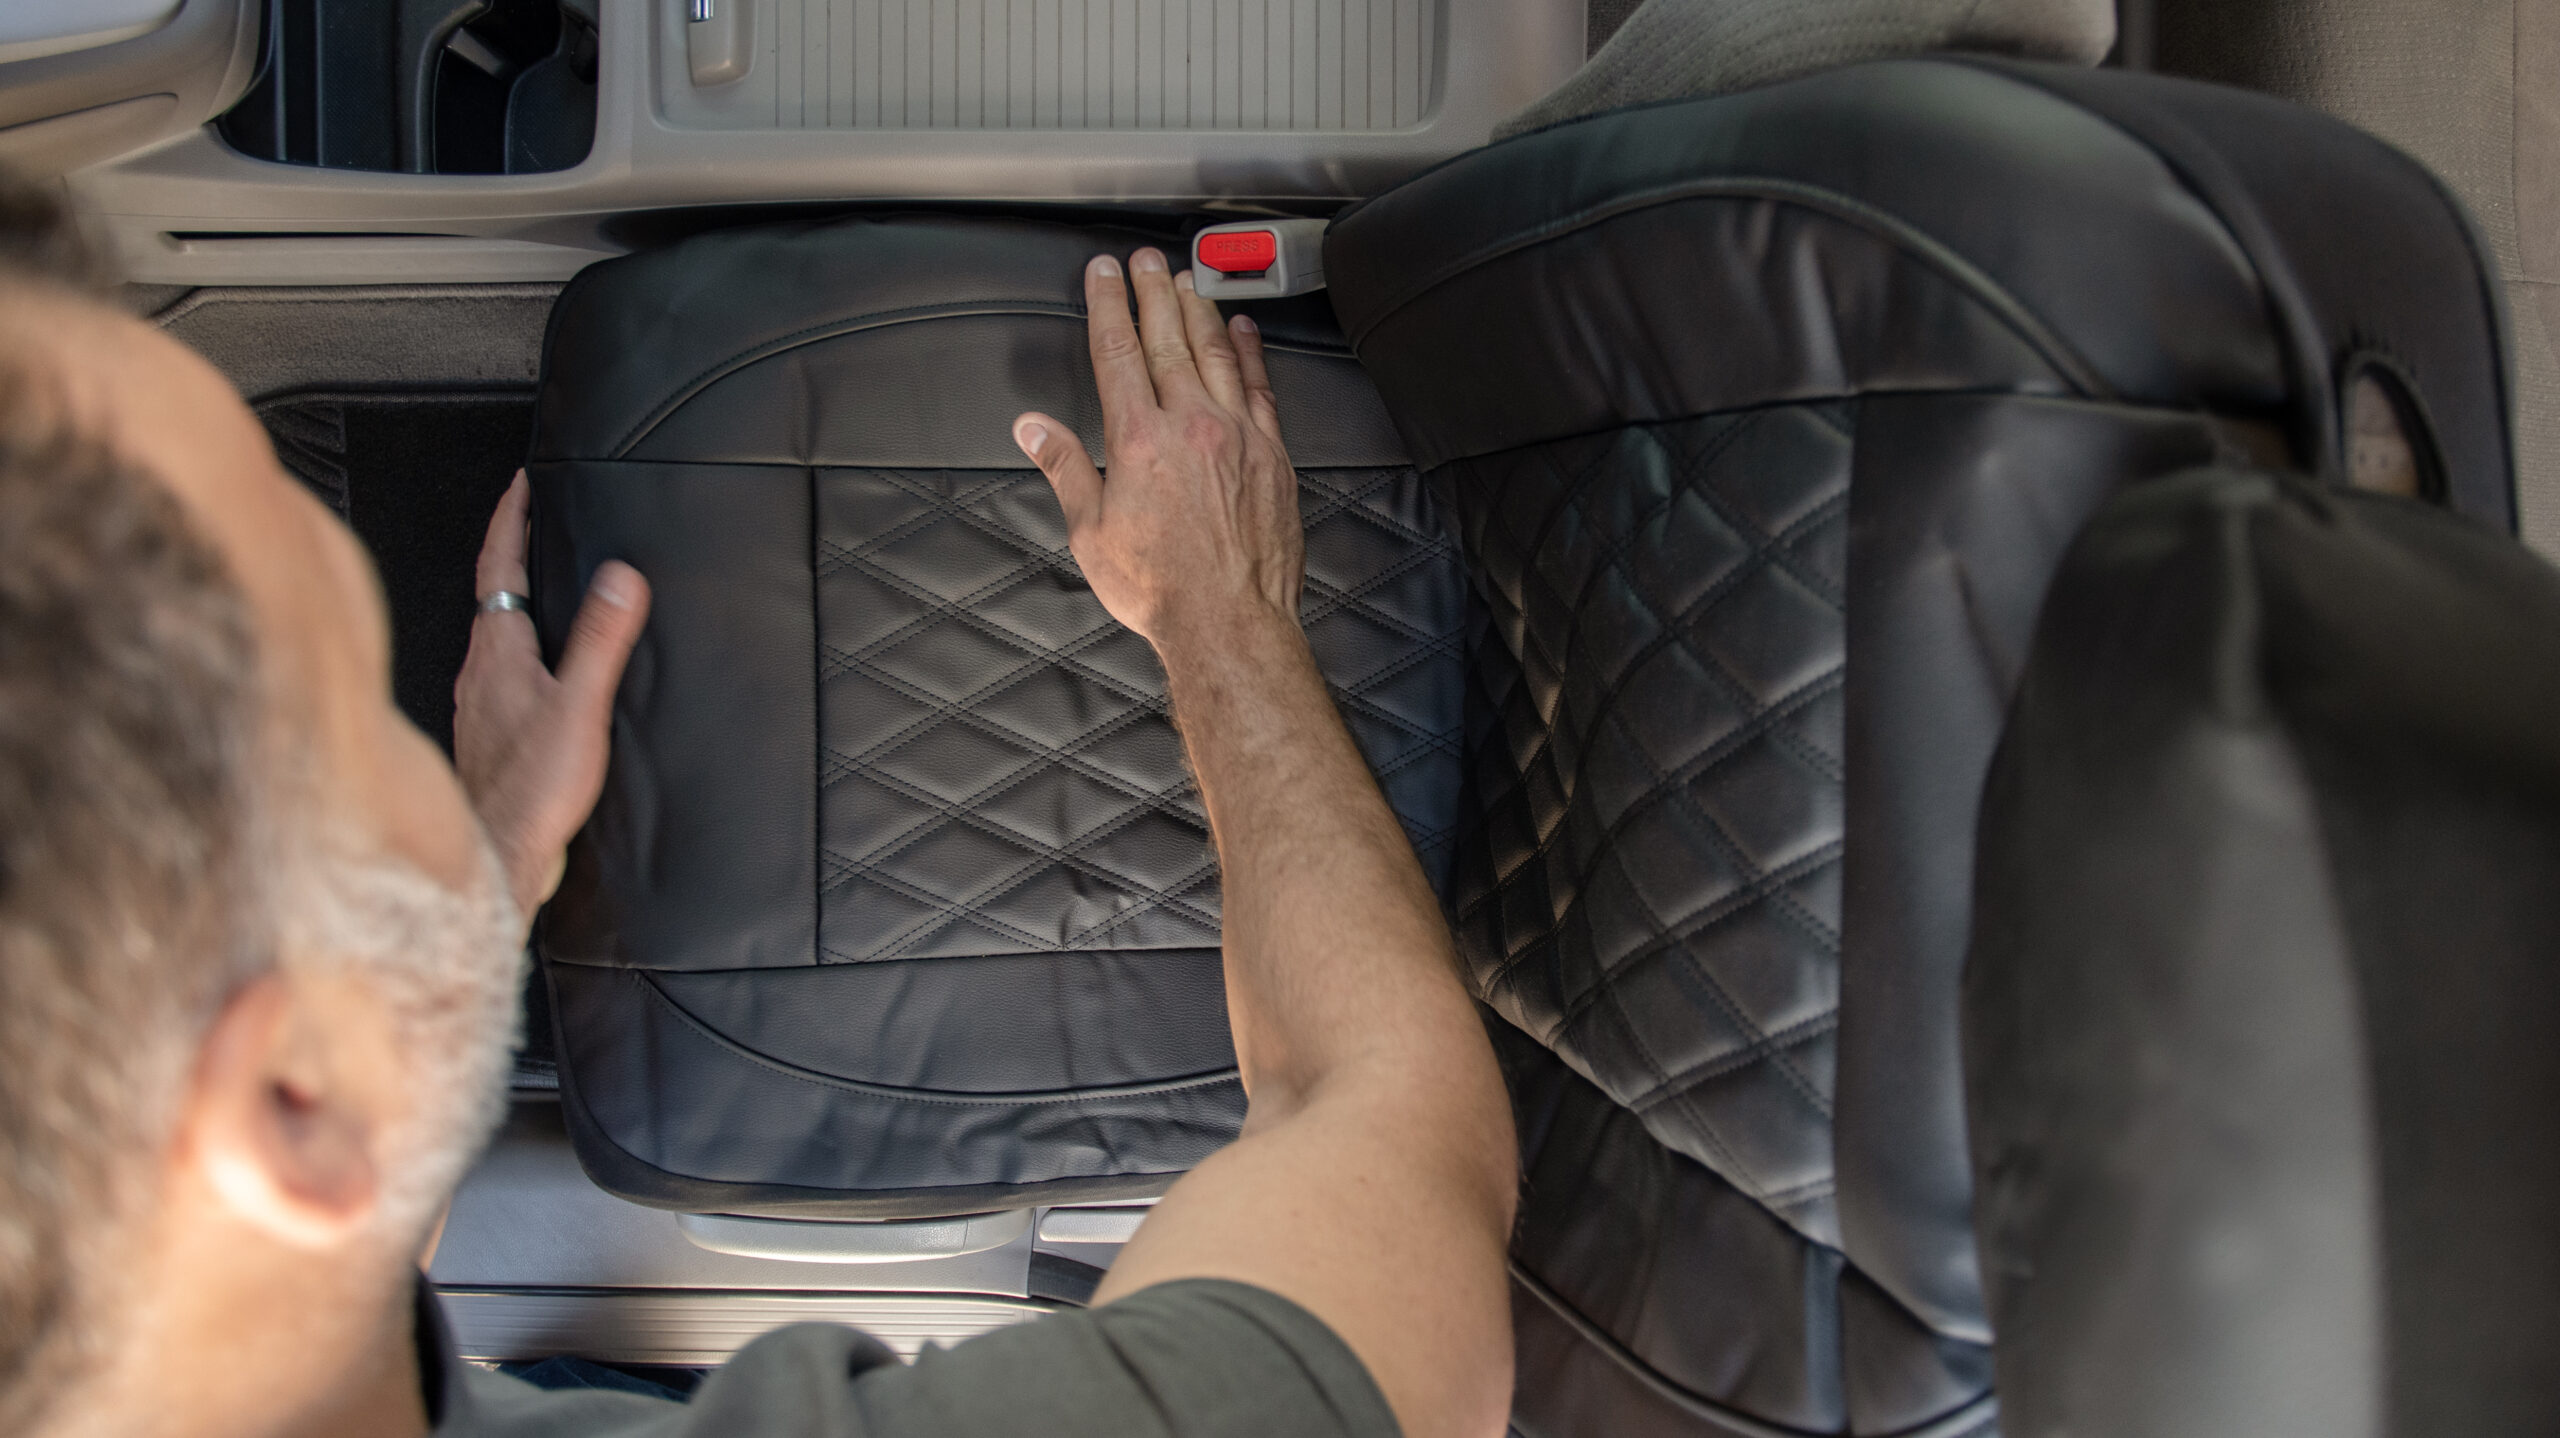
Positioning The Covers
Start by removing the old seat covers if needed. Lay the new cover over the seat, ensuring it aligns with the seat’s contours. Smooth out wrinkles and check for proper fit. The cover should match the seat’s shape.
Adjust the cover till it looks even. Make sure the seams align with the seat edges. This helps the cover stay in place. Take your time to get the best fit. A well-positioned cover enhances comfort and appearance.
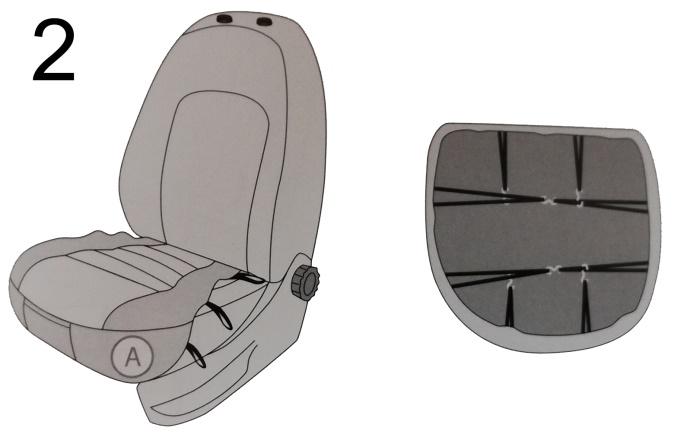
Securing With Straps
Most seat covers come with straps for securing. Pass these straps under the seat, connecting them as instructed. Ensure they are tight enough to hold the cover firmly.
Check that the cover does not shift when you sit. Tighten the straps if needed. A secure cover stays in place during rides. Double-check all straps to avoid loose fitting.
Properly secured covers last longer and offer better protection. Enjoy your car’s new look and feel.
Adjusting For A Perfect Fit
Adjusting seat covers in your car can seem daunting. But with patience, the right fit enhances your car’s interior. A snug seat cover not only looks good but feels comfortable. Ensuring it fits perfectly is key.
Smoothing Out Wrinkles
Wrinkles can ruin the look of new seat covers. Start by pulling the fabric tightly. Use your hands to smooth out creases. Stretch the cover from corner to corner. This helps in achieving a clean look. For stubborn wrinkles, use a steamer. Steam helps relax fabric fibers, making it easier to smooth. Always check the material’s care instructions before applying heat.
Adjusting Fasteners
Fasteners keep the seat cover in place. Check the attachment points under the seat. Ensure the straps are aligned correctly. Tighten them securely to prevent slipping. Some covers use clips or hooks. Ensure these are fastened properly. This prevents movement during use. Recheck fasteners after a few days. Adjust as needed to maintain a perfect fit.
Credit: www.cover-company.com
Maintenance Tips
Changing car seat covers can freshen up your vehicle’s interior. First, choose the right size and style for your seats. Next, remove the old covers carefully and replace them, ensuring a snug fit. Regularly check for wear and tear to keep them looking new.
Replacing seat covers can breathe new life into your car's interior. Proper maintenance ensures they stay fresh and last longer. Regular care prevents wear and tear. This section will provide essential tips for maintaining your new seat covers.
Regular Cleaning
Clean seat covers often. Dust and dirt can accumulate quickly. Use a vacuum to remove loose debris. A mild detergent works well for deeper cleaning. Avoid harsh chemicals. They may damage the fabric. Use a soft cloth or brush. Gently scrub the surface. Rinse with clean water. Ensure thorough drying. Moisture can lead to mold or mildew.
Handling Spills
Act fast when spills occur. Blot the liquid with a clean cloth. Do not rub. Rubbing spreads the stain. Use a mild cleaning solution. Test it on a hidden area first. Apply it gently to the spill. Blot again with a clean cloth. Rinse with water. Dry the area completely. Consider using seat covers with water-resistant material. They offer extra protection against spills.
Common Mistakes To Avoid
Replacing seat covers in a car seems simple, yet mistakes happen. These errors can lead to frustration and wasted time. Knowing common pitfalls helps in achieving a clean, professional look. Avoiding these mistakes ensures the seat covers fit well and enhance the car's interior.
Choosing The Wrong Size
Measure your seats before buying covers. Using the wrong size leads to a poor fit. Loose covers slide around, creating discomfort. Tight covers may tear or damage the seats. Check the dimensions carefully. Each car model has specific seat sizes. Verify the measurements with the product details. This step avoids purchasing ill-fitting covers.
Improper Installation
Proper installation is crucial for seat covers to function well. Incorrect installation can cause slippage. Covers may not stay in place during use. Read the instructions thoroughly. Manufacturers provide guidelines specific to their products. Follow each step carefully. Use any included tools or accessories. Secure all straps and fasteners tightly. This ensures the covers remain stable and look neat.
Benefits Of Diy Seat Cover Replacement
Replacing seat covers in your car can be a rewarding task. Doing it yourself saves money and allows personal expression. You can transform your car’s interior while learning a new skill. Let’s explore the benefits of DIY seat cover replacement.
Cost Savings
DIY seat cover replacement can save a lot of money. Professional services often come with high fees. By doing it yourself, you avoid labor costs. You only pay for the materials. This approach can lead to significant financial savings.
Many stores offer affordable seat covers. You can find options to fit any budget. Online tutorials and guides make the process easier. Even with no experience, you can succeed. This makes DIY an attractive option.
Personalization Options
Choosing your own seat covers allows for personalization. You can select colors and patterns you love. This gives your car a unique look. Match your personality or the car’s exterior.
DIY lets you experiment with different styles. You can try bold or subtle designs. Your choices can reflect your taste. It’s an easy way to update your car’s interior. Personal touches make your car feel more like home.
Credit: www.autozone.com
Frequently Asked Questions
How To Remove Old Seat Covers?
To remove old seat covers, start by loosening any ties or clips. Carefully unhook or unzip the cover from the seat. Ensure you remove all attachments without damaging the fabric or seat. For stubborn covers, use a flat tool to gently pry them off.
What Tools Are Needed For Replacement?
You’ll need basic tools like a screwdriver, pliers, and possibly a wrench. These help in removing screws or fasteners. A flathead screwdriver can assist in prying off old covers. Some seat covers may require specific tools, check the manufacturer’s instructions.
Can I Replace Seat Covers Myself?
Yes, you can replace seat covers yourself with basic tools and patience. Carefully follow instructions provided with your new covers. Ensure you secure them tightly to avoid any wrinkles or loose areas. DIY replacement can save you money and provide a sense of accomplishment.
How Long Does Replacement Take?
Replacing seat covers typically takes 1-2 hours per seat, depending on your experience. The process involves removal, cleaning, and installation. Allocate sufficient time to ensure proper fitting and finish. Rushing can lead to improper installation or damage.
Conclusion
Replacing seat covers is easier than it seems. Start with the right tools. Follow simple steps to remove old covers. Slide new covers over the seats. Ensure they fit snugly. Check for loose edges. Tighten any straps or zippers. Enjoy a fresh look inside your car.
Maintenance keeps covers looking new. Regular cleaning helps. Protects against wear and tear. A small task with a big impact. Your car feels fresh and inviting. Anyone can do it with patience and care. Keep your car’s interior looking its best.

Emma Grace is a devoted mother and passionate content writer at BestBabyCart.com. With firsthand parenting experience and a love for research, she creates helpful guides and honest reviews to support parents in choosing the best for their babies. Her goal is to make parenthood easier, one article at a time.