
Car crashes remain the leading cause of death for children ages 1 to 13 in the United States, and the National Highway Traffic Safety Administration (NHTSA) reports that 46% of car seats are installed incorrectly, drastically increasing injury risk NHTSA car seat safety guide. If you’ve just unboxed a Safety First convertible car seat, the installation process can feel overwhelming — but a secure, properly adjusted seat is the single most important thing you can do to protect your child on every drive. This 2026-updated guide walks you through every step of installation, covering both LATCH and seat belt methods, rear-facing and forward-facing setup, and common pitfalls to avoid. We’ll also include real-world testing tips to confirm your seat is secure before your first trip.
 This seat is properly secured with less than 1 inch of side-to-side movement.
Credit: www.youtube.com
This seat is properly secured with less than 1 inch of side-to-side movement.
Credit: www.youtube.com
Pre-Installation Checks: Verify Your Seat and Vehicle Readiness
Before you touch the car seat, complete these two quick checks to avoid preventable errors.
Confirm Your Seat Is Safe and Up to Date
First, check for active recalls on your Safety First seat. Visit the NHTSA recall lookup tool and enter your seat’s model number and manufacture date (found on the label on the seat shell or base). If your seat is on a recall list, contact Safety First immediately for a free repair or replacement — do not use a recalled seat under any circumstances. Next, register your seat on the Safety First official website. This ensures you receive instant alerts if a recall is issued for your model later. Most convertible car seats have a 10-year expiration date from the date of manufacture, so double-check the label to confirm your seat is still within its usable lifespan. Expired seats have degraded plastic and harness components that may fail in a crash.
Gather Your Tools and Review Your Vehicle’s Seat Belt Features
You will need your Safety First car seat manual (available on the manufacturer’s website if you lost the printed copy) and a clean, flat surface in your vehicle’s back seat to work. If you plan to use the seat belt installation method, confirm your vehicle’s seat belts have a locking mechanism: most 2026 model year vehicles have auto-locking shoulder belts, but older cars may require a separate locking clip (included with most car seats) to prevent the belt from loosening over time. For a visual walkthrough of recall checks and seat registration, watch this official Safety First tutorial: Safety First car seat setup guide.
Choose the Safest Installation Location in Your Vehicle
The position of the car seat in your vehicle has a massive impact on crash safety. The Insurance Institute for Highway Safety (IIHS) confirms that the center rear seat is up to 43% safer for children in a side-impact crash than outboard positions IIHS child safety research, so prioritize the center spot if it fits your seat properly.
Rear-Facing vs. Forward-Facing Placement Rules
For infants and toddlers, rear-facing is the safest position, as it supports the head, neck, and spine during a crash. Keep your child rear-facing until they reach the maximum height or weight limit listed on your Safety First seat’s label — for most 2026 models, this is 40–50 pounds and 40 inches tall. Do not rush the transition to forward-facing, even if your pediatrician gives the go-ahead early. Once your child outgrows the rear-facing limits, switch to forward-facing with the harness, and use the top tether for added security. Keep them forward-facing with the harness until they reach the seat’s upper weight limit (usually 65 pounds for convertible models).
Avoiding Airbag and Projectile Hazards
Never install a car seat in the front passenger seat of a vehicle with an active airbag — airbags deploy at speeds of up to 200 mph and can cause fatal head or chest injuries to children. If you must use an outboard rear seat, choose the position farthest from any active airbags (usually the driver’s side rear seat if the passenger side has a curtain airbag that deploys from the roof). Also, avoid placing loose items like toys, bags, or heavy objects on the seat behind or next to the car seat. In a crash, these items become dangerous projectiles that can strike your child. Stow all loose gear in the trunk or secured cargo nets. For cold-weather travel, avoid puffy winter coats under the harness, as they compress in a crash and leave dangerous slack. For layering tips that work with car seat harnesses, check out baby coat guidelines.
Install the Seat Using LATCH (Lower Anchors and Tethers for Children)
LATCH is the easiest, most consistent installation method for most vehicles, and it eliminates the risk of a misused seat belt. Follow these steps for a secure LATCH install:
- Locate the lower LATCH anchors in your vehicle’s back seat. These are marked with a small car seat icon between the seat cushion and backrest. Do not use the lower anchors for the center seat unless your vehicle’s manual explicitly confirms center LATCH anchors are approved.
- Attach the Safety First seat’s lower LATCH connectors to the vehicle’s lower anchors. You will hear a click when the connectors are fully locked.
- Tighten the LATCH straps by pulling the adjustment strap on the free end of each strap. Remove all slack, but do not overtighten, as this can warp the seat shell.
- For forward-facing installations, locate the top LATCH tether anchor in your vehicle. This is usually on the back of the vehicle seat behind the headrest, or on the floor of the trunk for some SUVs. Attach the seat’s top tether to the anchor and tighten it until no slack remains.
Install the Seat Using Your Vehicle’s Seat Belt
If your vehicle does not have LATCH anchors, or if you prefer seat belt installation for added security, follow these steps:
- Place the car seat in your chosen rear seat position, facing the correct direction (rear-facing or forward-facing) for your child’s size.
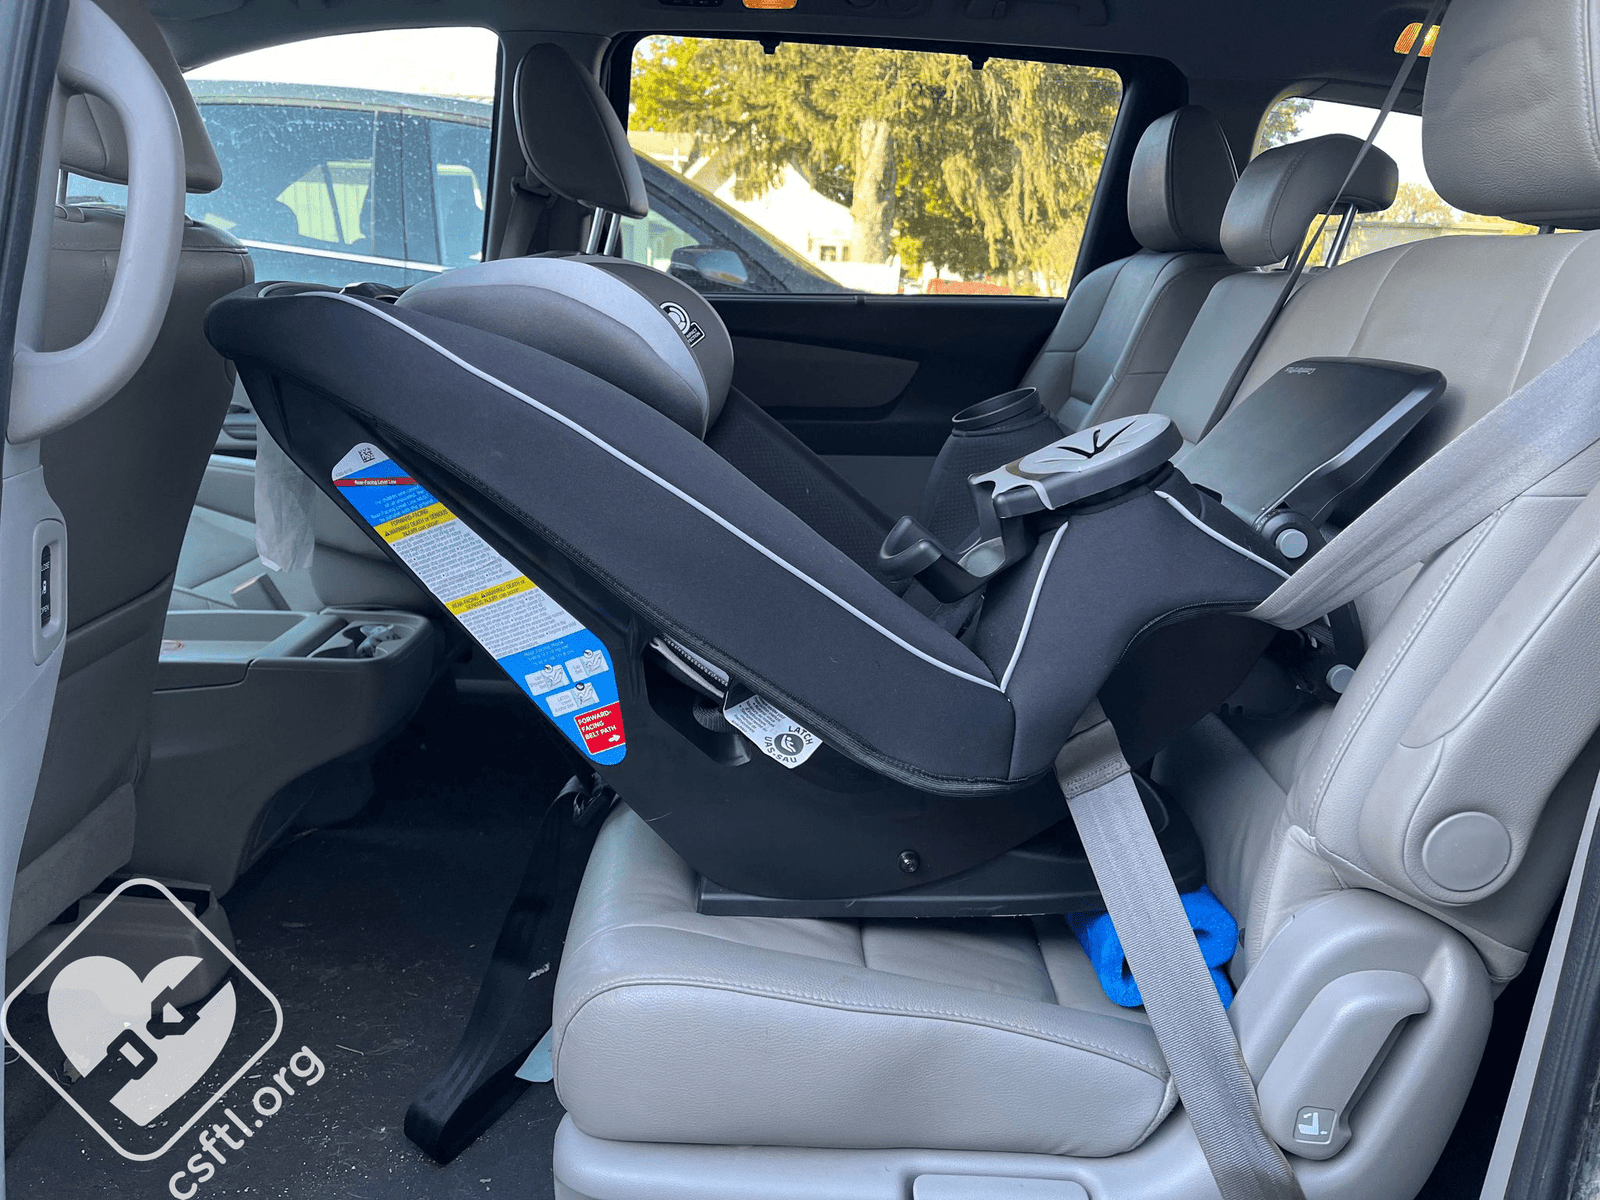
- Thread the vehicle’s seat belt through the designated belt path on your Safety First seat. The belt path is marked with a label and a reinforced opening on the seat shell — do not thread the belt through the incorrect path, as this will make the seat unstable.
 Thread the seat belt through the designated belt path marked on your Safety First seat for a secure fit.
Credit: csftl.org
Thread the seat belt through the designated belt path marked on your Safety First seat for a secure fit.
Credit: csftl.org
- Buckle the seat belt and pull it tight to remove all slack. If your vehicle’s seat belt does not lock automatically, pull the shoulder belt all the way out until it clicks into locked mode, then feed the excess belt back in. For vehicles with non-locking lap belts, use the included locking clip: thread the clip 1 inch below the LATCH connector, then buckle the belt and tighten.
- Test the seat’s movement: grab the base at the belt path and push/pull firmly side-to-side and front-to-back. The seat should not move more than 1 inch in any direction. If you struggle to get a tight fit with the seat belt, consider purchasing a seat belt tightening tool approved by Safety First for your specific model — these tools help remove excess slack without damaging the belt or seat.
Adjust Harness, Recline, and Headrest for Your Child’s Size
A correctly installed seat is only half the battle — the harness and recline must be adjusted to fit your child’s exact size to work as intended in a crash.
Set the Correct Recline Angle for Age
For rear-facing installations, the seat must be reclined at an angle that prevents your child’s head from flopping forward. Most Safety First convertible seats have a recline level indicator on the side: aim for the 45-degree angle mark for infants under 1 year old, and a more upright 30–35 degree angle for toddlers over 1 year old who have good head control. For forward-facing installations, set the seat to the most upright position allowed for your child’s height.
Position the Harness and Chest Clip Correctly
The harness straps should lie flat against your child’s chest, with no twists. For rear-facing seats, the harness slots should be at or below your child’s shoulders. For forward-facing seats, the slots should be at or above the shoulders. The chest clip should be positioned at armpit level, not lower on the chest or higher near the neck. To tighten the harness, pull the adjustment strap on the front of the seat until you cannot pinch any excess horizontal webbing at your child’s shoulder. A common mistake we see in practice is leaving the harness too loose to avoid upsetting the child, but a snug harness is non-negotiable for crash safety. For road trips, a properly installed seat lets you focus on planning early baby outings without worrying about seat stability.
Adjust the Headrest for Head and Neck Support
The headrest should be positioned 1 inch above your child’s ears when they are seated in the seat. If the headrest is too low, it will not protect their head in a side-impact crash; if it is too high, it can push their head forward and block their airway. Adjust the headrest by pressing the adjustment button on the back of the seat and raising or lowering it until it aligns with the top of your child’s ears. A well-adjusted headrest supports restful sleep on drives, similar to how a thoughtfully designed crib environment supports sleep at home.
Test Your Installation for Security and Proper Fit
Before your first trip, complete these two tests to confirm your installation is safe:
The 1-Inch Side-to-Side Movement Test
Grab the base of the car seat at the belt path (the area where the LATCH straps or seat belt attach) and push/pull firmly side-to-side and front-to-back. The entire seat should move less than 1 inch in any direction. If it moves more than that, re-tighten the LATCH straps or seat belt and re-test. A seat that moves more than 1 inch can cause severe injury in a crash, as the child’s head and body will strike the vehicle’s interior.
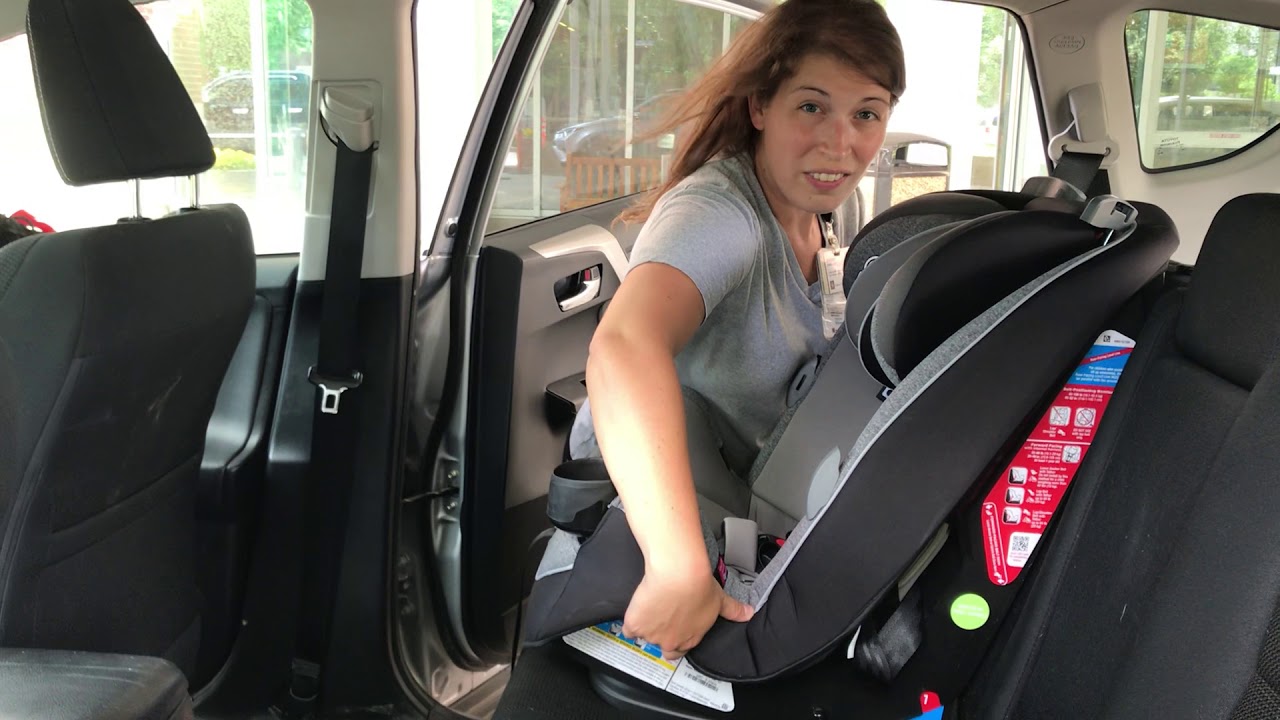 Pull LATCH straps tight until no slack remains, with no more than 1 inch of movement at the base.
Credit: www.youtube.com
Pull LATCH straps tight until no slack remains, with no more than 1 inch of movement at the base.
Credit: www.youtube.com
Harness Fit Checks for Every Ride
Every time you buckle your child in, complete a quick harness check:
- Pinch the webbing horizontally at your child’s shoulder. If you can pinch any excess material, tighten the harness until it is snug against their chest.
- Confirm the chest clip is at armpit level, not loose or tilted.
- Make sure the harness straps are not twisted, as twisted straps reduce crash protection by up to 15% per IIHS testing. Stick to thin, close-fitting layers for travel, and pack extra baby socks for trips to keep their feet warm without adding bulk under the harness.
Common Installation Mistakes to Avoid in 2026
Even experienced parents make these errors, so double-check your work against this list:
- Using the wrong belt path: Always thread the seat belt or LATCH straps through the path marked for your child’s current seating direction (rear-facing vs. forward-facing).
- Skipping the top tether for forward-facing installations: The top tether reduces forward head movement in a crash by up to 6 inches, per NHTSA testing.
- Leaving the harness too loose: A loose harness allows your child to fly forward or be ejected from the seat in a crash.
- Using bulky coats or blankets under the harness: Puffy layers compress in a crash, leaving dangerous slack. Opt for thin layers, and place a blanket over the harness if your child is cold.
- Installing the seat in the front passenger seat: Never use a car seat in a position with an active airbag.
- Forgetting to lock the seat belt: An unlocked seat belt will loosen over time, making the seat unstable.
- Using an expired or recalled seat: Always check the manufacture date and recall status before use.
- Using unapproved aftermarket accessories: Strap covers, seat protectors, and headrest pillows not tested with your specific Safety First model can interfere with the harness’s crash performance and void the seat’s warranty. Only use accessories included with the seat or approved by the manufacturer. Register your Safety First seat on the manufacturer’s website to get instant recall notifications, and stay informed about other baby product safety updates like formula ingredient alerts if you use formula.
Ongoing Safety Checks and Maintenance
A correctly installed seat does not stay secure forever — complete these checks regularly:
Monthly Inspection Routine
Once a month, re-test the seat’s movement (1-inch test) and check the harness for fraying, twisting, or loose stitching. Also confirm the recline angle and headrest position are still correct for your child’s current size.
When to Re-Check After Disruption
Re-install and re-test your seat after any of the following events:
- You remove the seat from the vehicle for cleaning or travel
- You get into a minor or major car accident, even if no visible damage is done to the seat
- You have your vehicle’s seat belts or seats repaired or replaced
- Your child has a significant growth spurt that requires adjusting the harness or headrest With a secure seat, you can confidently plan day trips and focus on packing kid-friendly snacks in baby plates for travel to keep your little one happy on long drives.
Frequently Asked Questions
How do I adjust the harness on a Safety First car seat?
To adjust the harness, press the harness release button at the front of the seat, then pull the shoulder straps to lengthen them or push them through the slots to shorten them. Once the straps are at the correct height for your child’s shoulders, pull the adjustment strap at the front to tighten the harness until it is snug against their chest. Confirm the chest clip is at armpit level, and that the straps lie flat with no twists.
Can I use a Safety First car seat for newborns?
Yes, Safety First convertible car seats are designed for newborns starting at 4–5 pounds, as long as the seat is in rear-facing mode, the recline angle is set to 45 degrees, and the harness is adjusted to fit the newborn’s small frame. Use a newborn insert only if it is included with your specific seat model — third-party inserts can interfere with the harness’s crash performance.
How do I install a Safety First car seat rear-facing?
Place the car seat in the rear seat of your vehicle, set it to rear-facing mode, and adjust the recline to 45 degrees for infants. Thread the LATCH straps or seat belt through the rear-facing belt path, tighten to remove all slack, and test for less than 1 inch of movement. Adjust the harness slots to be at or below the newborn’s shoulders, and tighten the harness until no excess webbing can be pinched at the shoulder.
What is the weight limit for a Safety First car seat?
Weight limits vary by model, but most 2026 Safety First convertible seats have a rear-facing weight limit of 40–50 pounds and a forward-facing harness limit of 65 pounds. Always check the label on your specific seat for exact height and weight limits, as these differ between models.
Can I use the LATCH system for a forward-facing Safety First seat?
Yes, and you should always use the top LATCH tether for forward-facing installations. The top tether anchors to a designated point on your vehicle’s rear seat (usually behind the headrest or on the trunk floor) and reduces forward head movement in a crash by up to 6 inches, per NHTSA testing. Do not use the lower LATCH anchors for forward-facing seats without the top tether.
Conclusion
Installing a Safety First convertible car seat correctly takes 15–30 minutes the first time, but it is one of the most important safety tasks you will complete as a parent. By following this step-by-step guide, checking for common mistakes, and completing regular safety inspections, you can ensure your child is protected on every drive, from quick grocery runs to long road trips. If you have questions about your specific seat model, contact Safety First’s customer support team or visit a certified car seat inspection station (offered for free at most fire departments and pediatric clinics) to have a technician check your work. For more baby gear and travel tips, explore our full library of guides for new parents.

Emma Grace is a devoted mother and passionate content writer at BestBabyCart.com. With firsthand parenting experience and a love for research, she creates helpful guides and honest reviews to support parents in choosing the best for their babies. Her goal is to make parenthood easier, one article at a time.