
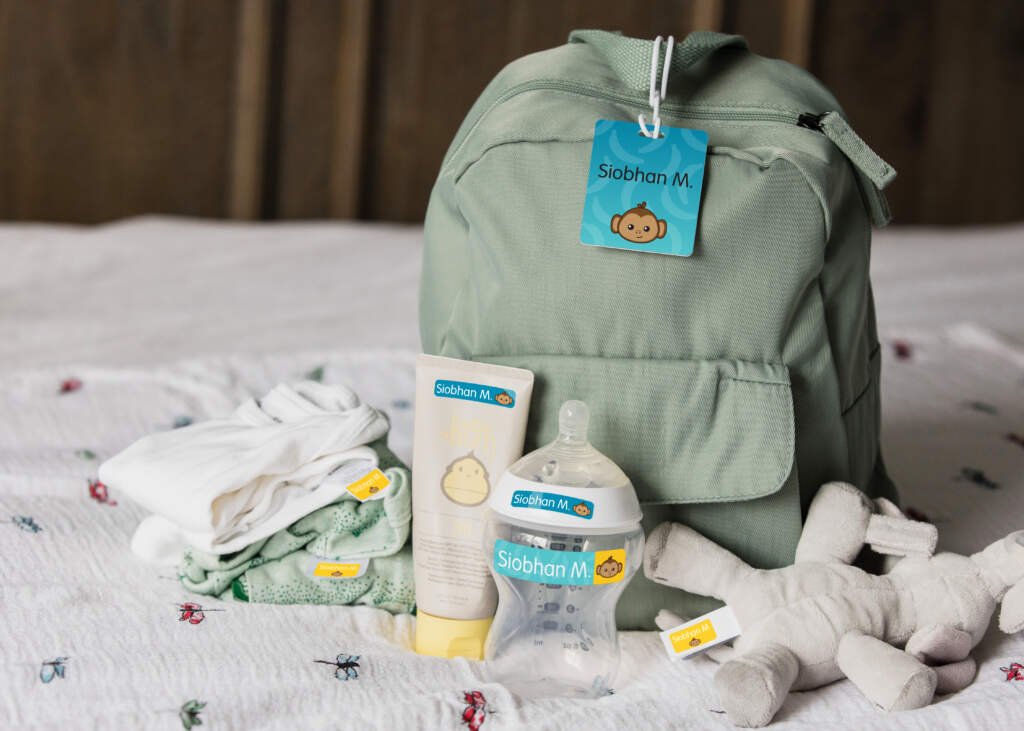
Sending your little one to daycare comes with a mile-long prep checklist: extra clothes, comfort items, snacks, bottles, and, often overlooked, clearly labeled diapers. It’s a tiny task that can feel trivial next to packing backpacks and adjusting to new drop-off routines, but poor diaper labeling is one of the top causes of daycare chaos: mix-ups lead to your child sitting in a wet diaper for an hour, unlabeled supplies get discarded by staff to avoid cross-contamination, and you’re out money on replacement diapers every week. The good news? Labeling diapers for daycare takes 10 minutes or less if you use the right methods, and the peace of mind is worth every second of effort. Below, we break down the most durable, skin-safe labeling methods, step-by-step application guidance, and pro tips to make sure labels stay put all week, no peeling or fading required.
 Custom labeled diapers make it easy for caregivers to identify your child’s supplies at a glance, even during busy diaper change rushes.
Credit: mommyconnections.ca
Custom labeled diapers make it easy for caregivers to identify your child’s supplies at a glance, even during busy diaper change rushes.
Credit: mommyconnections.ca
Why Proper Diaper Labeling Is Non-Negotiable for Daycare
It’s easy to write off diaper labeling as a minor detail, but it serves three critical purposes for your child, daycare staff, and your wallet. First, it eliminates cross-use of diapers between children, a key hygiene practice that reduces the spread of common daycare illnesses like norovirus, ringworm, and bacterial skin infections. To reduce the spread of germs and prevent cross-contamination during diaper changes, the CDC’s child care hygiene guidelines recommend clear, durable labeling of all personal items, including diapers. Second, it cuts down on staff time spent searching for the correct supplies: caregivers manage 8 to 12 diaper changes per child per day in full-time daycare settings, so unambiguous labels let them focus on care rather than inventory checks. Finally, it protects your budget: most daycares discard unlabeled diapers to avoid liability, which can cost parents $15 to $25 per week in replacement disposable diaper costs, or even more for specialty cloth diapers. For more on this, see our guide on loose baby tooth during cleaning tips.
Best Labeling Methods for Daycare Diapers, Ranked by Durability
Not all labeling methods are created equal: some work for short-term disposable use, while others are built to last through hundreds of cloth diaper washes. Below are the most common options, ranked by how well they hold up to daily daycare use.
Permanent Fabric Markers
Fabric-safe permanent markers are the cheapest, fastest option for labeling both disposable and cloth diapers. Look for CPSIA-compliant, non-toxic formulas (standard permanent markers often contain solvents that can bleed through disposable lining or irritate sensitive skin). Write your child’s name in block letters on the smooth front surface of the diaper, and let the ink dry for 30 seconds before stacking to avoid smudging.
- Pros: No extra supplies needed, works on all diaper types, costs less than $5 for a pack of 3.
- Cons: Fades after 5 to 7 washes for cloth diapers, can smudge if not given time to set.
- Best for: Short-term disposable diaper use, quick touch-ups, or last-minute labeling.
Waterproof Adhesive Labels
Pre-made waterproof adhesive labels (the same type many parents use for bottles and clothing) are the most versatile option for daycare. Look for BPA-free, phthalate-free, laundry-safe labels designed for baby items, which hold up to 100+ washes for cloth diapers and won’t peel off disposable packaging even in warm storage bins. Many brands offer custom prints with your child’s name, favorite characters, or color-coding for multiple kids in the same class.
- Pros: Customizable, long-lasting for both cloth and disposable, often include pre-printed designs to save time.
- Cons: Can peel if placed on stretchy elastic waistbands, upfront cost is higher than markers ($10 to $20 for a pack of 50).
- Best for: Full-time cloth diaper use, bulk disposable packs, or families with multiple kids in the same daycare.
Iron-On Fabric Labels
For parents using cloth diapers full-time, iron-on fabric labels are the most durable, long-term option. Made from soft 100% cotton or polyester with a heat-activated adhesive, these labels won’t peel even after 200+ laundry cycles, and they have no rough edges that could irritate your child’s skin. For added peace of mind, the CPSC’s children’s product safety standards require all baby item labels to be free of small detachable parts and toxic materials, so always check for CPSIA compliance before purchasing.
- Pros: Permanent, no irritation, no smudging or fading.
- Cons: Only works on cloth diapers (heat will melt disposable plastic), requires an iron and 15 seconds of set-up time per label.
- Best for: Full-time cloth diaper users, long-term daycare stints.
Labeling Material Safety Checklist
No matter which method you choose, prioritize safety first:
- Avoid labels with glitter, sequins, or 3D decorations that can fall off and become choking hazards.
- Opt for hypoallergenic adhesives and ink if your child has sensitive skin or eczema.
- Skip labels with harsh chemical smells, which can indicate toxic solvents or dyes.
Step-by-Step Guide to Labeling Diapers for Daycare
Even the best labeling supplies will fail if applied incorrectly. Follow these four steps to make sure labels stay put and are easy for caregivers to read.
Step 1: Prep Your Diapers First
For cloth diapers, wash and dry them fully before labeling: any leftover detergent residue or moisture will weaken adhesive and cause ink to smudge. For disposable diapers, keep them in their original sealed packaging until you’re ready to label to avoid getting the outer plastic dirty or smudged before application. If you’re using cloth diapers, stock up on enough to cover average annual cloth diaper needs plus 10 to 15 extras for unexpected laundry delays or growth spurts.
Step 2: Choose the Right Placement
Placement is the number one factor in label longevity. For disposable diapers, stick the label to the smooth, non-stretchy front surface 1 inch below the waistband elastic, away from the leg cuffs and inner lining that touches your child’s skin. For cloth diapers, apply labels to the outer rise (the part that doesn’t stretch when your child moves) or the plastic-covered side snap tab. Never place labels on elastic waistbands or leg cuffs: stretching as your child moves will pull the adhesive off within a few hours.
Step 3: Apply and Set Your Label
For adhesive labels, press firmly for 10 to 15 seconds with a flat object like a credit card to remove air bubbles and activate the adhesive. For markers, write in all-caps block letters (cursive is hard for rushed caregivers to read) with your child’s full first name and last initial to avoid mix-ups if there’s another child with the same first name in the class. Let ink dry for 30 seconds before stacking diapers to prevent smudging. For iron-on labels, place a thin towel between the iron and the label, set to medium heat, press for 15 seconds, and let cool completely before handling.
Step 4: Add Optional Context
If your child has specific needs, add a small note to the label: for example, a “use diaper rash cream” note next to their name, or a small red star sticker next to the label to indicate they have a latex allergy. Many parents also color-code labels by child if they have multiple kids in the same daycare, so staff can identify supplies at a glance before reading the name.
 Fabric iron-on labels are the most durable option for cloth diapers, holding up to 200+ laundry cycles without peeling.
Credit: mommyconnections.ca
Fabric iron-on labels are the most durable option for cloth diapers, holding up to 200+ laundry cycles without peeling.
Credit: mommyconnections.ca
Pro Tips to Keep Diaper Labels Intact All Week
A good labeling setup will last the full week with minimal maintenance. Follow these tips to avoid mid-week label failures:
- Turn cloth diapers inside out before washing to reduce friction on the label surface.
- Skip fabric softener: it breaks down adhesive on sticker labels and fades marker ink over time.
- Store labeled disposable diapers in a cool, dry place away from direct sunlight or hot cars, which can melt adhesive and fade ink.
- Keep 2 to 3 backup labels and a fabric marker in your daily diaper bag for quick replacements if a label peels off mid-week.
- Always test your labeling method 2 to 3 days before your child’s first daycare day: wash a labeled cloth diaper or store a labeled disposable diaper in a warm spot for 48 hours to make sure the label holds up before you send a full week’s supply.
Creative (and Practical) Labeling Hacks for Busy Parents
If you’re short on time or want to make labeling easier for the whole family, these hacks work in real-world daycare settings:
- Use a label maker to print crisp, smudge-proof block letters if you hate handwriting, or print custom labels at home with your child’s name and your phone number for extra security.
- Add a small, simple symbol (a star, heart, or animal) next to your child’s name for pre-readers, so caregivers can quickly match the label to your child’s cubby, bottle, or blanket.
- For disposable diapers, label the entire outer pack with your child’s name, plus 2 to 3 individual diapers to keep in your daily bag. This cuts down on labeling time if you’re short on supplies.
- Most daycares require labeling for all personal items, from bottles and clothing to extra dishware, so a consistent labeling system for all your child’s supplies will save you time and prevent mix-ups across the board. Many parents love adding fun patterns to custom diaper labels, and chevron for baby items is a popular, safe choice as long as the print is non-toxic and won’t fade after washes.
Common Diaper Labeling Mistakes to Avoid
Even experienced parents make these common errors that lead to peeling labels and mix-ups:
- Using regular permanent markers: Standard permanent markers often contain solvents that bleed through disposable diaper lining, stain your child’s clothes, and can irritate sensitive skin. Always opt for CPSIA-compliant fabric markers.
- Placing labels on stretchy surfaces: Elastic waistbands and leg cuffs stretch as your child moves, pulling adhesive off after a few hours. Stick to smooth, non-stretchy parts of the diaper only.
- Writing only a first name: If your daycare has multiple children with the same first name, a last initial or full last name prevents costly and stressful mix-ups.
- Skipping the test run: Sending 30 unlabeled or poorly labeled diapers to daycare on the first day leads to unnecessary chaos. Test your labels 2 to 3 days in advance to confirm they hold up to washing or storage.
- Using labels with detachable parts: Glitter, sequins, or 3D stickers can fall off and become choking hazards for babies and toddlers. Stick to flat, smooth labels with no small loose parts. Avoid labels with rough edges or harsh adhesives that could cause skin irritation, just like you’d vet safe crib bedding materials to protect your child’s sensitive skin.

Frequently Asked Questions
Why do daycares require diaper labeling?
Daycares mandate diaper labeling to eliminate mix-ups between children, which protects both hygiene and supply inventory. Unlabeled diapers can lead to accidental cross-use, increasing the risk of spreading skin infections, norovirus, or other common daycare illnesses. For staff managing 8 to 12 diaper changes per child per day, clear labeling also cuts down on time spent searching for the correct supplies, letting them focus on care rather than inventory management. Many daycares will also discard unlabeled diapers to avoid liability, which can cost parents $15 to $25 per week in replacement supplies for disposable diapers.
What’s the safest way to write on disposable diapers?
Use a CPSIA-compliant non-toxic fabric marker, or a waterproof adhesive label designed for single-use items. Avoid regular permanent markers, as many contain solvents that can bleed through the diaper lining and irritate your child’s sensitive skin. Write your child’s full first name and last initial in block letters on the front smooth surface of the diaper, 1 inch below the waistband, and let the ink dry for 30 seconds before packing to avoid smudging.
Do iron-on labels work on disposable diapers?
No, iron-on labels are only suitable for cloth diapers, as the heat and adhesive will melt the plastic outer layer of disposables and create a choking hazard. For disposable diapers, opt for waterproof adhesive labels or non-toxic fabric markers, which are designed to hold up to the storage conditions and occasional moisture exposure common in daycare settings.
Do I need to label every single diaper, or just the pack?
Most daycares require individual labeling for each disposable diaper, as packs are often split between cubbies and shared supply stations. If you’re short on time, label 2 to 3 individual diapers to keep in your daily diaper bag, and label the outer pack with your child’s name to identify your supply in the classroom storage area. For cloth diapers, labeling 10 to 12 individual diapers is sufficient, as most daycares store each child’s cloth stash in a separate labeled cubby.
Do I have to label other daycare items besides diapers?
Nearly all daycares require labeling for all personal items, including bottles, extra clothing, pacifiers, blankets, and food containers. Check your daycare’s specific labeling policy for requirements around font size, material type, and whether you need to include contact information on labels.
Conclusion
Proper diaper labeling is a small, low-effort task that eliminates a huge source of stress for both parents and daycare staff. By choosing the right durable, non-toxic labeling method, placing labels on smooth non-stretchy surfaces, and testing your setup before your child’s first day, you’ll avoid mix-ups, reduce germ spread, and make sure your kid always has a fresh, correctly sized diaper when they need it. If you’re still prepping for your child’s first week of daycare, our guide to adjusting to early baby schedules has extra tips to cut down on morning chaos and make drop-offs stress-free for everyone.

Emma Grace is a devoted mother and passionate content writer at BestBabyCart.com. With firsthand parenting experience and a love for research, she creates helpful guides and honest reviews to support parents in choosing the best for their babies. Her goal is to make parenthood easier, one article at a time.