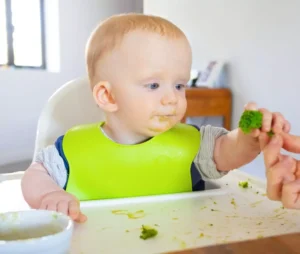
When To Introduce Solid Foods To Baby

When To Introduce Solid Foods To Baby: Timing & Tips

Introduce solid foods around 6 months when your baby shows developmental readiness and stable head control.

I have guided many new parents on when to introduce solid foods to baby. This article draws on clinical guidance, real-world experience, and common sense to give clear steps you can trust. You will learn how to spot readiness, pick first foods, reduce allergy and choking risk, and build healthy habits that support growth and development.
When to start: age and readiness signs
Source: pathways.org

When to start: age and readiness signs

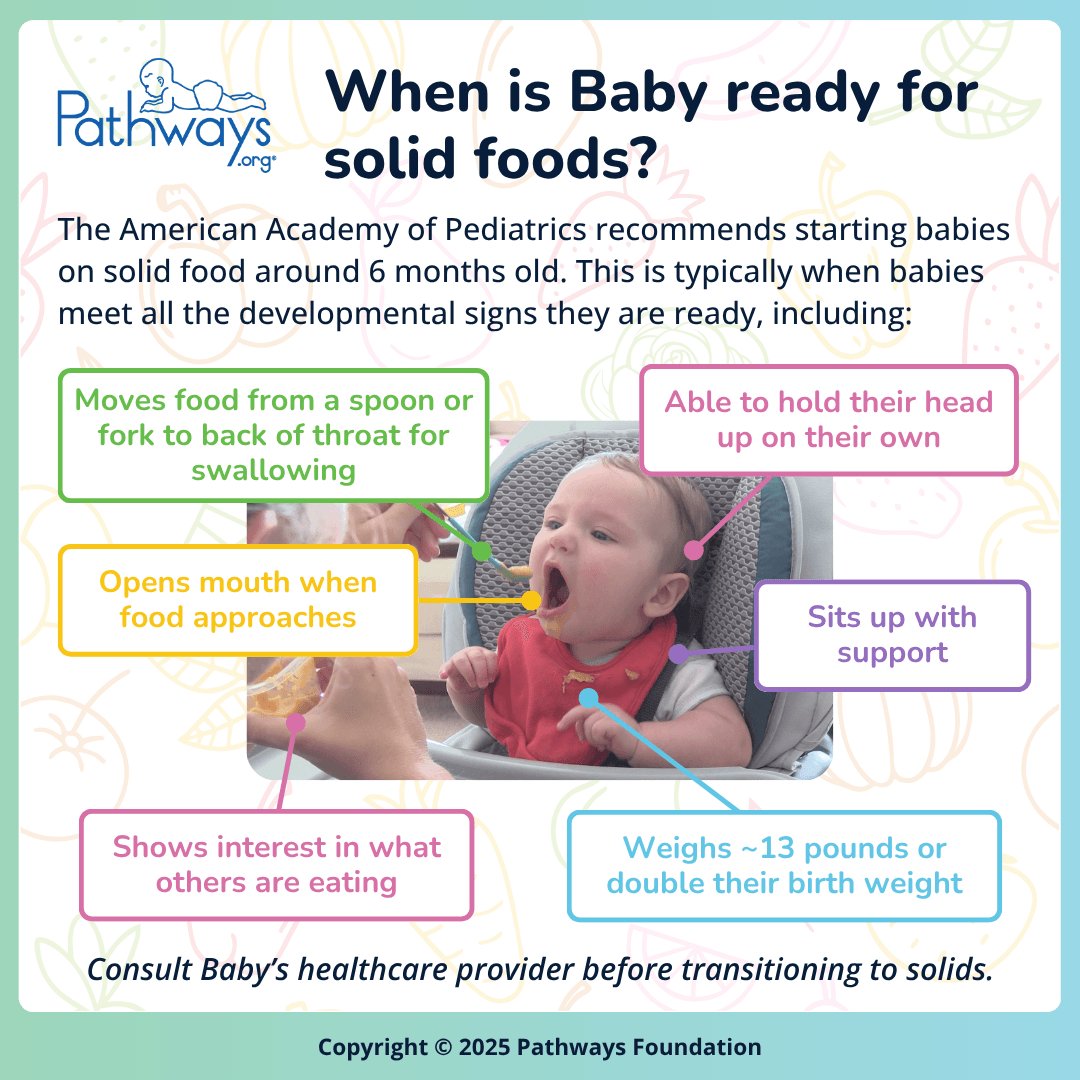
Most experts agree to start solids at about six months. But age alone is not enough. Watch for clear readiness signs before you begin when to introduce solid foods to baby.

  • Sits with minimal support and has good head control.
  • Shows interest in food, reaches for spoons, or opens mouth for food.
  • Can move food from front to back of the mouth and swallow (reduced tongue-thrust reflex).
  • Doubles birth weight or follows pediatrician guidance for growth.

Knowing when to introduce solid foods to baby means using both age and these skills. If your baby is under 4 months, wait. If your baby is older than 6 months but not showing signs, slow down and consult your pediatrician.

First foods and textures: what to offer first
Source: organicsbestshop.com

First foods and textures: what to offer first

Choose nutrient-dense, smooth-textured foods first. This helps fill iron and zinc needs while your baby learns to eat.

  • Single-ingredient purees: iron-fortified cereal, pureed meats, pureed lentils.
  • Pureed vegetables and fruits: sweet potato, avocado, banana, pear.
  • Thin textures at first. Move to thicker purees and mashed foods over weeks.
  • Introduce one new food every 3–5 days to watch for reactions.

When to introduce solid foods to baby also includes variety. After a few weeks, offer soft finger foods and mixed textures to build chewing skills.
How to introduce solids: step-by-step plan
Source: healthychildren.org

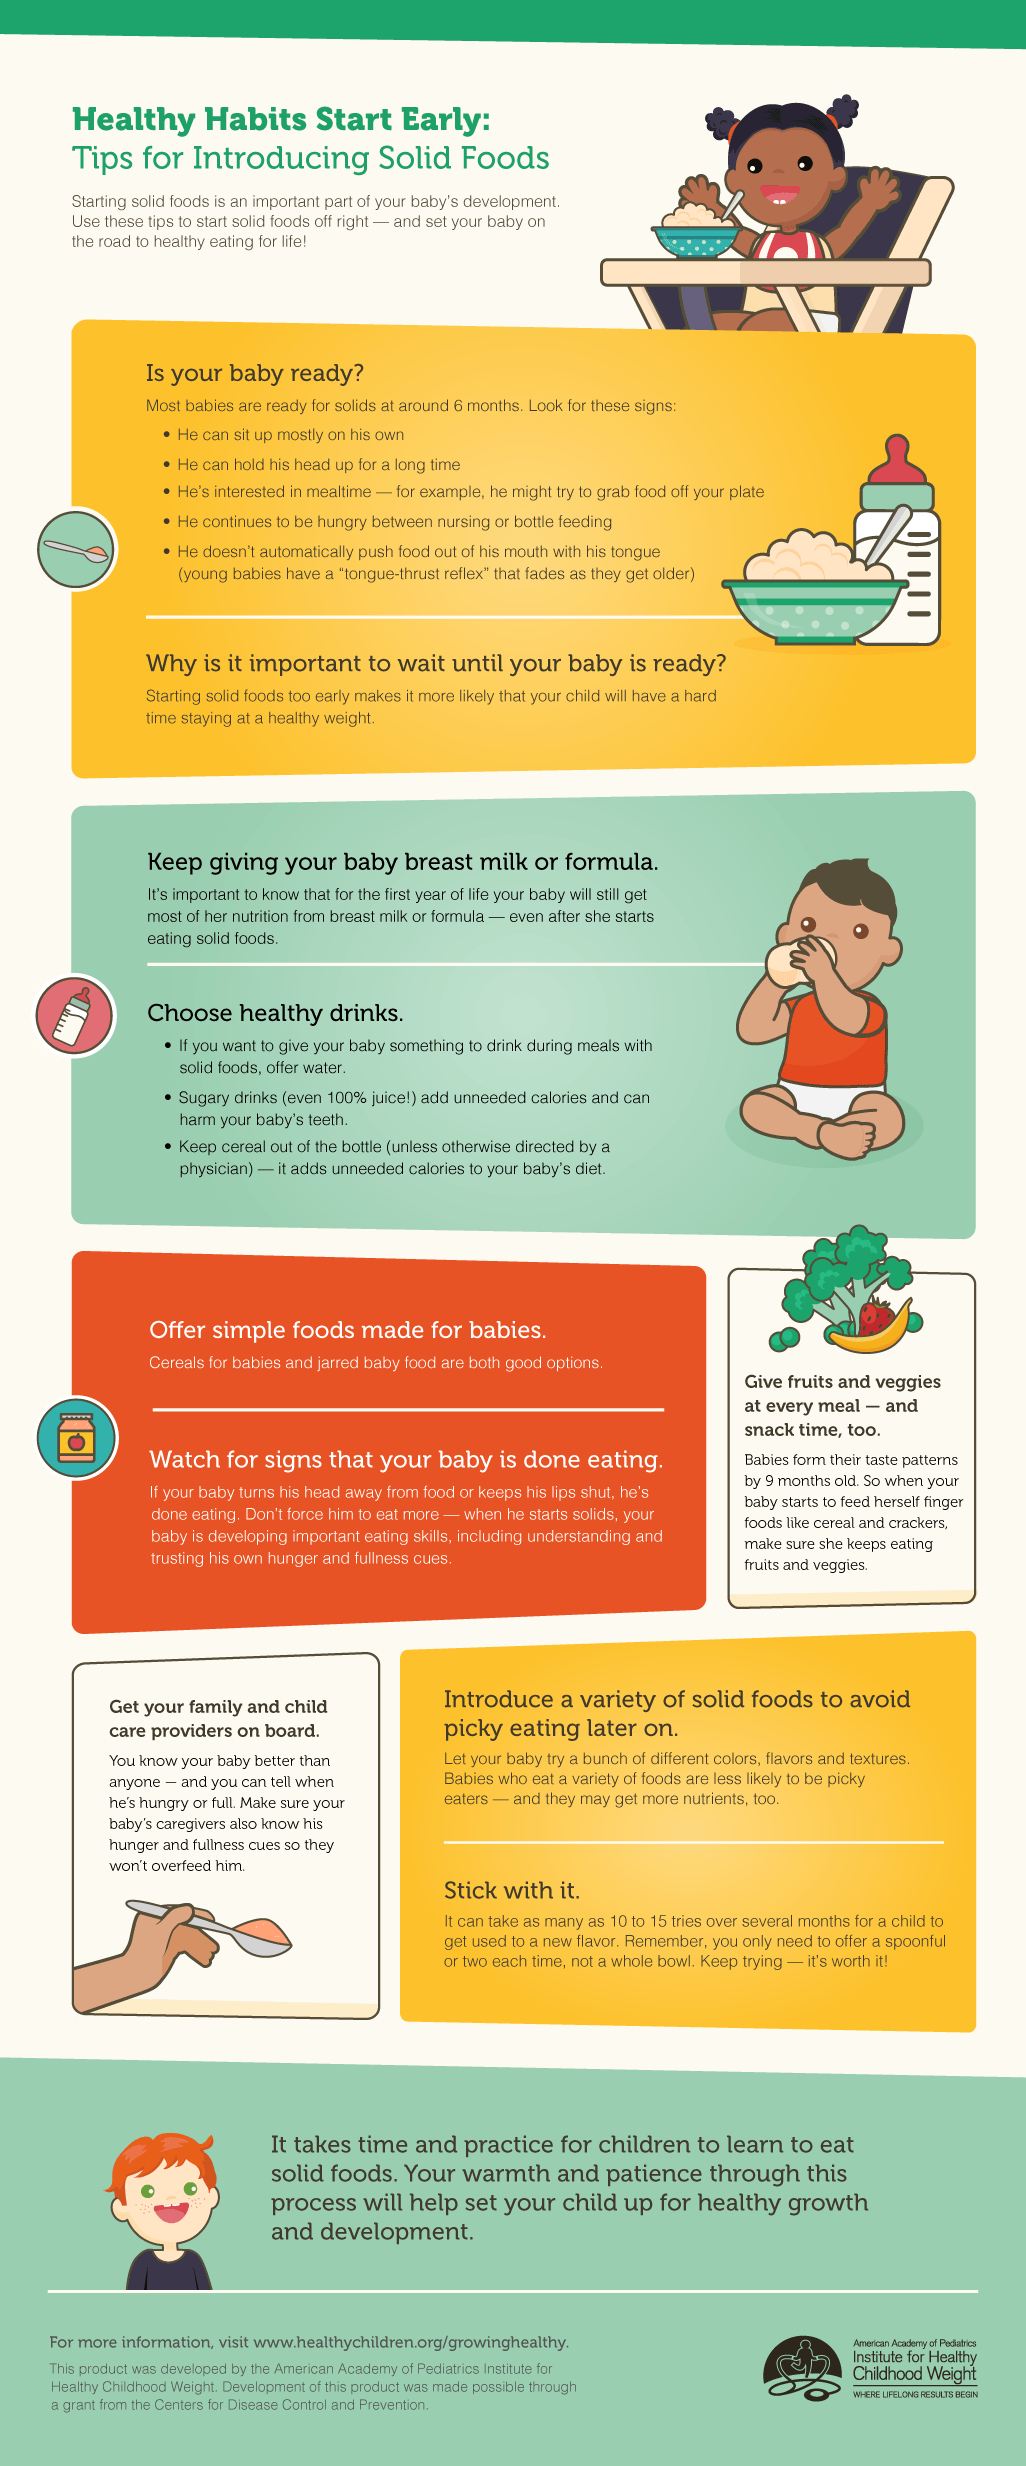
How to introduce solids: step-by-step plan

Start slow. Keep feeding relaxed and flexible. Below is a practical plan that worked for many families.

  1. First week: offer 1–2 tablespoons once a day after a breast or bottle feed.
  2. Weeks 2–4: increase to two meals a day of 2–4 tablespoons each.
  3. Month 2–3: add a third meal, introduce new textures, and let baby self-feed.
  4. Keep breast milk or formula as the main nutrition source until 12 months.

Use a calm seat, small spoon, and soft lighting. Expect messy sessions. Keep offering foods even if baby spits out at first. Repetition builds acceptance.
Introducing allergens and preventing allergies
Source: solidstarts.com

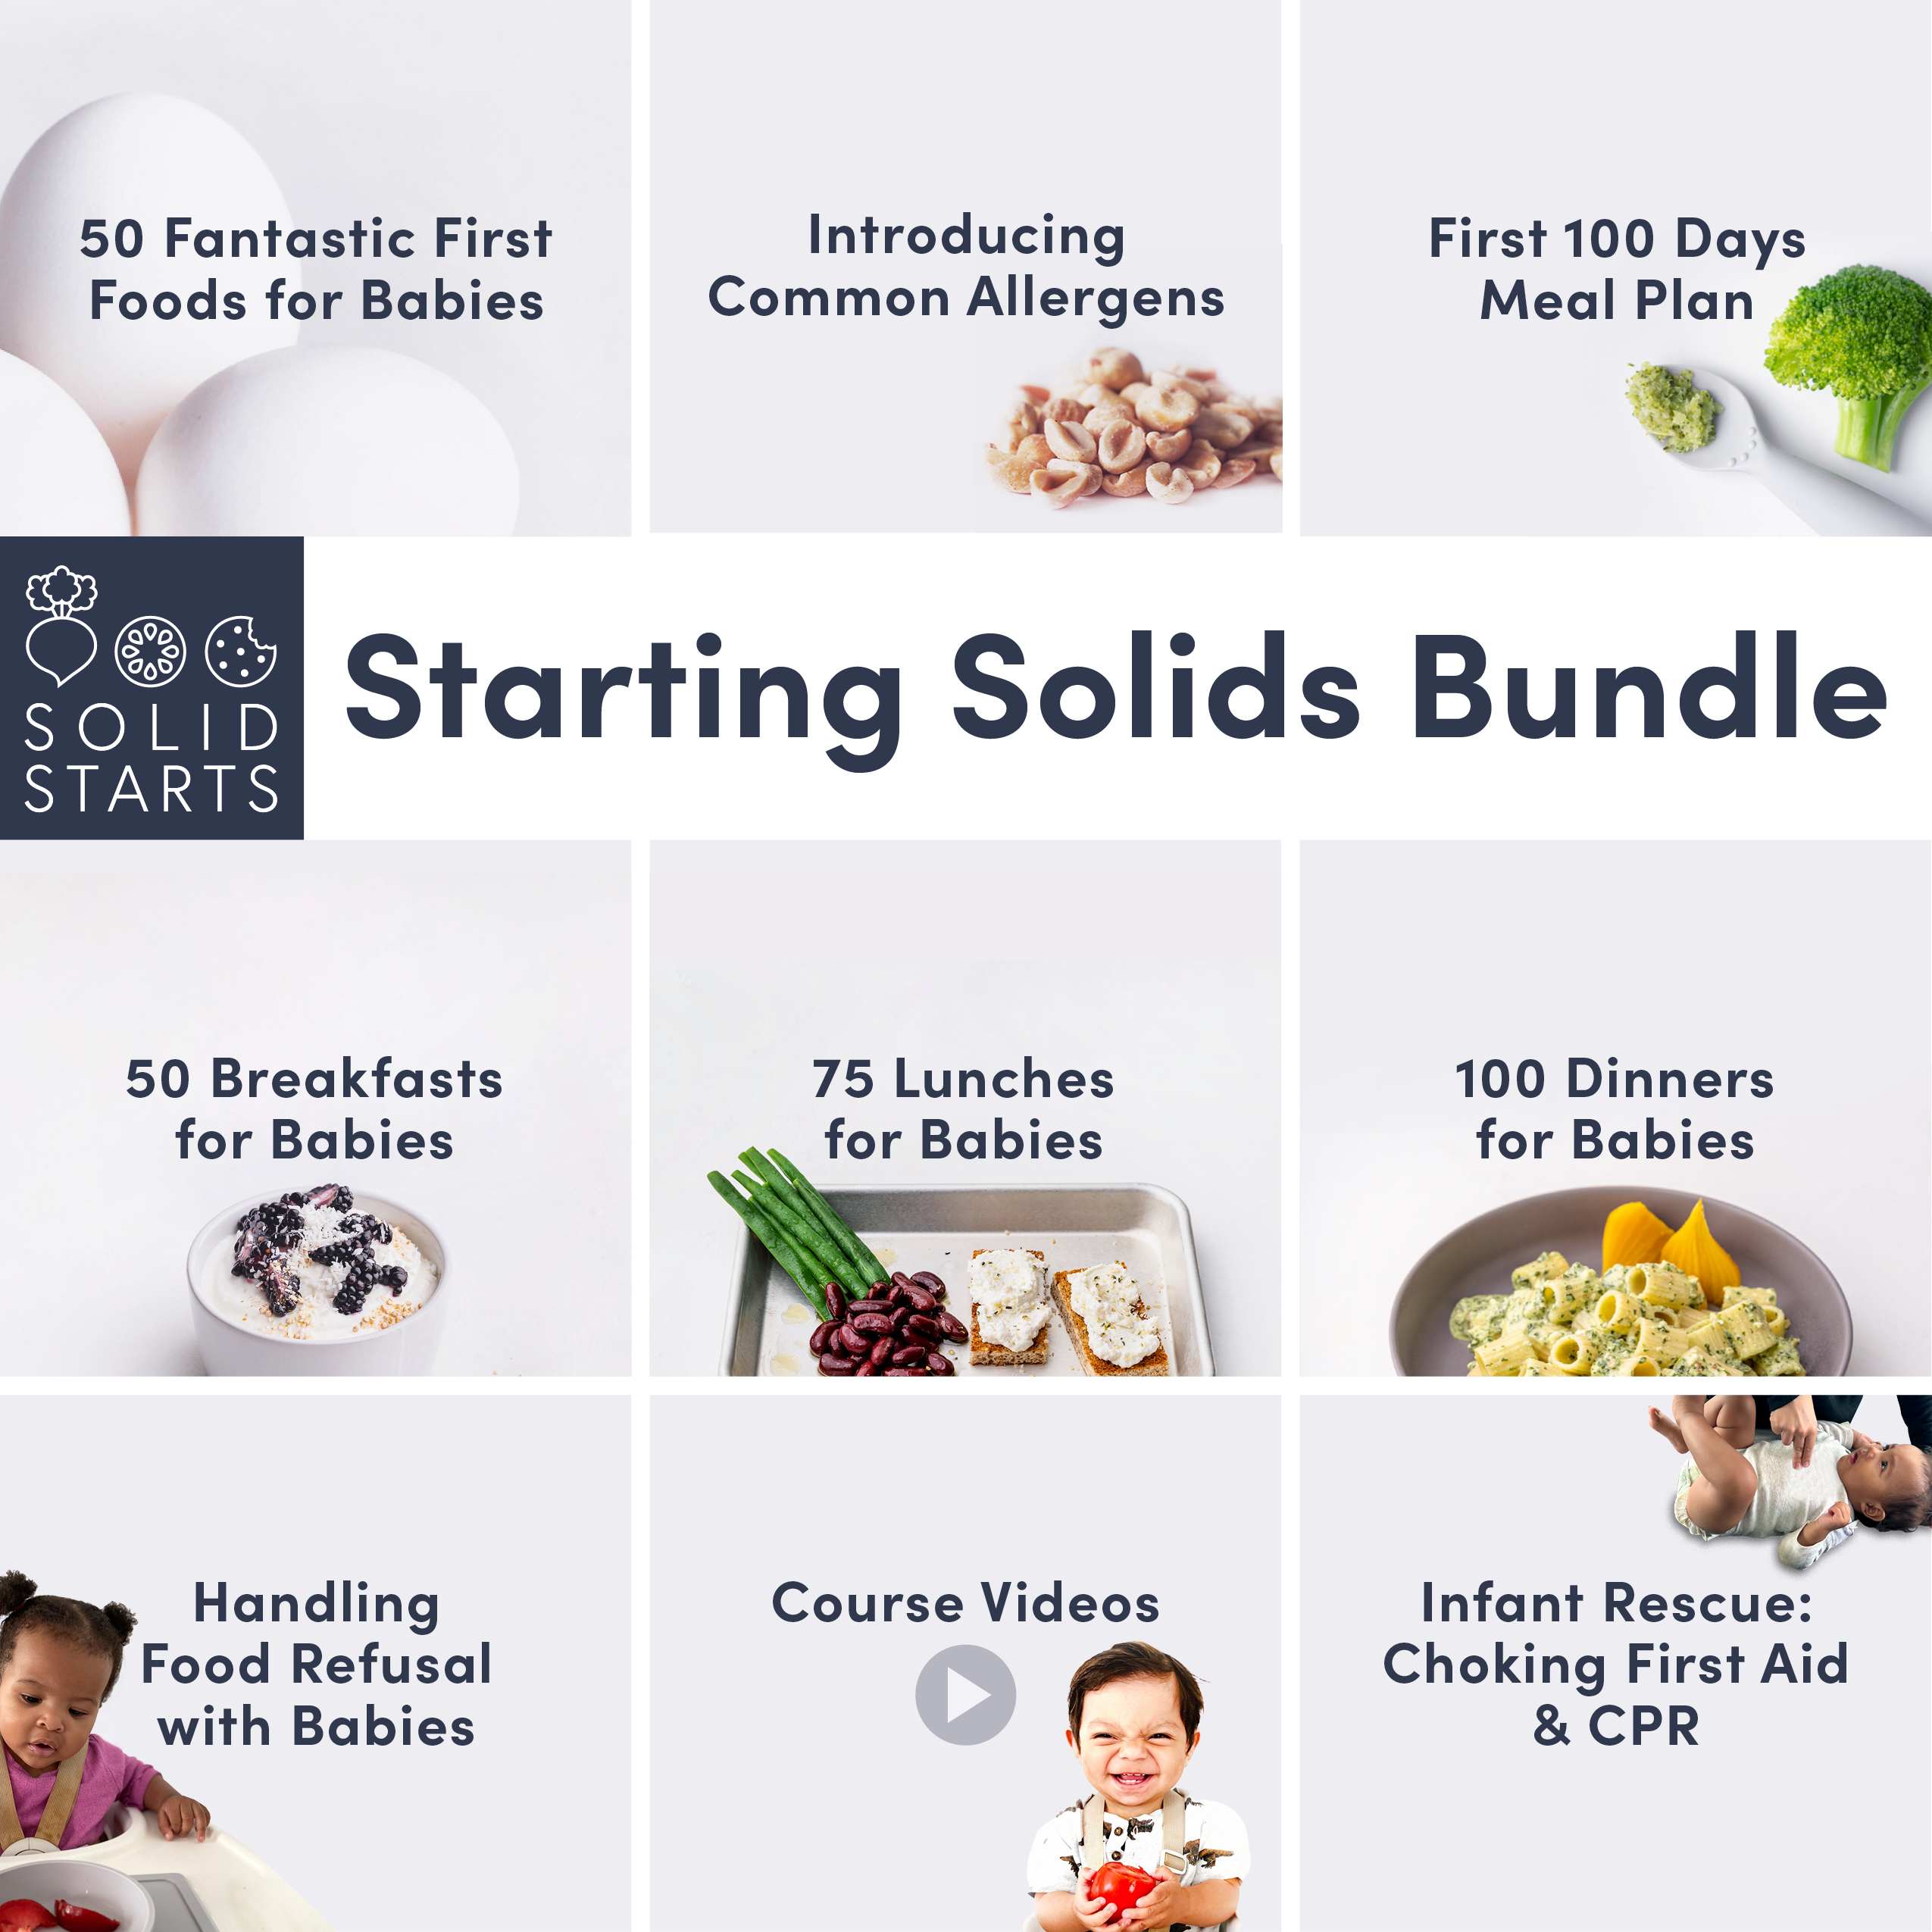
Introducing allergens and preventing allergies

Early, guided exposure can reduce allergy risk for some babies. When to introduce solid foods to baby includes careful timing for common allergens.

  • Common allergens: peanut, egg, dairy, tree nuts, soy, shellfish, wheat, sesame.
  • Introduce high-risk foods after baby tolerates other solids, usually around 6 months.
  • Offer small, age-appropriate forms—peanut powder mixed into puree or smooth peanut butter thinned with water or breast milk.
  • If your baby has severe eczema or a family history of food allergy, consult your pediatrician before introducing common allergens.

Watch for reactions for at least two hours after first exposures. Seek urgent care if you see swelling, breathing difficulty, or severe rash.
Choking safety and finger foods
Source: onceuponafarmorganics.com

Choking safety and finger foods

Safety is key when deciding when to introduce solid foods to baby. Follow simple rules to reduce choking risk.

  • Always supervise feeds. Sit baby upright while feeding.
  • Cut foods into small, flat pieces or thin strips that baby can gum.
  • Avoid whole grapes, nuts, hard candies, popcorn, and large chunks of raw vegetables.
  • Learn infant CPR and choking response. A short course can be life-saving.

Encourage self-feeding with soft cooked vegetables, ripe fruit slices, or soft bread pieces to build hand-mouth coordination.
Nutrients to focus on: iron, zinc, healthy fats
Source: happyfamilyorganics.com

Nutrients to focus on: iron, zinc, healthy fats

Solids start to provide nutrients breast milk may not fully supply after six months. Prioritize these key nutrients.

  • Iron: pureed meats, iron-fortified cereal, beans, lentils.
  • Zinc: meat, beans, dairy (as tolerated).
  • Healthy fats: avocado, full-fat yogurt, olive oil mixed into purees.
  • Vitamin D: continue supplements if recommended. Ask your pediatrician.

Plan meals that mix protein, fat, and easy carbs. This supports growth and steady energy.
Breastfed vs formula-fed babies
Source: dignityhealth.org

Breastfed vs formula-fed babies

The timeline is similar, but feeding patterns differ. Know how to adjust when to introduce solid foods to baby based on milk type.

  • Breastfed babies may need iron-rich solids sooner, since breast milk iron becomes low around 6 months.
  • Formula-fed babies often get iron from formula, but they still need solids for chewing skills and variety.
  • Let hunger cues guide timing. Solids complement, not replace, milk until about 12 months.

Monitor weight gain and diaper output to ensure baby is getting enough nutrition as solids increase.

Premature babies and special situations
Source: amazon.com

Premature babies and special situations

For preemies, corrected age matters. Use adjusted age to time introductions when to introduce solid foods to baby.

  • Use adjusted age (chronological age minus weeks early) until about 2 years.
  • Check developmental readiness, not just age. Some preemies need extra time to develop head control and swallowing.
  • Talk with your pediatric team for personalized guidance.

Babies with medical issues or developmental delays may need speech or feeding therapy support.

Common mistakes to avoid

Avoid these pitfalls many parents face when deciding when to introduce solid foods to baby.

  • Starting too early (under 4 months) can raise allergy and digestion risks.
  • Over-relying on sweet or processed foods; choose whole, nutrient-dense options.
  • Skipping iron-rich first foods. Iron is critical after 6 months.
  • Forcing food. Let baby lead and build positive associations with eating.

Small steps and patience pay off. Expect fussiness and progress in fits and starts.

Personal experience and practical tips

I introduced solids to my first child at about six months. She loved avocado and pureed chicken. My key lessons:

  • Start with short, calm sessions. We did 1–2 spoons at a time.
  • Keep a food log for the first two weeks to spot reactions.
  • Offer the same food many times. Acceptance came after 8–10 tries for some foods.
  • Use a bib with a catcher. It saved many shirts.

When to introduce solid foods to baby felt stressful at first. A steady, low-pressure approach worked best for us and for families I have advised.

Sample first-week feeding schedule

This simple plan helps you begin with confidence. Adjust for hunger, mood, and pediatric guidance.

  • Day 1–3: 1–2 teaspoons of iron-fortified cereal or pureed vegetable once a day after milk.
  • Day 4–7: 1–2 tablespoons, once a day, try a second food on day 5 or 6.
  • Week 2: Move to two meals per day and introduce a new food each few days.

Keep milk feeds before or between meals as needed. Note patterns and growth changes.

Monitoring growth and when to call the pediatrician

Track growth and behavior as you add solids when to introduce solid foods to baby.

  • Check weight, length, and head growth at regular visits.
  • Call your pediatrician if baby loses weight, has persistent vomiting, or refuses all foods for days.
  • Ask about blood tests if iron deficiency is a concern.

Early questions are normal. Your pediatrician can tailor advice to your baby’s needs.

Related concepts: baby-led weaning vs purees

Two common approaches shape when to introduce solid foods to baby.

  • Puree-led: start with smooth purees and progress to mashed and finger foods.
  • Baby-led weaning: offer soft finger foods and let baby self-feed from the start.
  • You can combine both methods. Many families use a mix to build skills and exposure.

Pick the approach that fits your baby and family. Consistency and safety matter most.

Frequently Asked Questions of when to introduce solid foods to baby

When is the best age to start solids?

Most babies start solids around six months. Watch readiness signs like head control, sitting, and interest in food.

Can I start solids earlier than 6 months?

Starting before 4 months is not recommended. Between 4 and 6 months, assess readiness and consult your pediatrician.

How often should I offer solid food at first?

Begin with one small meal a day, then increase to two and three meals over weeks. Milk remains the main food until 12 months.

How do I introduce common allergens safely?

Introduce allergens like peanut and egg around 6 months once other solids are tolerated. Start with small amounts and watch for reactions.

What if my baby gags or spits out food?

Gagging is common as babies learn to manage textures. Stay calm, offer safe textures, and supervise closely. Seek help if there is persistent coughing or airway concerns.

Conclusion

When to introduce solid foods to baby comes down to readiness, not just a calendar. Aim for around six months, watch key skills, and focus on iron-rich, safe, and varied foods. Start slowly, stay patient, and keep milk as the main source of nutrition until about 12 months. Try small, consistent steps this week—offer one new food, watch for cues, and celebrate small wins. Share your questions or successes below, subscribe for more feeding tips, or speak with your pediatrician for personalized support.

How to Introduce Solids to Baby

How to Introduce Solids to Baby: Your Guide to a Happy Start!

Introducing solids to your baby is one of the most exciting (and nerve-wracking) milestones of their first year. You’re not just navigating new flavors and textures—you’re setting the stage for lifelong healthy eating habits, supporting their rapid growth, and building positive associations with mealtime. Current 2026 guidance from the American Academy of Pediatrics (AAP) and Centers for Disease Control and Prevention (CDC) confirms that most infants are ready to start complementary feeding between 4 and 6 months, with 6 months being the ideal window for the majority of babies. As parents who’ve navigated this milestone ourselves, we’ve compiled guidance aligned with the latest pediatric recommendations to help you avoid common pitfalls and make mealtime enjoyable for the whole family.

Why Introducing Solids Is a Key Milestone

Breastmilk or formula remains your baby’s primary source of nutrition until their first birthday, but solids play a critical complementary role in their development. Starting at the right time delivers specific benefits you can’t get from milk alone:

  • Nutrient support: Iron stores in breastfed babies drop sharply after 6 months, putting them at risk for iron deficiency. Iron-rich first foods fill this gap, while zinc, vitamin D, and healthy fats support brain development and immune function.
  • Oral motor skill building: Chewing and swallowing textured foods strengthens the muscles needed for speech development later in childhood.
  • Flavor exposure: Early, repeated exposure to a wide variety of fruits, vegetables, and proteins reduces the risk of picky eating and food aversions long-term.
  • Family connection: Shared mealtimes let babies observe and mimic family eating habits, building positive associations with food and social interaction.

In practice, most parents find the first few weeks of solids are less about getting full nutrition from food and more about letting their baby explore new tastes and textures at their own pace. You can also read our guide on BestBabyCart.com.

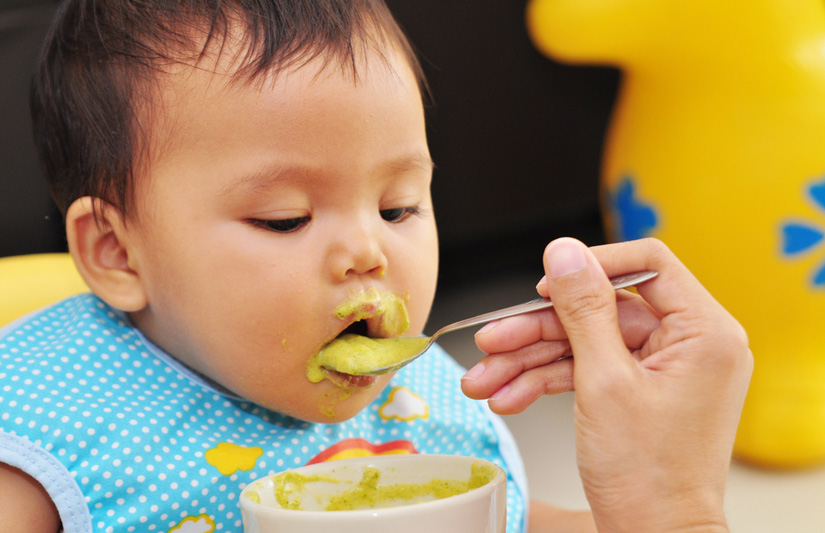
Smiling baby in a highchair tasting pureed food with a spoon, symbolizing the start of solids Image: Happy baby in a highchair tasting pureed food
When Is Your Baby Actually Ready for Solids?

Age is only one factor in determining when to start solids—developmental readiness is far more important. The AAP recommends waiting until at least 4 months of age to start, with 6 months being the ideal window for most infants. Babies born preterm should use their adjusted age (due date) rather than chronological age to assess readiness.

Key Readiness Signs to Look For

Your baby is likely ready for solids when they demonstrate all of the following cues, per CDC infant feeding guidelines:

  • Steady head control: Can hold their head upright and steady for 2+ minutes without support, and can sit with minimal assistance (so they don’t slump forward, which increases choking risk)
  • Diminished tongue-thrust reflex: No longer automatically pushes food out of their mouth with their tongue (you can test this by placing a small amount of puree on their tongue—if they swallow it rather than pushing it out, the reflex has faded)
  • Interest in family meals: Reaches for food on your plate, watches you eat intently, or opens their mouth when they see you take a bite
  • Chewing motions: Mimics chewing movements or smacks their lips when they see food

A common mistake many new parents make is starting solids early to help their baby sleep longer, but multiple peer-reviewed studies show no correlation between early complementary feeding and extended overnight sleep stretches. If you’re unsure, check in with your pediatrician before starting. You can also read our guide on baby nap schedule.

Best First Foods: What to Offer and What to Avoid

Your baby’s first foods should be single-ingredient, iron-rich, and easy to digest, with no added salt, sugar, or spices. Prioritize these categories for your first few weeks of feeding:

  • Iron-fortified single-grain cereals: Oat or barley fortified cereals are ideal; limit rice cereal to occasional servings to reduce arsenic exposure, per current FDA 2026 guidance. Mix with breastmilk or formula to a smooth, runny consistency.
  • Pureed meats: Chicken, turkey, and beef are excellent sources of heme iron, which is more easily absorbed by babies than plant-based iron.
  • Legumes: Cooked and pureed lentils, chickpeas, and lima beans are plant-based iron-rich options for vegetarian or vegan families. For cooking guidance, check out our tips for cooking baby-friendly legumes.
  • Produce: Start with mild, slightly sweet options like pureed sweet potato, carrot, pear, apple, or mashed avocado (a great source of healthy fats for brain development).

Foods to Skip Until 12 Months (or Older)

  • Honey: Risk of infant botulism, per FDA guidance, until 12 months of age.
  • Cow’s milk as a drink: Hard to digest and can cause intestinal bleeding in infants under 12 months; small amounts in yogurt or cheese are safe after 6 months.
  • Choking hazards: Whole grapes, cherry tomatoes, nuts, popcorn, raw hard vegetables, sticky foods like straight peanut butter, and any food larger than a pea for babies under 12 months.
  • Added salt, sugar, and processed foods: Babies’ kidneys can’t process excess sodium, and added sugar increases risk of childhood obesity.
  • Fruit juice: No fruit juice is recommended for infants under 12 months, per AAP guidance, as it offers no nutritional benefit and can cause diaper rash and stomach upset.

Introducing Allergens Safely

Current AAP starting solids guidance recommends introducing common allergens (peanut, tree nut, egg, dairy, wheat, soy, fish, shellfish) early, around 6 months, to reduce long-term allergy risk. Introduce one new allergen at a time, waiting 3–5 days between new foods to monitor for reactions. Mix allergens with familiar foods to make them more palatable: thin smooth peanut butter with warm water and mix it into oatmeal, or mash hard-boiled egg into sweet potato puree.

Step-by-Step Guide to Your First Feeding

Once your baby shows all readiness cues and you have your pediatrician’s approval, follow these steps for a low-stress first meal:

  1. Prep your space and gear: Use a stable highchair with a footrest (your baby’s feet should touch the footrest to support proper swallowing posture). You’ll need soft-tipped, baby-sized spoons, a long-sleeved waterproof bib, and small, non-slip bowls. You don’t need a massive collection of gear to start—begin with a few suitable feeding dish sets designed for infants. If you travel frequently with your little one, look for portable highchair options that are easy to clean and stable enough for on-the-go meals.
  2. Pick the right time: Feed when your baby is alert and calm, not overly hungry (which can lead to frustration) or tired (which can lead to fussiness). Mid-morning, after a small milk feed, is often ideal. Avoid feeding right before a nap.
  3. Start tiny: Offer just 1–2 teaspoons of a single-ingredient puree. Let your baby taste at their own pace—don’t force them to eat if they turn away or close their mouth.
  4. Follow with milk: Offer a full milk feed after solids to ensure your baby is getting enough nutrition, as breastmilk or formula will remain their primary calorie source until 12 months.
  5. Watch for cues: Positive signs your baby is enjoying the meal include leaning forward, opening their mouth, and grabbing for the spoon. If they turn their head away, spit out food, or cry, stop the feeding and try again another day.
  6. Log new foods: Keep a simple log of the foods you try, the date, and any reactions (rashes, upset stomach, etc.) to track patterns, especially when introducing allergens.

How to Introduce Solids to Baby Image: Starter kit for baby's first solid food feedings

For a visual walkthrough of the first feeding process, check out our short demo video:

Baby-Led Weaning vs. Traditional Purees: Finding the Right Fit for Your Family

There’s no one “right” way to feed your baby—both traditional spoon-feeding and baby-led weaning (BLW) have benefits, and many families use a hybrid approach. Here’s how to decide what works for you:

Traditional Spoon-Feeding (Purees)

  • Pros: Easy to control portion sizes, less mess, and simple to mix iron-rich foods like meat puree into familiar flavors. Ideal for babies who struggle with early textures or have developmental delays.
  • Cons: Can lead to a slower transition to lumpy textures, and homemade purees require extra prep time.
  • Best for: Parents who want more control over portion sizes and nutrient intake, or babies who need extra support with oral motor skills.

Baby-Led Weaning (BLW)

  • Pros: Encourages self-feeding, builds fine motor skills, and exposes babies to a wide variety of textures early. No separate prep is needed—baby can eat modified versions of family meals.
  • Cons: Significantly messier, and carries a higher choking risk if foods are not prepared to the correct soft consistency. It can also be harder to track exactly how much food your baby is eating.
  • Best for: Babies 6+ months who have strong head control, can sit unassisted, and show clear interest in self-feeding (grabbing for food off your plate, trying to put everything in their mouth).

Hybrid Approach (Most Popular)

The majority of families use a mix of both methods: offer iron-rich purees with a spoon for nutrient-dense foods, and soft finger foods (steamed broccoli florets, avocado wedges, banana strips) for baby to explore and self-feed. This balances the nutritional control of purees with the motor skill benefits of BLW.

Non-Negotiable Food Safety and Allergy Rules

Safety is the top priority during mealtime. Follow these rules to reduce choking risk and manage potential allergies:

Choking Prevention

  • Always supervise your baby during every meal, with no distractions (no TV, phones, or toys at the table).
  • Prepare foods to the correct texture: for 6–8 month olds, foods should be soft enough to mash easily between your thumb and forefinger. For 9+ month olds, soft-cooked vegetables, shredded meat, and small pasta are appropriate.
  • Avoid hard, round, or sticky foods until age 4, per AAP choking hazard guidelines. Never leave your baby unattended while eating.
  • Learn infant CPR and choking first aid: the Red Cross offers affordable in-person and online courses for parents.

Allergy Management

  • Introduce common allergens early, around 6 months, as current evidence shows this reduces long-term allergy risk.
  • Introduce one new food at a time, waiting 3–5 days between new foods to monitor for reactions.
  • Know the signs of an allergic reaction: mild signs include hives, redness around the mouth, vomiting, or diarrhea. Severe signs include trouble breathing, swelling of the face or tongue, or pale/bluish skin. If you notice severe symptoms, call emergency services immediately. For mild reactions, contact your pediatrician for guidance.

Hygiene Best Practices

  • Wash your hands and all surfaces (highchair tray, utensils, countertops) before prepping food.
  • Store homemade purees in airtight containers in the refrigerator for up to 3 days, or freeze for up to 1 month.
  • Discard any uneaten food from your baby’s plate after 1 hour—saliva from your baby’s mouth can introduce bacteria that causes foodborne illness.

Progressing Through 9–12 Months: Textures, Meals, and Milestones

By 9 months, most babies are ready for more varied textures and a more consistent meal schedule. Here’s what to expect:

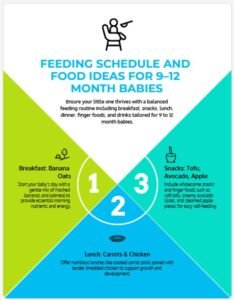
  • Meal structure: Offer 3 solid meals per day, plus 1–2 small snacks as needed. Total daily milk intake will drop to 24–30 oz, down from 32+ oz at 6 months.
  • Texture progression: Move from smooth purees to lumpy mashes (mashed sweet potato with small lumps, shredded chicken), then soft finger foods (steamed carrot sticks, soft cheese cubes, small pasta, scrambled eggs). By 12 months, most babies can eat most of the same foods as the rest of the family, cut into small, soft pieces.
  • Self-feeding skills: Encourage your baby to use their hands to pick up food, and offer a soft-tipped spoon for them to practice. By 10 months, most babies will have mastered the pincer grasp (picking up small pieces of food with their thumb and forefinger). By 12 months, they can use a spoon with minimal spilling.
  • Family meals: Eat together as often as possible—babies learn by watching others eat, and shared mealtimes build positive associations with food. If you’re planning outings with your baby, adjust your schedule around adjusting outings for feeding windows to avoid feeding a fussy, overtired infant.

When shopping for store-bought baby food, take a moment to scrutinize ingredient lists to avoid added salt, sugar, or unnecessary additives like palm oil.

Feeding schedule and food ideas for 9–12 month babies (3) Image: Sample meal schedule for older infants exploring varied textures

Troubleshooting Common Early Feeding Hurdles

Mess, refusal, and minor digestive upsets are normal parts of the solids journey. Here’s how to handle common issues:

  • Food refusal: It’s normal for babies to need 10–15 exposures to a new food before they accept it, per AAP guidance. Don’t force them to eat—offer the food again another day, or mix it with a familiar favorite to increase acceptance.
  • Gagging vs. choking: Gagging is a normal, protective reflex that moves food to the front of the mouth to be chewed more or spit out; it is often loud and may look messy, but it is not an emergency. Choking is silent, and baby will be unable to cough, cry, or breathe—this is a medical emergency, so call emergency services immediately and perform infant first aid if trained.
  • Constipation: Common when starting solids, especially with iron-fortified cereal or bananas. Offer high-fiber foods like pureed prunes, pears, or peas, and small sips of water (4–6 oz per day, per your pediatrician’s guidance) to help move things along. If constipation lasts more than 3 days, or your baby has hard, painful stools, call your pediatrician.
  • Messy eating: It’s a normal part of learning motor skills! Use a long-sleeved bib and a washable splash mat under the highchair to make cleanup easier. Avoid scolding your baby for making a mess, as it can create negative associations with mealtime.
  • Spit up: Common as babies learn to swallow thicker textures. Keep your baby upright for 20–30 minutes after feeding, and offer smaller portions more frequently to reduce reflux.

Frequently Asked Questions

Q: Can I start solids at 4 months? A: The AAP recommends waiting until at least 4 months of age to start solids, with 6 months being the ideal window for most infants. Starting before 4 months is linked to higher risk of obesity and food allergies later in childhood. Always check with your pediatrician before starting, especially if your baby was born preterm.

Q: What’s the best first food to try? A: Single-ingredient, iron-rich options are ideal: iron-fortified oat or barley cereal, pureed chicken or beef, pureed lentils, or mashed avocado are all great starter choices.

Q: Can I do baby-led weaning instead of purees? A: Yes, for babies 6+ months who have strong head control, can sit unassisted, and show interest in self-feeding. Just be sure to prepare all finger foods to a soft, mashable consistency to reduce choking risk.

Q: How do I prevent food allergies? A: Current guidance recommends introducing common allergens early, around 6 months, one at a time, and waiting 3–5 days between new allergens to monitor for reactions. Early introduction has been shown to reduce long-term allergy risk.

Q: What if my baby refuses solids? A: It’s normal for babies to reject new foods the first few times they’re offered. Don’t force them to eat—try again another day, or mix the new food with a familiar favorite to increase acceptance.

Q: How much should my baby eat when starting solids? A: Start with 1–2 teaspoons per meal, gradually increasing to 2–4 tablespoons per meal by 8 months. Remember that milk is still the primary source of nutrition until 12 months, so don’t worry if your baby only eats a small amount at first.

Q: How many solid meals should I offer per day? A: Start with 1 solid meal per day, gradually increasing to 2 meals by 7–8 months, and 3 meals plus 1–2 snacks by 9 months.

Q: When can I introduce water? A: Offer small sips of water in a sippy cup during meals starting at 6 months, to help your baby get used to drinking from a cup and prevent constipation.

Q: Do I need to buy special baby food? A: No! You can use store-bought single-ingredient purees, or make your own from family meals (just skip added salt, sugar, and choking hazards). Homemade options are often more affordable and let you control exactly what goes into your baby’s food.

Conclusion

Introducing solids to your baby is a fun, messy, and rewarding milestone that sets the foundation for lifelong healthy eating habits. The most important rules to remember: wait for clear developmental readiness rather than relying solely on age, start with iron-rich single-ingredient foods and introduce allergens early, prioritize safety by supervising all meals and learning infant first aid, and follow your baby’s cues without pressure. Every baby progresses at their own pace, so don’t stress if they refuse foods or make a mess—this is all part of the learning process.

Your next step is simple: schedule a quick check-in with your pediatrician to confirm your baby is ready for solids, then pick one iron-rich first food to try this week. For more guidance on navigating your baby’s first year, from safe sleep to on-the-go feeding hacks, explore our full library of parent-tested resources.