Baby Nap Schedule Guide

Baby Nap Schedule Guide: Expert Tips for Better Sleep 🔥

A baby nap schedule guide can feel daunting. Babies have unique sleep needs that change as they grow.

Welcome, tired parents! If you’ve ever felt like nap time is a battleground, you’re not alone. A fussy, overtired baby can turn your day upside down, leaving you wondering how to bring back the peace. The good news? A well-crafted baby nap schedule can be your secret weapon for better sleep, for both your little one and you. As a parent, you deserve rest too, and with the right guidance, you can create a baby sleep routine that works wonders.

In this comprehensive guide, we’ll walk you through age-specific nap schedules, expert tips to establish a routine, and creative ideas to make nap time a breeze. Whether your baby is a newborn or a toddler, we’ve got you covered with proven strategies backed by sleep experts. Let’s dive in and transform those restless days into peaceful naps!


Why Is a Nap Schedule Important for Babies?

Naps aren’t just a luxury—they’re a necessity for your baby’s growth and your sanity. Here’s why a nap schedule should be at the top of your parenting toolkit:

  • Brain and Body Boost: Sleep supports cognitive development, memory, and physical growth. The American Academy of Pediatrics highlights that naps enhance learning and emotional regulation in babies.
  • Mood Magic: A well-rested baby is less cranky, making playtime and bonding more enjoyable for everyone.
  • Nighttime Harmony: Consistent naps prevent overtiredness, which can lead to nighttime waking or shorter sleep cycles.
  • Parent Perk: Predictable nap times give you a chance to recharge, work, or simply enjoy a quiet cup of coffee.

Without a schedule, your baby might miss these benefits, leading to a cycle of exhaustion. Let’s explore how to tailor a nap plan to your baby’s age.

Age-Specific Baby Nap Schedule Guidelines

Every baby is unique, but general guidelines can help you build a foundation. Here’s a detailed breakdown by age, based on expert recommendations:

Newborns nap tips (0-3 Months)

  • Nap Frequency: 4-5 naps per day
  • Nap Duration: 30 minutes to 2 hours
  • Total Nap Time: 4-6 hours
  • Wake Windows: 45-60 minutes
  • Insight: Newborns sleep 14-17 hours total, including naps, but their patterns are erratic. Watch for sleepy cues like yawning or glazed eyes to guide nap times.

Infants (4-6 Months)

  • Nap Frequency: 3-4 naps per day
  • Nap Duration: 1-2 hours
  • Total Nap Time: 3-4 hours
  • Wake Windows: 1.5-2 hours
  • Insight: As your baby’s circadian rhythm develops, aim for naps around 9 AM, 12 PM, and 3 PM. Flexibility is key as they adjust.

Older Infants (7-12 Months)

  • Nap Frequency: 2-3 naps per day
  • Nap Duration: 1-2 hours
  • Total Nap Time: 2-3 hours
  • Wake Windows: 2-3 hours
  • Insight: Most babies drop to 2 naps by 9 months. Schedule a morning nap (9-10 AM) and an afternoon nap (1-2 PM) to align with their energy dips.

Toddlers (1-2 Years)

  • Nap Frequency: 1-2 naps per day
  • Nap Duration: 1-3 hours
  • Total Nap Time: 1-3 hours
  • Wake Windows: 4-5 hours
  • Insight: By 15-18 months, most toddlers’ nap schedules settle into 1 nap around 12-1 PM. Ensure it doesn’t push bedtime too late (aim for 7-8 PM).


Follow this age-specific guide to create the perfect nap schedule for your baby

Image: Follow this age-specific guide to create the perfect nap schedule for your baby!

Expert Tips for Creating a Better Baby Nap Schedule

Building a nap schedule takes patience, but these expert tips will guide you every step of the way. Let’s make naptime a success!

Watch for Sleepy Cues

Timing naps around your baby’s natural sleepiness is crucial. Missing the window can lead to overtiredness, making naps harder to achieve.

  • How to Spot Cues: Look for yawning, eye-rubbing, fussiness, or staring off into space.
  • Action Plan: Track wake windows for a few days (e.g., 45 minutes for newborns) and start the nap routine when cues appear.
  • Emotional Note: It’s okay if you miss a cue sometimes—parenting is a learning curve, and you’re doing great!
Baby yawning in a crib, indicating a sleepy cue
Image: Yawning is a key sleepy cue—time for a nap!

Create a Calming Pre-Nap Routine

A predictable routine signals to your baby that sleep is near, reducing resistance and building trust.

  • Routine Ideas: Dim the lights, sing a lullaby, read a short book, or offer a gentle cuddle.
  • Duration: Keep it 5-10 minutes to maintain consistency without overstaying.
  • Expert Backing: The Sleep Foundation notes routines help babies associate actions with sleep.

Need soothing ideas? Check out Expert Tips to Soothe a Fussy Baby.

Set Up an Ideal Sleep Environment

A nap-friendly space can make or break your schedule. Create a haven for rest.

  • Essentials: Use blackout curtains, maintain 68-72°F, and add a white noise machine.
  • Product Tip: A sleep sack keeps your baby cozy without loose blankets.
  • Emotional Touch: This quiet space can become your baby’s safe retreat—watch their little face relax as they drift off!
Cozy nursery with blackout curtains, crib, and white noise machine
Image: A dark, quiet room sets the stage for better napsA dark, quiet room sets the stage for better naps


Be Consistent but Flexible

Consistency builds habits, but flexibility keeps you sane as your baby’s needs evolve.

  • How to Apply: Stick to nap times within a 15-30 minute window, adjusting for growth spurts or travel.
  • Parent Tip: If a nap is missed, offer a shorter “power nap” (20-30 minutes) to avoid a meltdown.

Limit Nap Length to Protect Nighttime Sleep

Overlong naps can disrupt nighttime rest, creating a vicious cycle.

  • Guideline: Cap naps at 2 hours for babies under 6 months and 3 hours for toddlers, unless catching up on sleep.
  • Action: Gently wake your baby if needed, using a soft voice or light touch.

Internal Link: Balance naps and nights with our Guide to Understanding Your Baby’s Sleep Schedule.

Use a Sleep Training Method (If Needed)

If naps are a struggle, gentle sleep training can help you develop self-soothing skills.

  • Methods: Try the “chair method” (sit near the crib, gradually move away) or “Ferber method” (timed check-ins).
  • Caution: Avoid before 4-6 months—younger babies need hands-on comfort.
  • Support: This step can feel tough, but you’re giving your baby a gift of independence!

Read more in this Study on Infant Sleep Interventions.

Transition Naps Thoughtfully

As your baby grows, they’ll need fewer naps. Handle transitions with care.

  • Signs to Watch: Nap resistance or shorter naps signal a transition (e.g., 3 to 2 naps at 6-9 months).
  • Strategy: Shift remaining naps earlier and adjust bedtime. Offer “quiet time” with books if needed.


The “Nap Time Kit”

Take naps on the go with a “Nap Time Kit”—a portable solution for consistent sleep anywhere. Include a white noise machine, a favorite blanket, a pacifier (if used), and a mini book. Pack it in a cute bag for travel or daycare. This kit ensures your baby’s routine stays intact, giving you peace of mind.


Nap Schedule for Babies Checklist

Ensure nap success with this practical checklist:

[xyz-ihs snippet=”baby-nap-schedule-checklist”]

Impact On Growth

Sleep plays a vital role in physical growth. During naps, the body releases growth hormones. This process supports healthy weight and height gain. Quality sleep also strengthens the immune system. A well-rested baby can fight off illnesses more effectively. Nap time supports both physical and mental growth.

Baby Nap Schedule Guide
Image: Sleep Training


Newborn Sleep Cycles

Newborns sleep a lot. Usually, they rest for 14 to 17 hours a day. Their sleep cycle is shorter, around 50 to 60 minutes. During this time, they move between active and quiet sleep. Active sleep involves rapid eye movements and light sleep. Quiet sleep is deep and restful. Newborns need frequent naps due to their short sleep cycles.


Changes Over Time

As babies grow, their sleep patterns change. By three months, they start developing longer sleep cycles. They may sleep for 60 to 90 minutes at a stretch. These changes help in establishing a more predictable nap schedule. By six months, many babies sleep for 6 to 8 hours at night. Naps become more structured, usually two or three times a day. Understanding these changes helps you adapt your nap schedule effectively.


FAQs About Baby Nap Schedules

How do I know if my baby is ready to drop a nap? Look for nap resistance, shorter naps, or difficulty falling asleep at bedtime. Most babies drop from 3 to 2 naps at 6–9 months and from 2 to 1 nap at 15–18 months.

What if my baby won’t nap at the scheduled time? Shorten the wake window or adjust the schedule by 15–30 minutes. Ensure a calming environment and routine to help them settle.

Can I let my baby nap in a stroller or car seat? Occasionally, yes, but avoid regular use. The AAP recommends a flat, firm surface like a crib for safety during longer naps.

How long should a baby nap at 6 months? At 6 months, expect 3–4 naps totaling 3–4 hours, with each nap lasting 1-2 hours. Adjust based on their nighttime sleep.

What if my baby wakes up early from a nap? If they wake after less than 45 minutes, soothe them back to sleep with rocking. If it’s consistent, they may need a longer wake window.

want to know more about new parenting pls click our FAQ’s

Conclusion: Better Sleep Starts with a Nap Schedule

Creating a baby nap schedule is a journey of love and patience, and it’s one of the best gifts you can give your child—and yourself. With these expert tips, from watching sleepy cues to building a Nap Time Kit, you’ll unlock the secret to better sleep for your little one. Every nap is a step toward a happier, healthier baby, and you’re doing an amazing job navigating this process.

Ready to explore more parenting wisdom? Dive into our Baby Care section for additional tips and product recommendations.

How to Serve Banana Bread to Baby

How to Serve Banana Bread to Baby: Easy and Nutritious Tips!

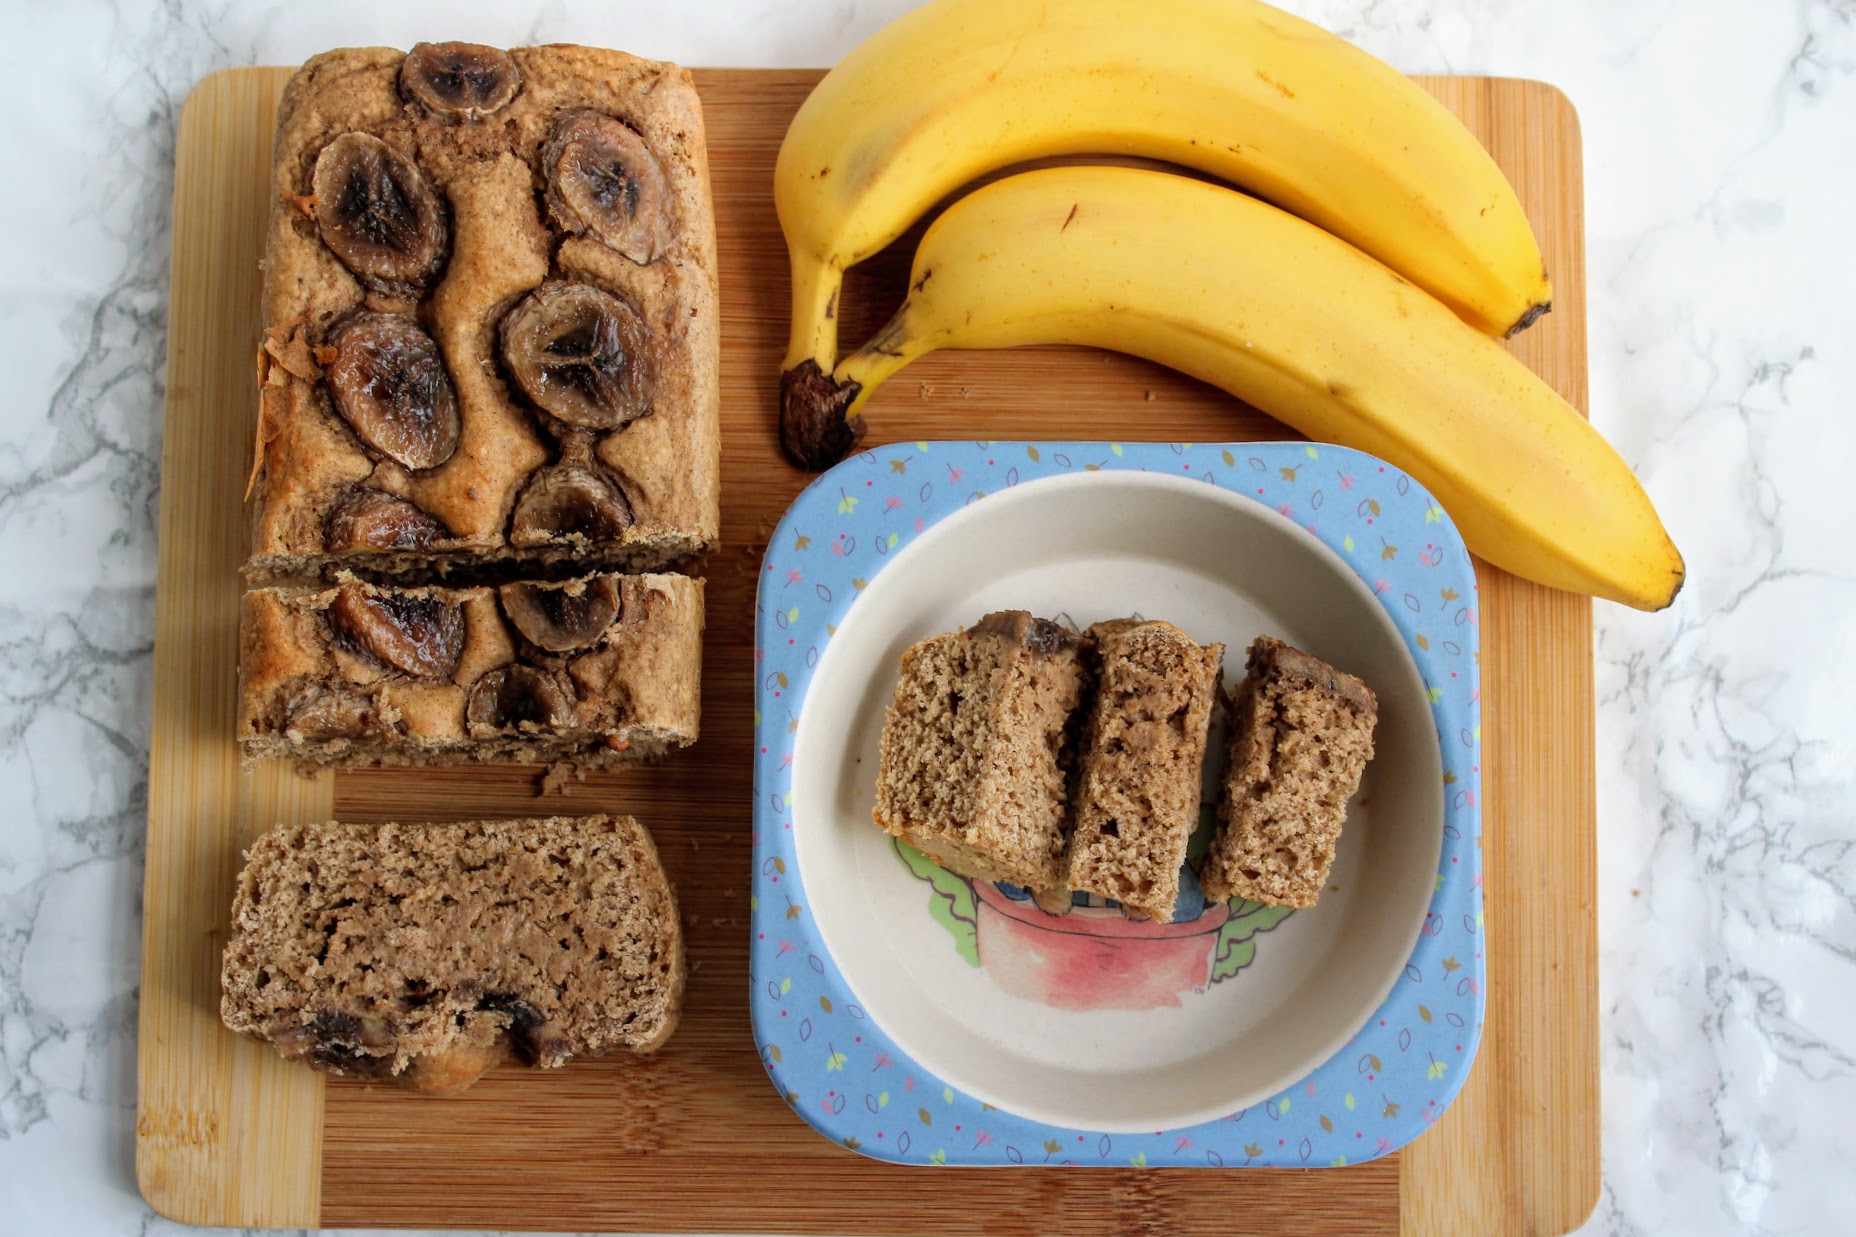
Serving banana bread to your baby is simple. It’s a healthy and delicious treat.

Banana bread can be a wonderful snack for babies. It’s soft, moist, and easy to chew. Packed with nutrients, it supports your baby’s growth. But how do you serve it safely? Babies have different needs from adults. You must ensure the bread is baby-friendly.

This means focusing on texture and ingredients. Avoid adding nuts or large chunks. Stick with basic, natural ingredients. This way, your baby can enjoy a tasty and nutritious treat without risk. This guide will explore the best ways to serve banana bread to your baby. Get ready to make snack time fun and safe for your little one!

Introduction To Banana Bread For Babies

Introduce banana bread to babies by serving small, soft pieces. Ensure it is moist and easy to chew. This treat provides a nutritious snack option.

Banana bread is a delightful treat. Babies love its sweet taste and soft texture. It is also easy to make at home. Introducing banana bread to your baby can be a fun and nutritious experience. Here, we will explore why banana bread is a great choice for babies and its nutritional benefits.

Why Choose Banana Bread?

Banana bread is a great choice for babies for several reasons:

  • Soft Texture: Easy for babies to chew and swallow.
  • Natural Sweetness: Contains natural sugars from bananas.
  • Versatile: Can be made with various healthy ingredients.
  • Homemade: Allows control over the ingredients.

This makes banana bread an ideal snack or breakfast option for your little one.

Nutritional Benefits

Banana bread offers many nutritional benefits that support your baby’s growth and development:

Nutrient Benefit
Bananas Rich in potassium, it supports heart health.
Whole Wheat Flour High in fiber, aids digestion.
Eggs Great source of protein, supporting muscle growth.
Milk Provides calcium, strengthens bones.

Banana bread can also be customized. You can add other nutritious ingredients like oats or nuts (if your baby is old enough). This enhances its nutritional profile even more. In summary, banana bread is not just tasty. It is also packed with essential nutrients your baby needs. “`

Ingredients For Baby-friendly Banana Bread

Serve baby-friendly banana bread by using mashed ripe bananas, whole wheat flour, and no added sugar. Cut into small, soft pieces to avoid choking hazards.

Making banana bread for your baby can be both fun and rewarding. It’s a great way to introduce new flavors and textures. Plus, it’s packed with nutrients. Choosing the right ingredients is key. They should be safe, healthy, and easy to digest.

Essential Ingredients

To make baby-friendly banana bread, start with ripe bananas. They add natural sweetness and are easy to mash. Use whole wheat flour for added fiber. Eggs help bind the ingredients together. You can replace eggs with applesauce if needed. Next, include unsweetened applesauce or yogurt. These keep the bread moist without added sugar. Use baking powder to help the bread rise. A pinch of cinnamon adds a touch of flavor.

Optional Add-ins

For extra nutrition, consider adding mashed sweet potatoes. They blend well and are rich in vitamins. Chia seeds or ground flaxseeds can add healthy fats. Just a small amount will do. You can also mix in finely chopped fruits. Soft fruits like apples or pears work best. Avoid nuts and seeds that are hard for babies to chew. Finally, a little vanilla extract can enhance the flavor. Just a drop or two is enough. Always ensure optional add-ins are suitable for your baby’s age and dietary needs. “`

Preparation Tips

Preparing banana bread for your baby can be a rewarding task. It’s a nutritious snack that you can make easily at home. Follow these simple preparation tips to ensure your baby enjoys a delicious and safe treat.

Selecting The Right Bananas

Choose ripe bananas with brown spots. They are sweeter and easier to mash. Avoid using overripe bananas with a strong smell. These might upset your baby’s stomach. Organic bananas are a great choice. They are free from harmful pesticides.

Mixing And Baking

Mash the bananas until smooth. Add other ingredients like flour and eggs. Ensure you mix them well to avoid lumps. Preheat your oven to 350°F (175°C). Use a non-stick baking pan. This prevents sticking and makes cleanup easier.

Pour the mixture into the pan. Bake for 45-50 minutes. Insert a toothpick into the center. It should come out clean if the bread is ready. Let the bread cool before serving it to your baby.

How to Serve Banana Bread to Baby

Serving Methods

Introducing banana bread to your baby can be a delightful experience. Babies usually love the sweet taste and soft texture. There are several serving methods to consider. These methods ensure your baby enjoys their meal safely and happily.

Finger Foods

Finger foods are a great way to help your baby develop motor skills. Banana bread is soft and easy to hold.

  • Cut the banana bread into small, manageable pieces.
  • Ensure each piece is bite-sized to avoid choking.
  • Serve the pieces on a plate or in a bowl your baby can reach.

Finger foods encourage self-feeding. It also helps in developing coordination. Always supervise your baby while they eat. A well-rested baby enjoys meals more—check our baby sleep solutions for better naps.

Pureed Options

For younger babies, pureeing banana bread might be the best choice. It ensures they can swallow easily.

  1. Take a slice of banana bread.
  2. Cut it into smaller chunks.
  3. Place the chunks in a blender.
  4. Add a small amount of breast milk, formula, or water.
  5. Blend until you reach a smooth consistency.

Pureed options are perfect for babies who are just starting solids. They provide a smooth and easy-to-swallow texture.

By offering these serving methods, you can make banana bread a fun and safe option for your baby. Always monitor your baby during meals to ensure they enjoy their food safely.

Allergen Considerations

Introducing banana bread to your baby can be exciting. Yet, it’s important to consider potential allergens. This section will guide you through common allergens and provide substitutes to ensure your baby enjoys banana bread safely.

Common Allergens

Banana bread often includes ingredients that might trigger allergies. Here are some common allergens to watch out for:

  • Eggs – A common ingredient in many baked goods.
  • Dairy – Such as milk or butter.
  • Nuts – Sometimes added for extra flavor or texture.
  • Gluten – Found in regular flour used in baking.

Substitutes For Allergens

There are many substitutes you can use to make banana bread safe for your baby. Here’s how you can replace common allergens:

Allergen Substitute
Eggs Use mashed bananas or unsweetened applesauce. 1/4 cup per egg.
Dairy Replace milk with almond or coconut milk. Use dairy-free margarine instead of butter.
Nuts Omit nuts from the recipe. Use seeds like flax or chia for texture.
Gluten Use gluten-free flour blends. Ensure it’s labeled safe for those with celiac disease.

By using these substitutes, you can create a delicious and safe banana bread for your baby. Always check labels and consult with a pediatrician if you’re unsure about any ingredient.

How to Serve Banana Bread to Baby: Easy and Nutritious Tips

Storing Banana Bread

Storing banana bread properly ensures it stays fresh and delicious for your baby. You can keep it in the refrigerator or freeze it to extend its shelf life. Both methods are easy and help maintain the bread’s texture and flavor.

Refrigeration Tips

Refrigerate banana bread to keep it fresh for up to a week. First, let the bread cool completely. Then, wrap it tightly in plastic wrap or aluminum foil. This prevents it from drying out. Place the wrapped bread in an airtight container or a resealable plastic bag. Store it on a shelf, not in the crisper drawer. This helps maintain the right humidity level.

Freezing Techniques

Freezing banana bread is a great way to keep it fresh for up to three months. Let the bread cool completely before freezing. Slice the bread into baby-friendly portions. This makes it easier to thaw only what you need. Wrap each slice in plastic wrap or aluminum foil. Place the wrapped slices in a freezer-safe bag or container. Label the container with the date for easy tracking. When ready to serve, thaw a slice in the refrigerator or at room temperature.

Creative Serving Ideas

Serving banana bread to your baby can be both fun and nutritious. With creative serving ideas, you can make each meal exciting. These ideas are simple, easy to prepare, and sure to delight your little one.

Fruit Pairings

Pair banana bread with fresh fruits. Sliced strawberries or blueberries work well. These fruits add a burst of color and flavor. You can mash some fruits and spread them on the bread.

Another great option is to serve the bread with apple slices. The crunchiness of the apples complements the softness of the bread. For a tropical twist, try adding small pieces of mango. Your baby will love the sweetness.

Healthy Toppings

Top the banana bread with natural yogurt. This adds a creamy texture and boosts protein. You can also sprinkle a pinch of cinnamon on top. Cinnamon enhances the flavor and adds a warm aroma.

Another healthy topping is nut butter. Spread a thin layer of almond or peanut butter on the bread. This adds healthy fats and makes the meal more filling. For a bit of crunch, sprinkle some chia seeds. They are tiny but packed with nutrients.

Safety Tips

Serve banana bread to your baby in small, soft pieces. Make sure it’s cool to avoid burns. Always supervise them while eating.

Serving banana bread to your baby can be a delightful treat. Yet, it’s important to ensure their safety. Here are some essential safety tips to keep in mind.

Choking Hazards

Babies have smaller airways, making choking a real risk. Always cut the banana bread into small, manageable pieces. Ensure they are soft and easy to chew. Avoid adding nuts or large chunks of fruit. These can pose choking hazards. Watch your baby closely while they eat. Never leave them unattended.

Portion Sizes

Portion control is key for babies. Start with small portions of banana bread. A small piece, about the size of your baby’s palm, is ideal. You can always offer more if needed. Overfeeding can lead to stomach discomfort. Remember, banana bread is a treat, not a meal replacement. Stick to appropriate portion sizes. “`

https://www.youtube.com/watch?v=VKIKIBNOInQ


Frequently Asked Questions

Here are the answers to the questions I often hear from new parents like you—let’s make feeding your baby fun and nutritious together!

When Can My Baby Start Eating Banana Bread?

Most babies can start eating banana bread around 6-9 months, once they’ve mastered purees and can handle soft, mashed textures. As a mom of three, I waited until my babies showed signs of readiness—like sitting up with support and grasping food. Check our baby milestones guide to ensure your little one is developmentally ready for solids!

Is Banana Bread Safe for Babies?

Yes, banana bread can be safe if made without added sugar, salt, or allergens like nuts. Use ripe bananas for natural sweetness and whole-grain flour for nutrition. Always mash or cut into small, soft pieces to avoid choking—my kids loved it this way! Consult the AAP guide on starting solids for more safety tips.

How Do I Prepare Banana Bread for My Baby?

Start with a simple recipe: mash ripe bananas, mix with whole-grain flour, a bit of breast milk or formula, and bake at a low temperature. Let it cool, then mash or break into tiny pieces. I used to make mini muffins for my babies—easy to serve and mess-free! A baby food maker on Amazon can simplify prep if you’re short on time.

Can Banana Bread Help with Baby Nutrition?

Absolutely! Bananas are rich in potassium and vitamin B6, supporting your baby’s growth. Whole-grain flour adds fiber, making it a nutritious option for little tummies. I noticed my kids had more energy on days we included it—pair it with our baby’s first foods guide for a balanced diet!

What If My Baby Doesn’t Like Banana Bread?

Every baby is different—mine had mixed reactions! Try different textures (e.g., mashed vs. pieces) or mix with a familiar puree like applesauce. If they still refuse, don’t worry—offer it again later. The CDC baby nutrition guidelines suggest introducing new foods multiple times. Got more feeding questions? Check our FAQ for new parents!

How Often Can I Serve Banana Bread to My Baby?

Offer banana bread 1-2 times a week as a treat, not a daily staple. Balance it with a variety of fruits, veggies, and proteins. I kept it special for my kids, like a weekend snack—perfect with our baby sleep solutions for a calm feeding time!

Are There Any Allergies to Watch For?

Banana bread is generally safe, but watch for reactions to ingredients like wheat or eggs if introduced for the first time. My third child had a mild wheat sensitivity, so I started small. The KidsHealth feeding tips recommend monitoring for rashes or fussiness after eating.

More questions about feeding your baby? Visit our FAQ for new parents.

Conclusion

Serving banana bread to your baby can be easy and fun. Always ensure it’s soft and in small pieces. Monitor your baby while eating to prevent choking. Use ripe bananas for natural sweetness without added sugar. Try including healthy toppings like yogurt.

Enjoy watching your baby discover new flavors and textures. It’s a wonderful way to introduce new foods. Happy feeding!

Have questions about feeding your baby? Feel free to reach out to us!


Diaper Rash Remedies for Babies

Diaper Rash Remedies for Babies: Quick Relief Tips

Diaper Rash Remedies for Babies. Diaper rash can be a frustrating and uncomfortable experience for both you and your baby. The redness, irritation, and fussiness can make even the simplest tasks overwhelming.

You want nothing more than to see your baby happy and comfortable, but finding the right solution can sometimes feel like a daunting task. The good news is, you’re not alone, and there are effective remedies that can help soothe your baby’s sensitive skin.

Imagine the relief of seeing your baby giggle without a care in the world, free from the discomfort of diaper rash. Ready to discover simple, proven solutions that can make a world of difference for your little one? Let’s dive in and explore the best diaper rash remedies that can bring peace and comfort back to your home.

diaper rash remedies for babies quick relief tips

img: infographic of diaper rash remedies for babies, quick relief tips

Common Causes Of Diaper Rash

Diaper rash is a common issue for babies. It can cause discomfort and stress for both babies and parents. Understanding the common causes of diaper rash can help in preventing it. It also aids in finding effective remedies. Let’s explore the most frequent triggers of this condition.

1. Prolonged Exposure To Wetness

Wet diapers are a primary cause of diaper rash. When a baby’s skin stays wet for too long, it becomes irritated. The moisture breaks down the skin, making it more prone to rashes.

2. Friction From Diapers

The constant rubbing of a diaper against a baby’s delicate skin can lead to irritation. This friction creates redness and soreness, especially in sensitive areas.

3. Use Of Irritating Substances

Certain products can irritate a baby’s skin. These include harsh soaps, scented wipes, and even some types of diapers. They may contain chemicals that are too strong for a baby’s sensitive skin.

4. Introduction Of New Foods

Starting solid foods can change the acidity and composition of a baby’s stool. This change can trigger diaper rash. New foods may also lead to more frequent bowel movements, increasing the risk of rash.

5. Bacterial Or Yeast Infections

Diaper areas are warm and moist, making them ideal for bacteria and yeast. These microorganisms can cause infections, leading to more severe rashes.

6. Sensitive Skin

Some babies naturally have more sensitive skin. This sensitivity makes them more prone to diaper rash. It’s essential to use products that are gentle and hypoallergenic.

Cause Description
Wetness Skin breakdown due to prolonged exposure to moisture.
Friction Rubbing the diaper against the skin is irritating.
Irritants Harsh chemicals in products irritate the skin.
New Foods Changes in stool due to the introduction of solids.
Infections Bacterial or yeast infections in the diaper area.
Sensitive Skin Natural sensitivity leading to higher rash risk.

By knowing these causes, you can better protect your baby. Prevention and careful product selection are key to keeping diaper rash at bay.

Diaper Rash Remedies for Babies: Quick Relief Tips

Preventive Measures

Diaper rash is a common concern for many parents. Babies have sensitive skin, making them prone to this uncomfortable condition. Understanding preventive measures can help keep your baby’s skin healthy. Following a consistent infant skincare routine, you can protect your child from diaper rash. Here, we’ll explore various strategies, offering effective baby skin care tips that align with pediatrician recommendations.

Prevention Of Diaper Rash

Preventing diaper rash starts with frequent diaper changes. Change your baby’s diaper as soon as it’s wet or soiled. This reduces prolonged exposure to moisture, a common cause of diaper rash. Using soft and absorbent diapers also helps.

Let your baby enjoy some diaper-free time. Fresh air can help keep the skin dry and prevent irritation. Simply lay your baby on a towel in a safe area, allowing their skin to breathe.

Infant Skincare Routine

A gentle skincare routine is vital. Use warm water and a soft cloth to clean your baby’s diaper area. Avoid wipes with alcohol or fragrances, as they can irritate sensitive skin. Pat the area dry with a soft towel.

Incorporate soothing ointments or diaper rash cream into your routine. Apply a thin layer to your baby’s clean, dry skin. This creates a barrier against moisture, reducing the risk of diaper rash.

Natural Remedies For Diaper Rash

Opt for natural remedies if your baby has sensitive skin. Coconut oil is a popular choice. Its antimicrobial properties can soothe and protect delicate skin. Apply a small amount to the affected area for relief.

Aloe vera gel is another effective option. It cools and soothes the skin, helping reduce redness and discomfort. Ensure the gel is pure and free from added chemicals.

Baby Health Tips

  • Ensure your baby’s clothes are loose and breathable.
  • Use mild detergent to wash their clothes and diapers.
  • Rinse clothes twice to remove all soap residues.


Pediatrician Recommendations

Consult your pediatrician for personalized advice. They can recommend specific diaper rash treatments suited to your baby’s needs. Always follow their guidance for effective and safe infant skincare.

Tips Benefits
Frequent Diaper Changes Reduces moisture exposure
Diaper-Free Time Allows skin to breathe
Use of Soothing Ointments Creates a moisture barrier

According to the AAP diaper rash advice, frequent diaper changes can help prevent irritation.

Natural Remedies

Diaper rash is a common issue that many parents face. It can cause discomfort and irritation for your little one. Fortunately, there are natural remedies that can help soothe diaper rash without harsh chemicals. These remedies use gentle ingredients that nurture and protect your baby’s delicate skin. Embracing natural solutions can be a comforting choice for Baby Skin Care. Let’s explore some effective options for Soothing Diaper Rash.

Coconut Oil

Coconut oil is a popular choice for Natural Remedies For Diaper Rash. It has antimicrobial and anti-inflammatory properties that can help soothe irritated skin. Applying coconut oil to the affected area creates a barrier, protecting the skin from further irritation.

Benefits:

  • Acts as a natural moisturizer
  • Contains lauric acid, which fights bacteria
  • Easy to apply and gentle on baby skin


Usage:

  1. Clean the diaper area with warm water and mild soap.
  2. Pat dry gently using a soft towel.
  3. Apply a thin layer of coconut oil on the rash.


Regular use of coconut oil can be part of Diaper Rash Prevention Tips. It’s a cost-effective and gentle solution to incorporate into your routine.

Aloe Vera

Aloe Vera is well-known for its skin-healing properties. It’s a natural remedy that can provide relief for diaper rash. The soothing gel from the aloe plant helps cool and calm irritated skin. Aloe Vera is often included in Gentle Baby Products for its hydrating benefits.

How Aloe Vera Helps:

Feature Benefit
Anti-inflammatory Reduces redness and swelling
Moisturizing Hydrates dry, cracked skin
Cooling effect Soothes burning sensation


Application:

  • Extract fresh aloe gel from the plant.
  • Gently apply on the diaper rash.
  • Let it dry naturally before putting on a new diaper.

Aloe Vera can be a safe choice for Preventing Diaper Rash. It complements Pediatrician-Recommended Treatments effectively.

Oatmeal Baths

Oatmeal baths are a soothing option for Diaper Rash Treatment. Oatmeal contains saponins, which cleanse and moisturize the skin. Due to its calming effects, it has been used as a Home Remedy For Diaper Rash.

Benefits of Oatmeal Baths:

  • Relieves itching and irritation
  • Balances skin pH
  • Gentle enough for daily use

Steps to Prepare:

  1. Grind oatmeal into a fine powder using a blender.
  2. Fill a bathtub with warm water.
  3. Add a cup of ground oatmeal to the water.
  4. Let your baby soak for 10-15 minutes.

Oatmeal baths can be a key part of your Best Diaper Rash Creams routine. They offer a natural and gentle way to care for your baby’s skin.

Diaper Rash Remedies for Babies: Quick Relief Tips


Over-the-counter Treatments

Diaper rash can be a distressing experience for both babies and parents. Red, irritated skin can cause discomfort and sleepless nights. Many parents seek effective diaper rash remedies to soothe their baby’s sensitive skin. Over-the-counter treatments offer a convenient solution. These products are designed to provide relief and promote healing. They are readily available and can be used at home. Let’s explore some popular options.

Barrier Creams

Barrier creams play a crucial role in baby skin care. They create a protective layer on the skin, shielding it from moisture and irritants. This skin barrier protection is essential for diaper rash prevention. Common ingredients in barrier creams include zinc oxide and petroleum jelly. These compounds help to soothe and protect the skin.

  • Zinc Oxide: Known for its healing properties. It reduces irritation and promotes skin recovery.
  • Petroleum Jelly: Provides a thick barrier, keeping moisture away from the skin.

Parents often choose barrier creams for their ease of use. Simply apply a generous layer during diaper changes. This can help prevent the rash from worsening. For persistent rashes, consult a pediatrician for advice. Experts might recommend specific brands or formulations tailored for your baby.

Ingredient Benefit
Zinc Oxide Healing and soothing properties
Petroleum Jelly Effective moisture barrier

Anti-fungal Ointments

Sometimes, diaper rash treatment requires more than a barrier. Fungal infections in infants can lead to stubborn rashes. In these cases, antifungal ointments are recommended. These ointments target fungal growth directly, reducing inflammation and irritation.

Common antifungal agents include:

  • Clotrimazole: Effective against yeast infections.
  • Miconazole: Another popular choice for treating fungal issues.

Using antifungal ointments requires careful application. Clean the affected area thoroughly before use. Apply a thin layer as directed by pediatric dermatology experts. These ointments can be combined with barrier creams for enhanced protection. Always monitor the rash for signs of improvement. If symptoms persist, seek medical advice.

Hydrocortisone Creams

Cortisone cream for babies is used to reduce inflammation. It is a mild steroid cream, effective for severe diaper rashes. While it can be a powerful tool in baby rash prevention, it must be used with caution.

Important considerations include:

  1. Use sparingly and only for short periods.
  2. Follow pediatric advice for dosage and application.
  3. Monitor the skin closely for any adverse reactions.

Hydrocortisone creams are usually recommended for rashes that do not respond to other treatments. They can provide relief when other soothing ointments fail. Always consult a healthcare provider before using steroid creams on infants. This ensures safe and effective natural remedies for diaper rash.

When To See A Doctor For Diaper Rash

Most diaper rashes respond well to home remedies for diaper irritation and natural remedies for diaper rash. These include frequent diaper changes, gentle cleansing, and the use of soothing ointments for diaper rash. But sometimes, a rash may need professional attention.

Signs Of Infection

If the rash is red, swollen, or has blisters, it could indicate an infection. Look out for pus-filled bumps or open sores. These require a pediatrician-recommended rash solution. An infection can worsen if not treated promptly, so don’t delay in seeking help.

Rash Persists Despite Treatment

Applying the best diaper rash creams and using sensitive skin products for babies should show improvement within a few days. If the rash doesn’t heal or worsens after trying various diaper rash treatments, it’s time to consult a doctor.

Fever And Behavioral Changes

A diaper rash accompanied by a fever can indicate a more serious issue. If your baby seems more irritable or uncomfortable than usual, it’s worth getting a professional opinion. Preventing diaper rash with proper baby skin care is essential, but sometimes medical intervention is necessary. 

Unusual Appearance

Rashes that appear very different from typical diaper rash, like those with a bright red color or unusual texture, should be evaluated. Sometimes, these can be allergic reactions needing specific care.

Rash Spreads Beyond Diaper Area

If the rash extends beyond the diaper area to other parts of the body, it may not be a simple diaper rash. This might require a specialized treatment approach that only a doctor can provide.

Understanding these signs will help you make informed decisions about your baby’s health. Always trust your instincts as a parent and seek medical advice when necessary.

For severe cases, the Mayo Clinic diaper rash treatment recommends consulting a doctor.

Tips For Diaper Changes

Diaper rash is a common issue that many parents face with their babies. Understanding how to effectively change diapers can help prevent skin irritation and keep your baby comfortable. Here are some practical tips for diaper changes that incorporate pediatrician advice and effective diapering techniques.

Pediatrician Advice

Consult with your pediatrician for tailored advice if rashes persist. They may recommend specific diaper rash creams or soothing ointments. Pay attention to any signs of allergies or infections, and follow your pediatrician’s guidance for baby skincare.

Skin Irritation

Skin irritation can cause discomfort and lead to rashes. Use healing ointments that form a protective barrier on the skin. Avoid overly wet wipes and let the skin dry naturally before putting on a fresh diaper.

Diapering Techniques

Mastering proper diapering techniques can prevent rash development. Clean the diaper area thoroughly with gentle strokes and apply a thin layer of diaper rash cream. Use natural remedies like coconut oil for extra protection.

Baby Skincare

Keep your baby’s skin healthy by using products designed specifically for infants. Choose baby wipes and skincare products labeled as hypoallergenic. Regularly check for signs of irritation and adjust products as needed.

Soothing Ointments

Apply soothing ointments to calm irritated skin. Look for ingredients like zinc oxide in diaper rash creams, which help reduce redness and inflammation. These ointments can provide immediate relief and promote healing.

Consider natural remedies for treating diaper rash. Use aloe vera or oatmeal baths to soothe the skin. These remedies can be gentle alternatives to chemical-based products and are often effective in calming irritation.

Healing Ointments

Healing ointments can speed up recovery from diaper rash. Apply a thin layer during each diaper change. Look for products with natural oils and vitamin E to nourish the skin and restore its natural barrier.

Baby Wipes

Choose baby wipes that are soft and free from harsh chemicals. Opt for unscented wipes to avoid further irritation. Always pat the skin dry instead of rubbing to prevent rash development.

Choosing The Right Diapers

Diaper rash can cause discomfort and distress for your baby. Choosing the right diapers plays a crucial role in keeping your baby’s skin healthy. With countless options available, selecting the best diaper can seem overwhelming. Understanding your baby’s skin needs and exploring various options can help prevent diaper rash. This section explores essential aspects to consider when picking the right diapers for your baby.

Quality And Material

High-quality diapers are essential for baby skin care. Look for diapers made from breathable materials. They help keep moisture away from the skin. Natural fibers like cotton are gentle on sensitive skin. Opt for diapers free from harsh chemicals to avoid irritation.

Absorbency Levels

Absorbency is a key factor in baby rash prevention. Choose diapers with high absorbency levels. They keep your baby’s skin dry and reduce the risk of diaper rash. Check for diapers with a wetness indicator. It helps you know when it’s time for a change.

Size And Fit

Ensure the diaper fits well. A proper fit prevents leaks and irritation. Use a size chart to determine the right size for your baby. A snug fit around the legs and waist is important. It minimizes friction and helps prevent diaper rash.

Eco-friendly Options

Using breathable cloth diapers can reduce irritation. Eco-friendly diapers are a great choice for sensitive skin products. They are often made from natural materials. These options are biodegradable and gentle on the skin. Switching to cloth diapers can be natural remedy for diaper rash.

Types Of Diapers

Type Features
Disposable Convenient, high absorbency, and wide availability
Cloth Eco-friendly, reusable, gentle on skin
Biodegradable Environmentally friendly, reduces waste, gentle materials


Consulting Pediatrician Advice

Seek pediatrician advice for choosing diapers. They can offer insights based on your baby’s skin condition. Experts recommend the best diaper creams and soothing ointments for diaper rash treatment. Professional guidance ensures your baby’s skin remains healthy.

Prevention Tips For Diaper Rash

  • Change diapers frequently to keep skin dry.
  • Use home remedies for diaper irritation, like coconut oil.
  • Ensure the diaper fits well to avoid friction.
  • Choose sensitive skin products for baby care.


Frequently Asked Questions

What Heals A Diaper Rash Fastest?

Apply a zinc oxide cream to soothe and protect the skin. Keep the area clean and dry. Frequent diaper changes reduce moisture. Allow skin to breathe by giving diaper-free time. Consult a pediatrician for a persistent rash.

What Is The Best Thing To Put On A Baby’s Diaper Rash?

Apply a zinc oxide cream to soothe diaper rash. Keep the area clean and dry. Use unscented wipes. Avoid tight diapers. Bathe the baby regularly with lukewarm water. Consult a pediatrician for persistent rashes.

What Is The Best Natural Remedy For Diaper Rash?

Coconut oil is an effective natural remedy for diaper rash. It soothes irritation and reduces inflammation. Apply a thin layer to the affected area after each diaper change. Its antibacterial and antifungal properties help prevent infection, promoting quick healing. Make sure the skin is clean and dry before application.

How Do You Stop A Diaper Rash Overnight?

Clean the affected area gently and pat dry. Apply a thick layer of zinc oxide cream. Use breathable, hypoallergenic diapers. Ensure frequent diaper changes to keep the area dry. Allow diaper-free time to promote healing.

Have more parenting questions? Visit our FAQ for new parents.

Conclusion

Caring for diaper rash requires patience and gentle remedies. Keep your baby’s skin dry and clean. Use natural products to soothe irritation. Try a warm bath with oatmeal for relief. Frequent diaper changes help prevent rash. Air out the area to promote healing.

Consider consulting a pediatrician for persistent cases. Your baby’s comfort is the priority. These steps can ease discomfort and protect delicate skin. Stay attentive to your baby’s needs. Simple changes make a big difference. Your love and care ensure a happy, rash-free baby.


Baby Eye Color Calculator Predict Your Baby's Beautiful Eyes

Baby Eye Color Calculator: Predict Your Baby’s Beautiful Eyes!


Curious about your baby’s eye color? You’re not alone.

Hey there, excited parent-to-be or new mom and dad! Have you ever gazed into your baby’s eyes and wondered, “What color will they be?” It’s one of the most magical mysteries of parenthood! At BestBabyCart.com, we’re here to help you predict your baby’s beautiful eye color with a fun baby eye color calculator concept. From understanding the science of genetics to celebrating this special milestone, this guide is packed with insights, emotional support, and a digital tool to make the journey even more exciting. Let’s dive into the world of baby eye colors and uncover the beauty waiting for you!

This calculator considers the eye colors of both parents and even grandparents. It then uses this information to predict your baby’s eye color. This tool is both fun and educational. It allows you to explore the science behind genetics simply. Dive into the world of genetics and discover what eye color your little one might have.

Baby Eye Color


How Does Baby Eye Color Work?

Your baby’s eye color isn’t just a random gift from nature—it’s a fascinating mix of genetics! Understanding the basics can help you predict what shade those little peepers might become.

Significance Of Eye Color

Eye color can tell a lot about our ancestry. It often reflects our genetic background. For many, eye color is a key part of identity. It adds to our uniqueness. Different cultures have different beliefs about eye color. Some even believe it can influence personality traits. Knowing your baby’s potential eye color can be a delightful part of expecting a child.

The Role of Genetics

Eye color is determined by genes passed down from you and your partner, primarily through the OCA2 and HERC2 genes. These genes control melanin production—the pigment that gives eyes their color. More melanin means darker eyes (brown), while less melanin results in lighter shades (blue or green).

Why Babies Are Born with Blue Eyes

Most babies are born with blue or gray eyes because melanin production in the iris doesn’t fully kick in until after birth. Over the first 6–12 months (sometimes up to 3 years!), their true eye color emerges as melanin levels adjust. It’s like a slow reveal of their unique beauty!

Parent 1 Parent 2 Possible Baby Eye Colors
Brown Brown Brown, Green, Blue
Brown Blue Brown, Green
Blue Blue Blue


Common Eye Colors In Babies


Can You Predict Your Baby’s Eye Color?

While genetics can be tricky, a baby eye color calculator can give you a fun prediction based on your and your partner’s eye colors. Let’s explore how it works and what factors come into play.

The Baby Eye Color Calculator Explained

A baby eye color calculator uses basic genetic principles to estimate the likelihood of your baby’s eye color. You input your eye color, your partner’s eye color, and sometimes your parents’ eye colors for a more accurate guess. For example, two brown-eyed parents have a higher chance of a brown-eyed baby, but surprises like blue or green are possible if recessive genes are at play!

Factors That Influence Eye Color

Beyond your eye colors, other factors matter: family history (grandparents’ eye colors), mixed genetics (if you’re a carrier for blue eyes), and even lighting conditions that can make eyes appear in different shades. It’s not an exact science, but it’s a delightful way to dream about your baby’s future look.

Parent 1 Eye Color Parent 2 Eye Color Possible Baby Eye Colors
Brown Brown Brown, Green, Blue
Brown Blue Brown, Green
Blue Blue Blue


Eye color can sometimes change as the baby grows. This is due to the amount of melanin increasing over time. Typically, by the age of three, a child’s eye color will be set.

The Science Of Eye Color

Understanding the science behind eye color can be fascinating. Eye color is determined by genetics and the complex interplay of various factors. Let’s explore this in detail through two main aspects: Melanin and Pigmentation and Iris Structure.

Melanin And Pigmentation

Melanin is the key pigment that influences eye color. It is found in the iris of the eye. The amount and type of melanin present determine whether eyes are blue, green, brown, or another color.

There are two types of melanin:

  • Eumelanin: This type is responsible for darker colors, like brown and black.
  • Pheomelanin: This type influences lighter shades, such as green and hazel.

More melanin usually means darker eyes. Less melanin results in lighter-colored eyes. A baby’s eye color can change over time as melanin levels increase or decrease.

Iris Structure

The iris is the colored part of the eye. It controls the size of the pupil and determines eye color. The structure of the iris, which includes layers of cells and fibers, also plays a role in how eye color appears.

Some key elements of the iris structure include:

  1. Stroma: This is the front layer of the iris, containing cells and blood vessels.
  2. Epithelium: This is the back layer, which has pigment cells that contribute to eye color.

Light scattering in the stroma can affect the perceived color. For example, blue eyes have little melanin and appear blue because of light scattering. Brown eyes have more melanin, which absorbs more light, making the eyes appear darker.

Genetics play a major role in determining the structure and pigmentation of the iris. The combination of genes from both parents will influence a baby’s eye color, making each set of eyes unique.


How Eye Color Is Determined


Factors Influencing Eye Color

The color of a baby’s eyes is a fascinating topic. Many parents wonder what their baby’s eye color will be. Several factors influence eye color. This section will discuss some of the key factors that determine eye color.

Parental Eye Color

One of the most important factors influencing a baby’s eye color is the eye color of their parents. If both parents have blue eyes, the baby is likely to have blue eyes. If one parent has brown eyes and the other has blue eyes, the baby may have a range of eye colors.

Parental Eye Color Combination Possible Baby Eye Color
Both parents with blue eyes Blue
One parent with brown eyes, one with blue eyes Brown, blue, or green
Both parents with brown eyes Brown, green


Genetic Variations

Genetic variations also play a significant role. Eye color is a polygenic trait, meaning multiple genes influence it. The most well-known genes are OCA2 and HERC2. These genes determine the amount of melanin in the iris. More melanin means darker eyes.

Here is a simple breakdown:

  • OCA2 Gene: Influences the amount of melanin
  • HERC2 Gene: Controls the expression of the OCA2 gene

Even with these genes, eye color can still vary. This is due to additional genetic factors and mutations.


Common Eye Colors In Babies

Babies often amaze us with their cute looks and sparkling eyes. One of the most exciting aspects is predicting their eye color. Different factors like genetics play a role. Let’s explore the common eye colors in babies.

Blue Eyes

Many babies are born with blue eyes. This is because they have low melanin at birth. As they grow, the melanin levels can increase. This can change the eye color. Some babies keep their blue eyes. Blue eyes are often seen in families with lighter skin tones.

Brown Eyes

Brown is the most common eye color worldwide. Babies with brown eyes have more melanin in their irises. This color can appear at birth or develop over time. Brown eyes are dominant genetically. This means if one parent has brown eyes, the baby is likely to have them too.

Green And Hazel Eyes

Green and hazel eyes are less common. They are often a mix of blue and brown eye genes. Babies with green or hazel eyes have moderate melanin levels. These colors may take months or years to fully develop. Green and hazel eyes can show flecks of different colors.


Changes In Eye Color Over Time

Understanding how a baby’s eye color changes over time can be fascinating. Many parents eagerly watch their child’s eyes, curious about what color they will become. The transformation from birth to the final color is a gradual and intriguing process.

Infant To Toddler Transition

Most babies are born with blue or gray eyes. This is due to the lack of melanin in their irises. As they grow, melanin production increases. This can change their eye color. By six months, you may notice some changes. The eyes might start to darken. This is especially true for babies with darker skin.

During the first year, the eyes can change dramatically. By the time a baby turns one, the eye color may still be changing. Sometimes, it takes up to three years for the final color to appear. Keep an eye on your little one’s eye color as they grow. It can be an exciting journey.

Permanent Eye Color

By the age of three, most children’s eye color is set. The melanin levels in the iris have stabilized. This determines the permanent eye color. If a child has brown eyes by this age, they will likely stay brown. The same goes for blue and green eyes.

Genetics play a big role in eye color. Parents’ eye colors can give clues about their child’s final eye color. But the exact color can still be a surprise. Remember, every child is unique. Their eye color journey is just one part of their unique story.

Fun Facts About Baby Eye Color

Babies are fascinating! One intriguing feature is their eye color. Parents often wonder what color their baby’s eyes will be. Here are some fun facts that might surprise you.

Rare Eye Colors

While many babies are born with brown or blue eyes, some have rare colors. These unique shades are less common and make a baby stand out.

Eye Color Percentage of Population
Green 2%
Gray 1%
Amber 0.5%
Red/Violet Extremely Rare


Green eyes are often seen in people of European descent. Gray eyes are less common and can appear blue in certain lighting. Amber eyes have a golden or copper hue. Red or violet eyes are usually due to a condition called albinism.

Celebrity Eye Colors

Many celebrities are known for their striking eye colors. Let’s explore a few famous faces.

  • Elizabeth Taylor – Violet eyes
  • David Bowie – One blue eye, one brown eye
  • Emma Stone – Green eyes
  • Mila Kunis – One brown eye, one green eye

Elizabeth Taylor had a rare violet eye color due to a genetic mutation. David Bowie had anisocoria, giving him one blue and one brown eye. Emma Stone and Mila Kunis both have unique and stunning eye colors that many admire.

Eye color can be a fun topic to explore. Each color holds its own unique charm and beauty. Whether your baby’s eyes are brown, blue, or a rare shade, they will surely be captivating!


Emotional Support for Expectant Parents

Waiting to see your baby’s eye color is an exciting part of parenthood, but it can also come with a mix of emotions. Let’s navigate this together.

Enjoy the Anticipation

It’s okay to feel a flutter of curiosity or even impatience! Predicting your baby’s eye color is a fun way to connect with your little one before their traits fully emerge. Savor this special time—it’s a once-in-a-lifetime experience.

Share the Joy

Connect with other parents on X or in parenting groups to share your predictions and excitement. Use hashtags like #BabyEyeColor or #NewParentJoy to find others who are just as thrilled to guess their baby’s features.

FAQs About Baby Eye Color Prediction

Can a baby eye color calculator be accurate?

It’s not 100% accurate since genetics can be complex, but it gives a fun estimate based on probabilities. Your baby’s true eye color may still surprise you!

When will my baby’s eye color be permanent?

Most babies’ eye colors settle by 6–12 months, but changes can happen up to age 3 as melanin develops. Keep watching for those magical shifts!

Can two brown-eyed parents have a blue-eyed baby?

Yes, if both parents carry the recessive blue-eye gene, there’s a 25% chance their baby could have blue eyes. Genetics are full of surprises!

Does family history affect eye color?

Absolutely! Grandparents’ eye colors can influence your baby’s eye color if recessive genes are passed down. Include family history for better predictions.

Are green eyes common in babies?

Green eyes are rare, occurring in less than 2% of the population. They’re more likely if one parent has green or hazel eyes, but they’re still a special surprise!

How Does A Baby Eye Color Calculator Work?

A baby eye color calculator uses genetic information. It predicts the probability of a baby’s eye color. It considers parents’ eye colors and genetic patterns.

Can Eye Color Change After Birth?

Yes, a baby’s eye color can change. It often changes within the first year. This is due to pigment development.

What Factors Influence Baby Eye Color?

Genetics play a major role. Parents’ eye colors and family history are key factors. Pigment production also influences.

Conclusion

Guessing your baby’s eye color is a heartwarming part of the parenting journey, and we’re so excited to share it with you! At BestBabyCart.com, we’re here to support you with fun tools, expert insights, and resources to make every moment magical. Download our Baby Eye Color Predictor Tool, share your predictions with loved ones, and celebrate the beauty of your baby’s unique eyes—no matter the shade!


How to Introduce Solids to Baby

How to Introduce Solids to Baby: Your Guide to a Happy Start!

Ready to introduce solids to your baby? 😊 This guide covers when to start, what foods to offer, how to feed safely, and tips for success. With practical steps, visuals, and expert advice, you’ll feel confident helping your little one explore new flavours and how to Introduce Solids to Baby.

Hey, new parents! 😄 Watching your baby grow is pure magic, and now you’re at an exciting milestone—introducing solids! As a mom running BestBabyCart.com, I remember the joy (and nerves!) of seeing my little one taste pureed carrots for the first time. It’s a big step, filled with questions like “When do I start?” “What foods are safe?” or “How do I avoid allergies?” Don’t worry—this mom-to-mom guide is here to make it fun, safe, and stress-free. Packed with expert tips on timing, foods, methods, and more, you’ll have everything you need to start your baby’s food journey with love and confidence. Let’s dive in!

Why Introducing Solids Is a Big Deal

Starting solids around 6 months is a key step in your baby’s growth. It’s not just about food—it’s about:

  • Nutrition: Solids add iron, zinc, and vitamins as breastmilk or formula alone isn’t enough past 6 months.

  • Development: Chewing and swallowing build oral skills for speech.

  • Exploration: New flavors spark curiosity and healthy eating habits.

  • Family Bonding: Mealtime becomes a shared adventure!

With 90% of babies starting solids by 7 months (per CDC), getting it right sets your baby up for a lifetime of good health. Let’s explore how to do it safely and joyfully.


Smiling baby in a highchair, tasting pureed food with a spoon, symbolizing the start of solids

Image: Happy baby in a highchair tasting pureed food.


When to Start Solids: Timing It Right

Wondering when your baby is ready? Most babies are ready around 6 months, but every little one is unique. Look for these signs, per the American Academy of Pediatrics:

Signs Your Baby Is Ready

  • Sits Up: Can sit with support and hold head steady.

  • Shows Interest: Reaches for your food or watches you eat.

  • Tongue Control: No longer pushes food out with tongue (tongue-thrust reflex fades).

  • Chewing Motion: Mimics chewing or smacks lips.

Age Guide: Start at 6 months for most babies, but some may be ready at 4–5 months with pediatrician approval. Preemies may need to wait longer.

Why 6 Months Is Ideal

  • Gut Health: Babies’ digestive systems mature by 6 months, reducing allergy risks.

  • Iron Needs: Breastmilk iron drops after 6 months; solids like fortified cereals fill the gap.

  • Safety: Waiting reduces choking risks, as babies gain better swallowing skills.

Talk to Your Pediatrician: Always check with your doctor, especially if your baby has health conditions or was born early.

Checklist: Is My Baby Ready for Solids?

  • ☐ Sits with support and holds head steady.

  • ☐ Shows interest in food (reaches or watches).

  • ☐ No tongue-thrust reflex.

  • ☐ Mimics chewing or smacks lips.

  • ☐ Pediatrician gives the green light.

Checklist titled ‘Is My Baby Ready for Solids?


Choosing the Best First Foods

Your baby’s first foods should be nutrient-rich, easy to digest, and safe. Here’s how to pick winners.

Top First Foods (6–8 Months)

Start with single-ingredient, smooth purees to watch for reactions:

  • Iron-Rich: Fortified baby cereal (e.g., Gerber) mixed with breastmilk or formula.

  • Fruits: Pureed apple, pear, or banana for sweetness.

  • Veggies: Steamed and pureed carrots, sweet potatoes, or peas.

  • Proteins: Pureed lentils or mashed avocado for healthy fats.

Serving Tip: Offer 1–2 teaspoons at first, increasing to 2–4 tablespoons as baby adjusts.

Foods to Avoid

  • Honey: Risk of botulism under 1 year.

  • Cow’s Milk: Hard to digest until 12 months.

  • Choking Hazards: Whole grapes, nuts, popcorn, or raw carrots.

  • High-Sodium/Sugar: Skip processed foods or sweets.

Allergy Watch: Introduce common allergens (e.g., peanut butter, eggs) one at a time, per National Institute of Allergy and Infectious Diseases. Wait 3–5 days before new foods to spot reactions.

How to Introduce Solids to Baby

Infographic: Colorful chart of first foods like pureed carrots, apples, and cereal.


How to Introduce Solids: Step-by-Step

Ready to feed your baby? Follow these steps for a smooth start.

Step 1: Gather Your Gear

  • Highchair: Stable and easy to clean, like Graco.

  • Spoons: Soft-tipped, baby-sized (e.g., Munchkin).

  • Bowls: Non-slip, BPA-free (e.g., Pyrex).

  • Bibs: Waterproof for easy cleanup (e.g., Bumkins).

Step 2: Choose the Right Time

  • Mood: Feed when baby is happy and alert, not sleepy or fussy.

  • Timing: Mid-morning or after a small milk feed works best.

  • Setting: Quiet, distraction-free space for focus.

Step 3: Start Small

  • Offer 1–2 teaspoons of a single-ingredient puree (e.g., Gerber oatmeal).

  • Use a soft spoon, letting baby taste at their pace.

  • Follow with breastmilk or formula to keep milk as the main nutrition source.

Step 4: Watch for Cues

  • Likes: Leaning forward, opening mouth.

  • Dislikes: Turning away, spitting out, or crying. Stop and try again later.

  • Reactions: Monitor for rashes, vomiting, or diarrhea (call your doctor if severe).

Step 5: Build Variety

  • Introduce one new food every 3–5 days.

  • Mix textures (e.g., lumpy purees by 7–8 months) to develop chewing skills.

  • Offer 2–3 meals daily by 9 months, plus milk feeds.

How to Introduce Solids to Baby

Image: Baby Starting Solid Bundle

Baby-Led Weaning vs. Purees: Which to Choose?

Not sure whether to spoon-feed or let baby self-feed? Here’s a breakdown.

Purees (Traditional Spoon-Feeding)

  • Pros: Easy to control portions, less mess, good for early iron-rich foods.

  • Cons: Slower transition to textures, more prep time.

  • Best For: Parents who want gradual introduction or babies with developmental delays.

Baby-Led Weaning (BLW)

  • Pros: Encourages self-feeding, motor skills, and texture exploration.

  • Cons: Messier, higher choking risk if foods aren’t soft.

  • Best For: Babies 6+ months who sit well and show strong chewing cues.

Hybrid Approach: Many parents mix both—offer purees with a spoon and soft finger foods (e.g., banana strips) to balance benefits.

Safety Tip: For BLW, use soft, palm-sized foods like steamed broccoli or avocado wedges. Always supervise closely.


Keeping It Safe: Food Safety and Allergies

Safety first! Here’s how to protect your baby during mealtimes.

Prevent Choking

  • Food Prep: Offer soft, mashed, or pureed textures; avoid round or hard foods like whole grapes.

  • Supervision: Always watch baby while eating.

  • Positioning: Use a highchair (e.g., Graco) for upright sitting.

  • Be Prepared: Learn infant CPR through a Red Cross class.

Manage Allergies

  • Early Introduction: Offer allergens like peanuts or eggs between 6–12 months (per NIAID).

  • Test Slowly: Introduce one new food at a time, waiting 3–5 days.

  • Monitor: Look for hives, swelling, or breathing issues. Call 999 for severe reactions.

Stay Hygienic

  • Wash hands, utensils before prep.

  • Store purees in Pyrex containers; refrigerate leftovers for up to 2 days.

  • Discard uneaten food after 1–2 hours to prevent bacteria.

Progressing with Solids: 9–12 Months

By 9 months, your baby’s ready for more variety and textures. Here’s how to keep it fun.

New Textures

  • Lumpy Purees: Transition to thicker mashes (e.g., mashed peas).

  • Finger Foods: Soft cubes of tofu, steamed carrots, or cheerios.

  • Self-Feeding: Let baby use hands or try a Munchkin spoon.

Meal Schedule

  • 3 Meals + Snacks: Offer solids 3 times daily, plus 1–2 snacks.

  • Milk Balance: Continue 24–32 oz of breastmilk or formula, reducing as solids increase.

  • Variety: Include all food groups—grains, fruits, veggies, proteins, dairy.

Encourage Exploration

  • Offer Choices: Put 2–3 foods on the tray (e.g., banana slices, oatmeal).

  • Model Eating: Eat together to show chewing and enjoyment.

  • Be Patient: Babies may need 10–15 tries to like a food (per HealthyChildren.org).

Feeding schedule and food ideas for 9–12 month babies (3)

 Image: Feeding schedule and food ideas for 9–12 month babies


Troubleshooting Common Challenges

Hitting bumps? Here’s how to handle common issues.

Refusing Foods

  • Why: Babies may dislike textures or be full from milk.

  • Fix: Offer small portions, mix with familiar foods, or try at a different time.

  • Tip: Avoid forcing; keep mealtime positive.

Constipation

  • Why: New foods like bananas or rice cereal can firm stools.

  • Fix: Offer prunes, pears, or water (4–6 oz daily by 6 months).

  • When to Call: If stools are hard or absent for 3+ days, consult your doctor.

Messy Eating

  • Why: Babies explore with their hands and mouths.

  • Fix: Use a Bumkins bib and a splash mat under the highchair.

  • Embrace It: Mess is learning! Keep a camera ready for cute moments.

FAQ: How to Introduce Solids to Baby

Q: When should I start solids?
A: Around 6 months, when the baby sits with support and shows interest. Check with your paediatrician.

Q: What’s the best first food?
A: Single-ingredient purees like Gerber cereal, carrots, or avocado.

Q: Can I do baby-led weaning instead of purees?
A: Yes, for 6+ month babies who sit well. Offer soft finger foods and supervise.

Q: How do I prevent food allergies?
A: Introduce allergens like peanuts early (6–12 months), one at a time, per NIAID.

Q: What if my baby refuses solids?
A: Try small portions, mix with familiar foods, and stay patient. Don’t force it.

Q: How much should my baby eat?
A: Start with 1–2 teaspoons, increasing to 2–4 tablespoons per meal by 8 months.

Q: How do I handle gagging?
A: Gagging is normal; ensure soft foods and supervise. Learn CPR from Red Cross for safety.

Q: How Many Times A Day Should A Baby Feed When Starting Solids?

Babies typically eat solids once or twice a day when starting. Gradually increase as they become comfortable. Balance solids with breast milk or formula to meet nutritional needs. Observe your baby’s hunger cues and adjust feeding times accordingly. Consult with a paediatrician for personalised guidance.

Q: How Long Does It Take For A Baby To Get Used To Solids?

Babies usually adjust to solids within a few weeks. Every baby is different, and some may take longer. Gradually introduce new textures and flavors to help them adapt. Monitor for any allergic reactions or discomfort, and consult a paediatrician if needed.

Q: Which Food to Give To A 4-Month-Old Baby?

Introduce pureed fruits and vegetables, like bananas and carrots, to a 4-month-old baby. Offer iron-fortified rice cereal mixed with breast milk or formula. Ensure food is smooth, avoiding chunks or lumps. Consult your paediatrician before starting solid foods to ensure safety and proper nutrition for your baby.

You’re Nailing This Milestone!

Parents, you’re doing amazing! 😊 Introducing solids is a joyful step in your baby’s growth, and with these expert tips, you’re set to make it fun, safe, and nutritious. From first purees to finger foods, you’re building a healthy eater. What’s your baby’s favourite food so far? Share in the comments—we’re cheering you on!

Happy parenting from BestBabyCart.com! Check out more tips to make your journey unforgettable.


How to Increase Milk Supply Naturally

How to Increase Milk Supply Naturally: Proven Techniques

How to Increase Milk Supply Naturally.Increasing milk supply naturally involves simple, effective strategies. Many mothers face challenges with milk production.

Understanding your body and its needs can help. Breastfeeding is a journey filled with joy and challenges. For many new moms, ensuring a steady milk supply is a top concern. Natural methods can offer peace of mind and support your body’s natural rhythms.

Why Milk Supply Matters

A healthy milk supply ensures your baby gets the nourishment they need to thrive. Low milk supply can stem from various factors, including stress, dehydration, hormonal changes, or improper latch. The good news? Your body is designed to produce milk, and with the right techniques, you can enhance your supply naturally. Let’s explore how to make that happen.

Understanding Milk Supply: Supply and Demand

Breast milk production works on a supply-and-demand system. The more your baby nurses (or you pump), the more milk your body is signaled to produce. This is because breastfeeding stimulates the release of prolactin, the hormone responsible for milk production. If you’re noticing a dip in supply, it might be due to infrequent feeding, poor latch, or external factors like stress. Don’t worry—we’ll cover actionable steps to get things flowing.

Proven Techniques to Increase Milk Supply Naturally

Here’s a comprehensive breakdown of natural methods to boost your milk supply, from lifestyle tweaks to dietary changes and breastfeeding techniques.

1. Optimize Breastfeeding Techniques

The foundation of a robust milk supply starts with effective breastfeeding practices. Here’s how to ensure you’re maximizing milk removal, which signals your body to produce more.

Ensure a Proper Latch

A good latch is critical for efficient milk transfer. If your baby isn’t latching correctly, they may not be stimulating milk production effectively. Signs of a proper latch include:

  • Your baby’s mouth covers most of the areola, not just the nipple.
  • Their lips are flanged outward, like a fish.
  • You hear swallowing sounds and don’t feel pain.

Tip: Work with a lactation consultant to perfect your baby’s latch. They can provide hands-on guidance tailored to you and your baby.

Nurse on Demand

Frequent nursing is key to boosting supply. Aim to breastfeed every 2–3 hours, or whenever your baby shows hunger cues (like rooting or sucking on their hands). Night feeds are especially important, as prolactin levels peak during the early morning hours.

Try Switch Nursing

Switch nursing involves alternating breasts multiple times during a single feeding session. This keeps your baby actively sucking, which stimulates milk production. For example:

  1. Start on one breast for 5–10 minutes.
  2. Switch to the other breast.
  3. Repeat 1–2 times per side.

ga-3s. B vitamins are necessary for energy and metabolism. Whole grains and lean meats provide these vitamins.

How to Increase Milk Supply Naturally: Proven Techniques


2. Stay Hydrated and Nourished

Your body needs fuel to produce milk, and hydration and nutrition play a huge role in maintaining a healthy supply.

Drink Plenty of Water

Breast milk is about 87% water, so staying hydrated is non-negotiable. Aim for at least 8–10 cups of water daily, and keep a water bottle handy during nursing sessions. Other hydrating options include herbal teas (like fenugreek or fennel) or coconut water.

Eat a Balanced Diet

A nutrient-rich diet supports milk production. Focus on:

  • Protein: Eggs, lean meats, beans, and tofu.
  • Healthy fats: Avocados, nuts, seeds, and olive oil.
  • Complex carbs: Oats, brown rice, and quinoa.
  • Galactagogues: Foods like oats, brewer’s yeast, and flaxseeds are known to boost milk supply.

Pro Tip: Try a lactation smoothie with oats, spinach, berries, and almond milk for a nutrient-packed boost.

Lactation-Boosting Smoothie Recipe

markdownShow inline

3. Incorporate Galactagogues

Galactagogues are foods, herbs, or supplements that may increase milk production. While not a magic bullet, they can support your efforts when combined with proper breastfeeding techniques.

Herbal Galactagogues

  • Fenugreek: A popular herb, often taken as tea or capsules. Start with a low dose and monitor for side effects like gas.
  • Blessed Thistle: Often paired with fenugreek to enhance milk production.
  • Fennel Seeds: Chew a teaspoon after meals or brew as tea for a gentle boost.

Note: Consult your healthcare provider before starting any herbal supplements, especially if you’re on medication or have health conditions.


Food-Based Galactagogues

Incorporate these into your diet:

  • Oats (think oatmeal or lactation cookies)
  • Brewer’s yeast (add to smoothies or baked goods)
  • Dark leafy greens (spinach, kale)
  • Almonds and sesame seeds

4. Pump Strategically

Pumping can be a game-changer for increasing milk supply, especially if your baby isn’t nursing frequently enough.

Power Pumping

Power pumping mimics cluster feeding, which signals your body to produce more milk. Here’s a sample schedule:

  1. Pump for 20 minutes.
  2. Rest for 10 minutes.
  3. Pump for 10 minutes.
  4. Rest for 10 minutes.
  5. Pump for 10 minutes.

Repeat this cycle for an hour, once or twice daily.

Pump After Feedings

If your baby doesn’t fully empty your breasts, pump for 5–10 minutes after feedings to stimulate further production.

Power Pumping Flowchart

pngShow inline

5. Manage Stress and Rest

Stress can reduce oxytocin, the hormone that triggers milk letdown. Prioritizing self-care is crucial for maintaining a healthy supply.

Practice Relaxation Techniques

  • Deep Breathing: Take 5 minutes to breathe deeply before nursing.
  • Meditation or Yoga: Even 10 minutes daily can lower stress levels.
  • Warm Compress: Apply a warm towel to your breasts before feeding to encourage letdown.

Prioritize Sleep

Lack of sleep can disrupt hormone levels, impacting milk production. Nap when your baby naps, and ask for help with household tasks to carve out rest time.

6. Seek Support

You don’t have to navigate this journey alone. Support from professionals and loved ones can make a big difference.

Consult a Lactation Consultant

A certified lactation consultant (IBCLC) can assess your breastfeeding technique, address latch issues, and create a personalized plan to boost your supply.

Join a Support Group

Connecting with other breastfeeding moms can provide emotional support and practical tips. Look for local or online groups through organizations like La Leche League.

Common Myths About Milk Supply

Let’s debunk a few myths that might be causing unnecessary worry:

  • Myth: Drinking more water will directly increase milk supply.
    Truth: Hydration supports overall health, but overhydration won’t boost supply beyond what your body needs.
  • Myth: You need to eat specific foods to make milk.
    Truth: A balanced diet is enough; galactagogues are a bonus, not a requirement.
  • Myth: Low supply is common.
    Truth: True low supply is rare. Most concerns stem from misinterpreting baby’s cues or normal variations in supply.
How to Increase Milk Supply Naturally: Proven Techniques

Impact Of Sleep On Supply

Sleep plays a significant role in maintaining your milk supply. Lack of sleep can increase stress levels and negatively affect your milk production. Prioritize getting enough rest whenever you can.

Try napping when your baby naps. It may feel challenging, but even a short rest can refresh you and help maintain your energy levels.

Consider enlisting help at night. A partner or family member can assist with non-feeding tasks, allowing you to get more uninterrupted sleep. How can you adjust your routine to ensure better rest?

Managing stress and ensuring adequate sleep can make a noticeable difference in your milk supply. Which of these strategies will you try first to enhance your breastfeeding experience?

Herbal Remedies

Herbal remedies have been cherished for centuries for their ability to support and enhance various aspects of health. When it comes to boosting milk supply naturally, these remedies can be a gentle and effective option. Many nursing mothers find comfort in the idea of using herbs, as they often offer a holistic approach to lactation. But how do these herbs actually help, and what should you keep in mind to use them safely?

Safe Herbal Usage

While herbs are natural, you must use them wisely. How do you ensure you’re not overdoing it?

It’s vital to research each herb thoroughly and consult with a healthcare provider. Dosage and frequency matter greatly.

Consider starting with small amounts and observing how your body responds. Every person is different, and what works for one might not work for another.

Remember, the key is balance. Would you add salt to a dish without tasting it first? The same cautious approach applies here.

So, how do you know if herbal remedies are the right choice for you? Ask yourself if you’re ready to embrace a natural approach and if you’re prepared to monitor your body’s cues. With mindfulness and care, herbal remedies can be a wonderful ally in your breastfeeding journey.

Exercise And Physical Health

Exercise and physical health play a crucial role in boosting your milk supply naturally. When your body is in good shape, it can work more efficiently, including producing milk for your baby. Staying active and maintaining a healthy lifestyle can positively influence your milk production. But how does exercise impact hormones, and what activities can you do? Let’s dive into these topics.

Impact On Hormones

Your hormones are the directors behind the scenes of milk production. Engaging in regular exercise can help balance these hormones. For instance, working out can reduce stress hormones like cortisol, which may interfere with milk supply. Lower stress levels can lead to more efficient milk production.

Exercise also boosts endorphins, often referred to as the ‘happy hormones’. When you feel good, your body can focus more on producing milk. Have you ever noticed how a brisk walk or a gentle yoga session lifts your mood? That happiness can translate into a more robust milk supply.

Recommended Activities

Not all exercises are created equal, especially when considering their impact on your milk supply. Light activities such as walking, swimming, or cycling can be beneficial. These exercises are gentle on the body and can be easily integrated into your daily routine.

Consider yoga or pilates as well. These are excellent for maintaining flexibility and reducing stress. A friend of mine once shared how yoga helped her stay calm during breastfeeding, ultimately supporting her milk production. Try a simple routine at home, and see how it feels.

Remember, the goal is to keep your body healthy without overexerting yourself. How can you make exercise a regular part of your day without feeling overwhelmed? Reflect on what activities you enjoy and how they fit into your life. It’s about finding a balance that works for you.

Support Systems

Boosting milk supply naturally involves staying hydrated and eating balanced meals. Regular breastfeeding can also help. Rest and relaxation play a vital role in supporting milk production.

Increasing milk supply naturally can feel like a daunting task, but having the right support systems in place can make a significant difference. Whether you’re a new mom or someone who’s been breastfeeding for a while, knowing where to turn for help is crucial. Support systems offer guidance, encouragement, and resources that can ease the journey and help you achieve your breastfeeding goals.

Community Resources

Community resources are invaluable when it comes to increasing your milk supply. Local breastfeeding support groups can connect you with other moms who are going through similar experiences. Sharing stories and tips can be both comforting and educational.

Online forums and social media groups can also provide a sense of community. These platforms allow you to ask questions anytime and get responses from moms worldwide. It’s like having a 24/7 support network.

Libraries and community centers often host free workshops and classes. These can be great opportunities to learn more about breastfeeding and meet other parents. Have you checked out what’s available in your area?

Remember, you’re not alone on this journey. Building a robust support system can be the key to successfully increasing your milk supply.

How to Increase Milk Supply Naturally: Proven Techniques


Frequently Asked Questions

How Can I Increase My Milk Supply Fast?

Boost milk supply by nursing often and staying hydrated. Consume lactation-friendly foods like oats and fennel. Ensure proper latch and consult a lactation expert. Rest well and avoid stress to support production. Use breast pumps to stimulate additional supply.

Which Foods Help Increase Breast Milk?

Oats, fenugreek, and almonds boost breast milk supply. Dark leafy greens and garlic enhance lactation. Flaxseed and sesame seeds support milk production. Include carrots and chickpeas for added benefits. Drink plenty of water to stay hydrated.

What Is The 4 4 4 Rule For Breast Milk?

The 4 4 4 rule for breast milk involves storing fresh milk for 4 hours at room temperature, refrigerating for 4 days, and freezing for 4 months. This guideline helps preserve the milk’s quality and ensures safety for infant consumption.

What Can I Drink To Produce More Milk?

Drink water, herbal teas like fenugreek or fennel, and milk-boosting smoothies. Oat milk and almond milk can also help. Hydration is crucial for milk production, so ensure you drink enough fluids daily. Consult a healthcare provider for personalized advice on lactation-friendly beverages.

Conclusion

Boosting milk supply naturally takes patience and consistency. Small changes can help. Try increasing your water intake. Eat nutritious foods regularly. Relax and rest whenever possible. Stress can affect milk production. Breastfeed more often to stimulate supply. Consider using herbal supplements.

Consult a healthcare professional before starting any new regimen. Your efforts can make a difference. Each mom is unique. Find what works best for you. Trust your body. Embrace the journey. Remember, you’re doing great. Keep nourishing your little one with love and care.

Happy breastfeeding!


How to Stop Baby Snack Feeding Breastfeeding

How to Stop Baby Snack Feeding Breastfeeding: A Gentle Guide for Parents

Hey there, mama! If you’re reading this, you’re probably wondering how to stop your baby from snack feeding while breastfeeding—and I totally get it. Those quick, frequent nursing sessions can feel like a never-ending cycle, leaving you exhausted, overwhelmed, and maybe even a little frustrated. As a mom of three and the founder of BestBabyCart.com, I’ve been there, and I’m here to help you through this transition with love, patience, and expert tips.

Snack feeding—where your baby nurses for just a few minutes at a time, often for comfort rather than hunger—can disrupt your routine and make breastfeeding feel like a full-time job. But don’t worry! With the right strategies, you can gently guide your little one toward longer, more satisfying feeds while still meeting their emotional needs. In this guide, we’ll walk through why babies snack feed, how to recognize when it’s time to stop, and practical steps to make the shift, plus some emotional support for you, because you’re doing an amazing job.

Why Does My Baby Snack Feed While Breastfeeding?

Before we dive into how to stop snack feeding, let’s talk about why your baby might be doing it in the first place. Understanding the reasons can help you approach this transition with empathy and confidence.

Comfort and Soothing

Breastfeeding isn’t just about food—it’s also about comfort. Your baby might snack feed because they find nursing soothing, especially during stressful moments like teething, growth spurts, or when they’re feeling tired or overwhelmed. Those quick sessions are like a warm hug from you, and that’s a beautiful thing!

Hunger or Growth Spurts

Sometimes, snack feeding happens because your baby is genuinely hungry more often, especially during growth spurts (common around 3 weeks, 6 weeks, 3 months, and 6 months). Their tiny tummy might need frequent top-ups, but if this becomes a habit, it can lead to a cycle of short, unsatisfying feeds.

Distractions or Overstimulation

As babies get older (around 4-6 months), they become more curious about the world. If your baby is easily distracted by noises, lights, or movement, they might pop on and off the breast, treating nursing like a quick snack rather than a full meal.

Supply and Demand Imbalance

If your milk supply is low or your baby isn’t latching properly, they might not get enough milk during a feed, leading to frequent nursing. This can also happen if your baby is used to snacking and hasn’t learned to take fuller feeds.

why babies snack feed

When Is It Time to Stop Snack Feeding?

Snack feeding isn’t always a problem, especially in the early weeks when your baby’s stomach is tiny, and they must nurse often. But as they grow, you might notice signs that it’s time to encourage longer, more structured feeds.

  • Your baby is over 6 months and still nursing every hour or two for just a few minutes.
  • You’re feeling drained, overwhelmed, or resentful about the constant nursing.
  • Your baby isn’t gaining weight as expected, or they seem fussy and unsatisfied after feeds.
  • You’re ready to introduce solids or a more predictable feeding schedule.

If any of these sound familiar, it might be time to guide your baby away from snack feeding gently. Don’t worry—this doesn’t mean you’re taking away their comfort. It’s about finding a balance that works for both of you.

Signs It’s Time to Stop Snack Feeding -

Image: Signs It’s time to stop Snack feeding!

How to Stop Baby Snack Feeding Breastfeeding: 7 Gentle Steps

Now that we’ve covered the why and when, let’s get to the how. These steps are designed to be gentle and gradual, ensuring your baby feels loved and secure while you transition to a more sustainable breastfeeding routine.

Step 1: Observe and Track Feeding Patterns

Start by keeping a simple log of your baby’s feeding times for a few days. Note when they nurse, how long each session lasts, and whether they seem hungry or just seeking comfort. This will help you identify patterns, like if they always snack feed before naps or when they’re bored. At BestBabyCart.com, we recommend using a feeding journal or app to make this easier. It’s a game-changer for spotting trends!

Step 2: Encourage Full Feeds with a Calm Environment

To break the snack feeding habit, encourage your baby to take fuller feeds. Create a calm, distraction-free environment during nursing—dim the lights, turn off the TV, and find a quiet spot. A relaxed setting helps your baby focus on eating rather than popping on and off. If they stop after a few minutes, gently encourage them to keep going by stroking their cheek or compressing your breast to stimulate milk flow.

Step 3: Offer Comfort in Other Ways

If your baby is snack feeding for comfort, find alternative ways to soothe them. Cuddles, a soft lullaby, or a pacifier can work wonders. I remember with my second child, a cozy swaddle and a white noise machine became our go-to for non-nursing comfort. Speaking of which, you can find highly rated white noise machines on Amazon—they’re a lifesaver for soothing without nursing!

Checklist: Alternative Comfort Methods

Use this checklist to try new soothing methods! Need a white noise machine? Shop our favorites on Amazon.

Step 4: Introduce a Feeding Schedule

Gradually space out nursing sessions to create a more predictable schedule. For example, if your baby nurses every hour, try stretching it to every 1.5 hours, then 2 hours. Offer a full feed at each session, and if they ask to nurse sooner, distract them with play, a song, or a walk in the stroller. This takes patience, but over time, your baby will adjust to longer intervals between feeds.

Should I Nurse Now

Step 5: Watch for Hunger Cues vs. Comfort Cues

Learn to distinguish between hunger and comfort cues. Hunger cues include rooting, sucking on their hands, or fussing with a specific cry. Comfort cues might look like general fussiness, wanting to be held, or reaching for you without clear hunger signs. If it’s comfort they’re after, try other soothing methods before offering the breast.

Step 6: Introduce Solids (If Age-Appropriate)

If your baby is 6 months or older, introducing solids can help reduce snack feeding. A small meal of mashed avocado or banana can make them feel fuller, reducing the need for frequent nursing. Just make sure to follow Pediatrician guidelines—start with one meal a day and gradually increase as they get used to solids. Need baby feeding gear? Check out our top picks for spoons and bibs on Amazon!

Step 7: Be Patient and Consistent

Change won’t happen overnight, and that’s okay. Be patient with your baby—and yourself. Consistency is key, but so is flexibility. If your baby is having a tough day (like during a growth spurt or teething), it’s okay to offer extra nursing sessions for comfort. You’re not failing; you’re meeting their needs with love.

Emotional Support for You During This Transition

Let’s take a moment to talk about you, mama. Stopping snack feeding can bring up a lot of emotions—guilt, sadness, or even relief. It’s normal to feel a mix of all three. Breastfeeding is such a special bond, and any change can feel like a loss, even if it’s the right step for your family.

Let Go of the Guilt

You might worry that reducing snack feeding means you’re taking away something your baby needs. But here’s the truth: you’re not. You’re teaching them new ways to feel secure while ensuring breastfeeding remains a positive experience for both of you. You’re doing an incredible job, and your baby knows they’re loved.

Find Support

Talk to other moms who’ve been through this—it helps to know you’re not alone. Join a local parenting group or connect with our community at BestBabyCart.com. Sharing your journey can make all the difference, and you might pick up some great tips along the way!

Celebrate the Wins

Every time your baby takes a full feed or goes a little longer between nursing sessions, celebrate it! Maybe treat yourself to a cup of coffee or a new book. You’re working hard, and you deserve to acknowledge your progress. This journey is as much about you as it is about your baby.

Common Challenges and How to Overcome Them

Transitioning away from snack feeding isn’t always smooth sailing. Here are some common challenges and how to handle them with grace.

Fussiness and Resistance

Your baby might fuss or cry when you delay a nursing session. This can be hard to hear, but stay calm. Offer a distraction like a toy or a short walk, and reassure them with your voice and touch. They’ll adjust with time.

Engorgement or Milk Supply Concerns

If your baby starts taking fewer but longer feeds, you might experience engorgement as your supply adjusts. Use a warm compress or hand express a little milk to relieve discomfort. Your supply will balance out within a week or two.

Teething or Growth Spurts

During teething or growth spurts, your baby might revert to snack feeding for comfort. That’s okay! Be flexible during these phases, and once they pass, gently guide them back to your new routine.

Conclusion: You’ve Got This, Mama!

Stopping snack feeding while breastfeeding is a journey, but with patience, consistency, and a whole lot of love, you and your baby can find a new rhythm that works for both of you. By encouraging full feeds, offering alternative comfort, and introducing a feeding schedule, you’ll create a breastfeeding experience that’s sustainable and fulfilling. And remember—you’re not alone. At BestBabyCart.com, we’re here to support you with expert advice and the best baby products. Ready to make nursing easier? Shop top breastfeeding essentials like nursing pillows and milk storage bags on Amazon through our site!

FAQ: Your Snack Feeding Questions Answered

Is snack feeding breastfeeding bad for my baby?

No, snack feeding isn’t inherently bad, especially in the early months when babies need frequent feeds. But as they grow, it can lead to unsatisfying feeds and exhaustion for you. Transitioning to fuller feeds can help create a better routine.

How long should a breastfeeding session last?

It depends on your baby, but most full feeds last 10-20 minutes per side. If your baby is nursing for less than 5 minutes and wants to feed again soon, they might be snack feeding.

Can I stop snack feeding without weaning completely?

Absolutely! Stopping snack feeding encourages longer, more satisfying feeds without ending breastfeeding. You can continue nursing while creating a more structured schedule.

What if my baby cries when I delay a feed?

Crying can be tough to hear, but try to stay calm. Offer comfort through cuddles, a song, or a pacifier. If they’re truly hungry, their cues will be more persistent—trust your instincts!

Will stopping snack feeding affect my milk supply?

Your supply might adjust as your baby takes fewer but longer feeds. If you experience engorgement, express a little milk for relief. Your supply will balance out within a few weeks.

Baby stroller sitting tips

Baby stroller sitting tips: Expert Guidelines for Parents

Babies can sit in a stroller when they can support their heads. This usually happens around 3 to 6 months.

But each baby is different. Parents often wonder about the right time to transition their baby to a stroller. Knowing when to make this move ensures your baby’s safety and comfort. Strollers are essential for convenient travel and outdoor activities.

But using them too early can be harmful. Understanding the right time can make outings stress-free and enjoyable. This guide will help you determine when your baby is ready. It will also provide tips to ensure a smooth and safe transition. Keep reading to learn everything you need to know about getting your little one stroller-ready.

Baby stroller sitting tips Expert Guidelines for Parents

Age Milestones

Choosing the right time for your baby to sit in a stroller can be crucial for their comfort and safety. Understanding age milestones helps parents make informed decisions. Babies grow at their own pace, but there are general stages you can expect. Knowing when your little one is ready for a stroller means looking at key developmental signs. Let’s explore these age milestones.

Newborn Stage

Newborns are delicate and need support. Their neck muscles aren’t strong enough to hold their head up. When using a stroller, choose one that reclines fully. This ensures their spine is supported and their neck is safe. Consider these important features for newborn strollers:

  • Full Recline: Allows baby to lie flat.
  • Five-point Harness: Keeps baby secure.
  • Head Support: Prevents neck strain.

Newborns often sleep. Reclining strollers allow them to nap comfortably. Look for strollers with good padding and a smooth ride. It’s important to check weight recommendations. Most newborn strollers support up to 20 pounds. Always ensure the stroller is stable. A stable stroller prevents tipping.

3-5 Months

Baby stroller sitting tips. At 3-5 months, babies start gaining head control. They might enjoy short stroller rides. Semi-reclined strollers work well during this stage. Babies can see the world without strain. Here are some features to consider:

  • Adjustable Seat: Allows semi-recline position.
  • Large Canopy: Protects from sun and rain.
  • Easy Maneuverability: Smooth turning makes rides enjoyable.

Babies love exploring new environments. Baby stroller sitting tips A stroller with a window or mesh allows them to see outside. At this age, babies enjoy interaction. Parents can talk to them during stroller rides. This enhances bonding and stimulates their senses. Remember to check the stroller’s safety features regularly.

5-7 Months

Baby stroller sitting tips. By 5-7 months, many babies sit with support. This is an exciting time for parents. Babies show interest in sitting up. Consider using strollers with upright seating. Important features include:

  • Upright Seat Option: Encourages proper posture.
  • Safety Harness: Keeps baby secure.
  • Comfort Padding: Provides extra comfort.

Babies become more curious. They love observing surroundings. A stroller with toys or a tray can be beneficial. Parents can provide snacks or toys during rides. This keeps the baby engaged and happy. Make sure the stroller is suitable for longer outings. Comfort and safety are key in this stage. Babies are more active now. Ensure the stroller is durable and well-maintained.

Stroller Features to Look For by Age

Image: Baby Sit in a Stroller


Stroller Types

Choosing the right stroller for your baby is essential. Understanding stroller types helps in making the best decision for your child’s needs. Each type offers unique features, catering to different ages and development stages. Knowing when a baby can sit in a stroller depends on stroller types and Baby sitting age. Let’s explore the different stroller types to ensure the best infant stroller use.

Infant Carriers

Infant carriers are specially designed for newborns and young babies. These strollers offer a snug fit, ensuring baby comfort in Stroller. They often come with a car seat attachment, providing seamless transition from car to stroller. But, what about an infant stroller without Car seat? It’s simple. Such models still offer secure seating and safety.

  • Developmental Milestones: Infant carriers support babies who are not yet sitting up independently.
  • Stroller Features For Infants: Reclined seating and head support are crucial.
  • Stroller Safety Guidelines: Ensure the harness is fastened securely at all times.

Choosing the right infant carrier involves understanding stroller weight limits. Babies grow quickly, and the stroller must accommodate their increasing size. Check the manufacturer’s guidelines for maximum weight. This ensures safe travel and prevents wear and tear.

Feature Description
Seating Position Fully reclined for newborns
Safety Harness 5-point harness system


Standard Strollers

Standard strollers cater to babies who have reached the baby sitting age. This typically occurs around six months, aligning with developmental milestones. These strollers provide a more upright seating position, making them ideal for babies ready to explore the world.

Considering when to transition to stroller is key. Babies should be able to support their own head and sit with minimal assistance. Standard strollers offer adjustable seats, allowing customization as the baby grows.

  • Baby Travel Gear: Ensure the stroller is lightweight for easy transport.
  • Baby Seating Position: Adjustable seats offer flexibility.
  • Stroller Safety Guidelines: Always lock the brakes when stationary.

Standard strollers come with various stroller features for infants. Some models include sun canopies, storage baskets, and adjustable handlebars. These features enhance convenience and comfort during outings. Keep an eye on stroller weight limits to ensure safety and longevity of use.

Stroller Positions By Age

Choosing the right stroller position for your baby is crucial. It ensures comfort and supports their developing body. Understanding stroller positions by age helps parents make informed decisions. Each age group has unique needs. Aligning the stroller position with your baby’s age and developmental stage is key.

Newborns: Fully Reclined Position

Newborns have limited neck and head control. They require a fully reclined stroller position. This position supports their spine and head. Always ensure the stroller provides adequate padding. Safety and comfort are the top priorities for newborns.

3-6 Months: Semi-reclined Position

At 3 to 6 months, babies start developing head and neck strength. A semi-reclined position is suitable. It allows babies to observe their surroundings. Ensure the stroller has adjustable features. Adjusting the angle as needed provides optimal support.

6-9 Months: Upright Position With Support

By 6 to 9 months, many babies can sit upright with support. An upright position is ideal for curious infants. Ensure the stroller has a supportive harness. This keeps your baby secure as they explore the world around them.

9 Months And Up: Fully Upright Position

Baby stroller sitting tips At 9 months and older, babies usually sit independently. A fully upright stroller position is suitable. This allows them to engage more with their environment. Ensure the stroller provides a comfortable seat. A five-point harness is recommended for added safety.

Age Range Recommended Stroller Position
Newborns Fully Reclined
3-6 Months Semi-Reclined
6-9 Months Upright with Support
9 Months and Up Fully Upright


Safety Features

As parents, ensuring the safety of your baby is the top priority, especially when they start using a stroller. Knowing when your baby can safely sit in a stroller is crucial. Most babies are ready around six months, but it’s essential to consider the stroller’s safety features. These features play a vital role in keeping your little one secure and comfortable during stroller rides. Below, we explore the critical safety features of strollers, focusing on harness systems and braking mechanisms.

Harness Systems

A good harness system is vital for your baby’s safety in a stroller. It keeps your baby secure, preventing them from slipping or falling out. Most strollers come with either a three-point or five-point harness system.

Three-Point Harness:

  • Secures the baby around the waist and between the legs.
  • Offers basic security but may not prevent all movements.

Five-Point Harness:

  • Provides straps over the shoulders, around the waist, and between the legs.
  • Offers greater security, keeping the baby snug and preventing excessive movements.

Choose a stroller with a five-point harness for enhanced safety. Ensure the straps are adjustable to fit your baby’s growth. Regularly check the harness for wear and tear. Always fasten the harness snugly, but not too tight, to ensure comfort and safety.

Braking Mechanisms

Braking mechanisms are critical in preventing accidental movement of the stroller. They ensure the stroller stays in place when parked. There are two main types of braking systems:

Foot-Operated Brakes:

  • Located near the wheels for easy access.
  • Engage by pressing down with your foot.
  • Ensure they lock both rear wheels to prevent rolling.

Hand-Operated Brakes:

  • Typically found on the handlebar.
  • Offer quick access, especially on uneven terrain.
  • Useful for jogging strollers where immediate control is needed.

Regularly test the brakes to ensure they engage and release smoothly. Clean any debris from the braking system to maintain functionality. Always use the brakes when stopping, even on flat surfaces, for added safety. A reliable braking system gives you peace of mind during every outing.

Comfort Considerations

Understanding when a baby can sit in a stroller is crucial for their safety and comfort. Comfort considerations play a pivotal role in ensuring that your little one enjoys the ride and stays cozy. Parents often prioritize comfort to make outings enjoyable and stress-free. Selecting the right stroller involves assessing features that cater to your baby’s comfort needs. This section delves into crucial aspects of stroller comfort, focusing on seat padding and weather protection.

Seat Padding

Seat padding is a vital component of stroller comfort. A well-padded seat offers support and cushioning for your baby. Babies are delicate and need adequate support to prevent discomfort. Quality padding can make a significant difference in how your baby feels during rides.

  • Soft Material: Look for strollers with soft, breathable materials. This prevents irritation on sensitive skin.
  • Adjustable Padding: Some strollers offer adjustable padding. This allows customization based on your baby’s age and size.
  • Removable Padding: Removable padding is easier to clean. It ensures hygiene and freshness.

Consideration of padding is essential for long-term use. Babies grow quickly, and adjustable padding caters to this growth. A Table below highlights key features to look for:

Feature Description
Material Soft, breathable fabric
Adjustability Customizable fit for growth
Removability Easy cleaning


Choosing a stroller with these features ensures a comfortable ride for your baby.

Weather Protection

Weather protection is crucial for stroller comfort. Babies are sensitive to weather changes, and suitable protection keeps them safe and cozy. Strollers come equipped with features that shield your baby from harsh weather elements.

[xyz-ihs snippet=”stroller-safety-checklist”]

  1. Canopy: A sturdy canopy shields your baby from the sun. It prevents direct exposure to harmful UV rays.
  2. Rain Cover: Ensure the stroller has a rain cover. This protects your baby from rain and keeps them dry.
  3. Wind Shield: Some strollers offer wind shields. These prevent cold winds from affecting your baby’s comfort.

Weather protection features are essential for all-season use. They ensure outings are pleasant regardless of weather conditions. A table below outlines important weather protection features:

Protection Type Benefit
Canopy Sun protection
Rain Cover Water resistance
Wind Shield Wind resistance


Investing in a stroller with these features guarantees your baby’s comfort in various weather conditions.

Baby’s Posture

Understanding when your baby can sit in a stroller is crucial for their comfort and safety. A key factor is the baby’s posture, which plays a significant role in determining readiness. Babies develop posture control in stages, and recognizing these stages helps parents make informed decisions. A stroller is more than a convenience; it’s a space where your baby can explore the world safely. Ensuring your baby’s posture is well-supported will enhance their stroller experience.

How To Check Postural Control

Postural control is a baby’s ability to maintain a stable position. It involves using muscles to support and move the body. To check your baby’s postural control, observe these key signs:

  • Trunk Stability: Your baby should hold their torso upright without slouching.
  • Balance: Look for the ability to keep balance when slightly pushed.
  • Strength: Notice if your baby can pull themselves to a sitting position.

To assess postural control, use a simple test:

Activity What to Observe
Sitting on your lap Check if your baby leans or sits upright.
Playing with toys Note if your baby can reach without losing balance.


Postural control involves core muscles. Strengthening these muscles is a gradual process. Regular tummy time and supported sitting can aid development. Pay attention to your baby’s cues and progress.

Head And Neck Control

Head and neck control is a fundamental milestone. It involves the ability to hold the head steady without support. This control usually develops around three to four months of age. Strong head and neck control is crucial for safe stroller use.

To evaluate head and neck control, consider these indicators:

  • Head Stability: Check if your baby can hold their head steady when upright.
  • Neck Muscle Strength: Notice if your baby can lift their head during tummy time.
  • Response to Movement: Observe how your baby reacts to sudden movements or gentle rocking.

Supporting your baby’s head with your hand while they sit can test their control. Babies who frequently have tummy time usually develop better head control. A firm neck ensures your baby can look around comfortably and safely in a stroller.

Sitting Up Independently

Sitting up independently is a significant developmental milestone. Babies typically achieve this between six to nine months. It indicates that your baby has developed enough strength and balance.

Signs that your baby is ready to sit up independently include:

  • Balance: Your baby can maintain a sitting position without support.
  • Core Strength: They can reach for toys without toppling over.
  • Coordination: Your baby can move from sitting to other positions smoothly.

Encourage independent sitting by providing opportunities to practice. Use pillows for support during the early stages. A safe, soft surface is ideal for practicing balance. Once your baby sits unaided, they are closer to sitting comfortably in a stroller.

When It’s Time To Let Your Baby Sit Upright In A Stroller

Deciding when to let your baby sit upright in a stroller depends on their developmental milestones. Ensure your baby shows signs of readiness before making the transition.

Here’s a checklist to help determine readiness:

  1. Stable Head Control: Your baby holds their head without wobbling.
  2. Independent Sitting: They can sit on their own for short periods.
  3. Postural Control: Your baby maintains balance in a sitting position.

Once your baby meets these criteria, adjust the stroller seat to an upright position. Ensure the stroller has adequate harness support. Keep initial stroller outings short to gauge your baby’s comfort. Being attentive to your baby’s posture will keep them safe and secure.

Usage Guidelines

Choosing the right time for your baby to sit in a stroller is crucial. It ensures safety and comfort. Usage guidelines help parents make informed decisions. They address key concerns. From how long a baby should sit to supervision needs, these guidelines are essential. They also consider factors like age and development. Consulting a pediatrician is always a wise step.

Duration Limits

Understanding duration limits is important for your baby’s health. Babies have delicate bodies. Prolonged sitting can be uncomfortable. It may also hinder development. Here are some general guidelines:

  • Newborns: Use a stroller with a fully reclining seat. Limit to 30 minutes.
  • 3 to 6 months: Choose a semi-reclined position. Limit to 1 hour.
  • 6 months and older: A seated position is fine. Limit to 2 hours.

These limits ensure your baby stays comfortable. They also prevent any strain on their developing spine. Always consider your baby’s comfort. Adjust the time spent in the stroller accordingly.

Supervision Needs

Active supervision is vital. Babies need constant attention. This prevents accidents and ensures safety. Here are some key points to remember:

  1. Always keep the stroller within sight.
  2. Ensure safety belts are securely fastened.
  3. Check for potential hazards. Uneven paths can be dangerous.
  4. Avoid using the stroller near busy streets.

Supervision is not just about watching. It’s about being present. Stay alert to your baby’s needs. Respond promptly to any discomfort they show.

Factors To Consider

Several factors influence when a baby can sit in a stroller. These include:

  • Age and Development: Babies develop at different rates. Some may be ready earlier.
  • Stroller Design: Ensure it’s suitable for your baby’s size and weight.
  • Weather Conditions: Avoid extreme temperatures. They can affect your baby’s comfort.
  • Activity Type: Consider the length and purpose of outings.

These factors help tailor stroller use to your baby’s needs. They ensure safety and comfort. Always prioritize what is best for your baby.

Consult Your Pediatrician

It’s wise to consult your pediatrician before making decisions. They offer professional guidance. They consider your baby’s unique health needs. Here are some reasons to consult them:

  • Evaluate your baby’s physical development.
  • Receive personalized advice on stroller use.
  • Discuss any concerns about posture or comfort.
  • Understand potential health implications.

Pediatricians are experts in child health. Their advice can ensure you make informed decisions. It also provides peace of mind. Knowing your baby is safe and comfortable is priceless.

Travel Tips

Traveling with a baby can be exciting yet challenging. As your little one grows, knowing when they can sit in a stroller becomes crucial. Once your baby can sit up independently, usually around six months, you can safely use a stroller. To ensure a smooth journey, consider these travel tips. They make your trip more enjoyable and stress-free.

Packing Essentials

Packing for a trip with a baby requires careful planning. Here are some essentials to keep in mind:

  • Diapers and Wipes: Always pack more than you think you’ll need.
  • Extra Clothes: Babies can be messy. Pack a change of clothes for both you and your baby.
  • Snacks and Milk: Bring your baby’s favorite snacks and formula or breast milk.
  • First Aid Kit: Include baby-friendly medications, band-aids, and a thermometer.
  • Toys and Books: Keep your baby entertained with lightweight toys and books.

It might be helpful to organize these items in a table for quick reference:

Item Quantity
Diapers 10-12
Wipes 1 pack
Clothes 2-3 sets
Snacks Varies
First Aid Kit 1


Stroller Accessories

Stroller accessories can enhance your baby’s comfort and your convenience. Consider the following:

  • Sunshade: Protects your baby from harsh sunlight.
  • Rain Cover: Keeps your baby dry during unexpected showers.
  • Organizers: Attach to the stroller for storing diapers, wipes, and bottles.
  • Footmuff: Ensures warmth in cooler weather.
  • Stroller Fan: Ideal for hot days to keep your baby cool.

These accessories not only provide comfort but also add convenience to your travel. A stroller equipped with the right accessories can make outings much more pleasant. Always consider the weather and the length of your trip when choosing accessories.

Transitioning Stages

As your baby grows, their needs and abilities change. One of the key milestones in their development is when they can sit in a stroller. This marks a significant transition in their early life. Understanding these transitioning stages helps ensure your baby’s comfort and safety. Observing your baby’s development milestones will guide you in making the right choices. This includes knowing when to use the stroller and when it’s time for an upgrade.

From Stroller To Walker

Transitioning from a stroller to a walker is a big step in your child’s growth. It requires careful consideration of their physical abilities and safety needs. Babies typically start using a stroller when they can sit with support. Infant stroller safety features, such as adjustable recline and harnesses, provide the necessary support.

Before moving to a walker, ensure your baby can sit without assistance. This shows they have developed the necessary muscle strength and balance. Here are some signs that your baby might be ready:

  • Sitting without support for several minutes.
  • Showing interest in exploring surroundings.
  • Attempting to pull themselves up.

It’s also important to consider stroller alternatives for toddlers. Some parents choose options like baby carriers or backpacks. These can be suitable for short outings or when navigating crowded areas. Each choice depends on your baby’s comfort and your lifestyle.

When To Upgrade

Understanding when to upgrade your baby’s stroller is crucial for their comfort and safety. Each stroller has a stroller weight limit which must be adhered to. Overloading a stroller can compromise its stability and safety.

Typically, a baby stroller age guide is provided by manufacturers. This indicates the suitable age range for each stroller model. Pay attention to these guidelines to ensure your stroller remains a safe option.

Consider the following factors when deciding if it’s time to upgrade:

  1. Baby sitting position: Ensure your child is comfortable and well-supported.
  2. Baby sitting support: Check for adequate padding and harness support.
  3. Look for stroller features for infants such as adjustable recline and sun protection.

As your baby grows, their needs will change. Transitioning from stroller to other modes of transport will be necessary. Always prioritize safety and comfort. This ensures a happy and healthy development journey for your little one.

When Can Your Baby Sit in a Stroller


Frequently Asked Questions

Can A 4 Month Old Sit In A Stroller?

A 4-month-old can sit in a stroller if it reclines fully. Ensure the stroller provides proper head and neck support. Always use safety harnesses to keep the baby secure. Check stroller guidelines for age recommendations to ensure safety.

When Can A Baby Sit In A Stroller Without A Car Seat?

Babies can sit in a stroller without a car seat around 6 months old. Ensure they have good neck and head control. Always check stroller guidelines for safety recommendations specific to your model.

When Should A Baby Stop Using A Bassinet Stroller?

Babies should stop using a bassinet stroller when they reach 20 pounds or can push up on hands and knees. This typically occurs around 4 to 6 months old. Always check the manufacturer’s guidelines for specific weight and age limits.

Transition to a regular stroller for safety.

When To Move Baby From Bassinet To Stroller?

Move baby from bassinet to stroller when they can sit up independently, usually around 6 months. Ensure stroller is suitable for their age and provides proper support. Always follow manufacturer guidelines for weight and age limits. Safety and comfort should be prioritized in making this transition.

Conclusion

Choosing the right time for your baby to sit in a stroller is important. Safety comes first, so make sure your baby can sit up independently. Usually, this happens around six months. Every baby is different, so watch for cues.

Your baby should have good neck and head control. Comfort is key for both you and your baby. Follow these guidelines, and you’ll enjoy your strolls together. Trust your instincts and consult your pediatrician if unsure. Happy strolling!


How Many Socks for Baby

How Many Socks for Baby: Essential Guide for New Parents


Babies need socks to keep their tiny feet warm and cozy. But how many pairs should you buy?

It’s a question many new parents ask. Keeping up with a baby’s needs can be challenging. Babies often spit up or have accidents, which means their clothes, including socks, need frequent changes. Having enough socks on hand can make daily life much easier.

In this blog post, we will explore the ideal number of socks for your baby. We will consider factors like the baby’s age, the climate, and laundry routines. Let’s dive in and find out how many socks your baby truly needs!

Introduction To Baby Socks

When preparing for a new baby, one of the small yet essential items on your list will be baby socks. These tiny garments play a crucial role in keeping your baby’s feet warm and protected. Understanding their importance and choosing the right ones can make a big difference in your baby’s comfort.

Importance Of Baby Socks

Baby socks help keep your baby’s feet warm. Babies lose heat faster than adults. Their feet can get cold quickly, especially in cooler weather. Keeping their feet warm helps to maintain their overall body temperature.

Socks also protect your baby’s feet. They act as a barrier against dirt and rough surfaces. This is important as your baby begins to explore their environment. Socks can help prevent minor injuries and keep their feet clean.

Choosing The Right Socks

Pick socks made from soft, breathable materials. Cotton is an excellent choice. It is gentle on your baby’s skin and allows their feet to breathe. Avoid synthetic materials that can cause irritation or overheating.

Ensure the socks fit well. Too tight can restrict circulation. Too loose and they can slip off. Look for socks with a bit of stretch for a snug but comfortable fit. Check the sock’s design. Look for smooth seams and a snug fit around the ankles. This will prevent the socks from slipping off and causing discomfort.

Consider the season. Thicker socks are better for cold weather. Lightweight socks are ideal for warmer months. Having a variety of socks ensures your baby is comfortable in any season.

Types Of Baby Socks

Choosing the right socks for your baby can be a daunting task. There are many types, each designed for different needs. Knowing what works best can help keep your baby comfortable and safe. Below, we discuss the different types of baby socks to help you make an informed choice.

Cotton Socks

Cotton socks are a popular choice for many parents. They are soft, breathable, and gentle on a baby’s skin. These socks are perfect for everyday wear. The breathable fabric helps in keeping the baby’s feet cool. Cotton socks are also easy to wash and maintain. They come in various colors and patterns, making them both practical and stylish.

Woolen Socks

Woolen socks are ideal for colder weather. They provide warmth and insulation, keeping your baby’s feet snug. Wool is a natural fiber, which means it can regulate temperature well. These socks are perfect for winter months or cold climates. They may require special care when washing. Always check the care label to ensure longevity.

Non-slip Socks

Non-slip socks are designed with safety in mind. They have rubber grips on the soles to prevent slipping. These socks are great for babies who are learning to walk. The grips provide extra stability on smooth surfaces. Non-slip socks are available in various materials, including cotton and wool. They combine comfort with safety, making them a smart choice for active babies.

Factors To Consider

When determining how many socks your baby needs, several factors come into play. It’s essential to consider these aspects to ensure your baby is comfortable and well-prepared for any situation. Let’s explore the key factors you should think about.

Seasonal Needs

The number of socks your baby needs can vary with the seasons. During colder months, babies require more pairs to keep their feet warm. In warmer months, fewer pairs may suffice. Here’s a simple table to help guide you.

Season Recommended Pairs
Winter 10-12 pairs
Spring 6-8 pairs
Summer 4-6 pairs
Fall 8-10 pairs


Baby’s Age

The age of your baby also influences the number of socks needed. Younger babies might need more frequent changes. As they grow, their needs change.

  • Newborns (0-3 months): 10-12 pairs
  • Infants (3-12 months): 8-10 pairs
  • Toddlers (1-2 years): 6-8 pairs

Activity Level

Active babies who crawl or walk need more socks. They tend to get dirty faster. Consider their activity level to decide how many pairs to have on hand.

  1. Low activity: 6-8 pairs
  2. Moderate activity: 8-10 pairs
  3. High activity: 10-12 pairs

These factors help you determine the right amount of socks for your baby. Always have a few extra pairs for emergencies.

How Many Socks for Baby: Essential Guide for New Parents

Credit: www.amazon.com

How Many Pairs To Buy

Buying socks for a baby can be tricky. Babies grow fast, and their needs change quickly. It is important to know how many pairs to buy for each stage of their early years. This guide will help you understand the right number of socks for your baby at different stages.

Newborn Stage

Newborns need many socks. They often spit up or have accidents. You’ll need to change their socks often. Aim for 7 to 10 pairs. This gives you enough for daily changes and laundry days.

Infant Stage

Infants are more active. They kick and move a lot. Their socks may get dirty faster. Plan to have 10 to 14 pairs. This ensures you always have clean socks ready.

Toddler Stage

Toddlers are very active. They walk, run, and play. Their socks will wear out quickly. You should have 12 to 15 pairs. This way, you always have a fresh pair ready.

Caring For Baby Socks

Caring for baby socks is an essential part of baby care. Baby socks need proper washing and storing to stay clean and last longer. Follow these simple tips to keep your baby’s socks in the best condition.

Washing Tips

Always use a mild detergent for baby socks. Harsh chemicals can irritate your baby’s skin. Wash socks in cold water to prevent shrinking. This keeps the socks soft and comfortable. Turn the socks inside out before washing. This helps remove dirt and protects the fabric. Use a laundry bag for baby socks. This prevents them from getting lost or tangled.

Storing Tips

Store baby socks in a dedicated drawer. This makes them easy to find. Use small bins or dividers to keep pairs together. This prevents mismatching and saves time. Roll socks into pairs before storing. This keeps them organized and neat. Label the storage bins if needed. This helps other caregivers find the right socks quickly.


Common Sock Problems


Parents often face common sock problems for their babies. These issues can be frustrating. They can also be frequent. Let’s explore some of the most common sock problems.

Lost Socks

Lost socks are a common issue. Babies often kick off their socks. This can happen during playtime or naps. Socks can disappear in the laundry. They might get mixed up with other clothes. Parents might find just one sock. The other one is nowhere to be seen. This can lead to mismatched pairs.

Outgrown Socks

Babies grow very fast. Their feet grow quickly too. Socks that fit today might not fit tomorrow. Tight socks can be uncomfortable. They can leave marks on the baby’s skin. Loose socks can fall off. Check the size of your baby’s socks often. Make sure they fit well.

Eco-friendly Sock Options

Choosing eco-friendly socks for your baby is a great step towards a sustainable future. These options not only benefit the environment but also ensure your baby’s comfort and safety. Below are some eco-friendly choices to consider.

Organic Materials

Organic materials are free from harmful chemicals and pesticides. This makes them ideal for baby socks.

Organic cotton is soft, breathable, and gentle on your baby’s skin. It reduces the risk of allergies and skin irritation.

Bamboo fibers are another excellent option. They are naturally antibacterial and moisture-wicking, keeping your baby’s feet dry and fresh.

Sustainable Brands

Sustainable brands focus on eco-friendly production methods. They ensure minimal environmental impact.

Here are a few sustainable brands that offer eco-friendly baby socks:

  • Brand A: Uses organic cotton and recycled packaging.
  • Brand B: Specializes in bamboo fiber socks.
  • Brand C: Offers a range of natural wool socks.

Supporting these brands not only helps the environment but also promotes ethical practices in the fashion industry.

Where To Buy

Wondering where to buy socks for your baby? You have many options. Let’s explore them in detail.

Online Stores

Online shopping offers convenience and variety. Websites like Amazon and Walmart have a wide range of baby socks. You can find different sizes, colors, and patterns. Online reviews help you choose the best products. Many stores offer fast shipping. Some even provide free returns, making it easy to exchange sizes.

Local Baby Shops

Local baby shops are great for personalized service. Staff can help you find the right size and material. You can feel the fabric before buying. Small stores often stock unique designs not found online. Supporting local businesses helps your community. Plus, you get to shop in a cozy, friendly environment.

How Many Socks for Baby: Essential Guide for New Parents

Credit: www.etsy.com

Frequently Asked Questions

How Many Socks Should A Newborn Have?

A newborn should have around 7-10 pairs of socks. This ensures they have enough for daily changes and unexpected messes.

What Size Socks For A Baby?

Baby socks should fit snugly without being too tight. Sizes vary, but typically, newborn socks fit babies 0-3 months.

How Often To Change Baby Socks?

Baby socks should be changed daily or whenever they get dirty or wet. Regular changes keep feet clean and healthy.

Are Baby Socks Necessary?

Yes, baby socks keep their feet warm and protected. They are especially important in cooler weather or air-conditioned environments.

Conclusion

Choosing the right number of socks for your baby is essential. Keep your baby’s feet warm and comfortable. Consider factors like age, weather, and laundry frequency. Regularly check for signs of outgrown socks. Always have a few extra pairs on hand.

This ensures you are prepared for any situation. Remember, comfort is key for your little one’s tiny toes. With these tips, you’ll easily manage your baby’s sock needs. Happy parenting!

cloth diapers essential guide for parents

How Many Cloth Diapers Should a Baby Have: Essential Guide for Parents

Every parent wonders, How many cloth diapers should a baby have? The answer depends on several factors.

Cloth diapering can be overwhelming at first. New parents might feel unsure about how many diapers to buy. This confusion is normal. Babies need frequent diaper changes, especially in the early months. Cloth diapers are eco-friendly and cost-effective, but only if you have enough on hand.

The number you need varies based on washing frequency, baby’s age, and personal preference. Understanding these factors can help you make an informed decision. In this guide, we will explore how many cloth diapers your baby might need. We will break down the essentials to make your cloth diapering journey easier.

diapering guide


Introduction To Cloth Diapers

Cloth diapers are making a comeback. Many parents are choosing these eco-friendly alternatives over disposable diapers. But what makes cloth diapers so appealing? Let’s dive into the basics.

Benefits Of Cloth Diapers

Cloth diapers are reusable. This means you buy them once and use them many times. They are also cost-effective in the long run. You save money by not buying disposables.

Cloth diapers are gentle on your baby’s skin. They contain fewer chemicals compared to disposables. This reduces the risk of diaper rash. Plus, they are environmentally friendly. Less waste ends up in landfills.

Types Of Cloth Diapers

There are various types of cloth diapers. Each has its own features. The most common types include pre-folds, fitted, pocket, and all-in-one diapers.

Pre-folds are simple and affordable. They require a waterproof cover. Fitted diapers look like disposables but need a cover as well. Pocket diapers have a pocket for inserting absorbent material. All-in-one diapers are the most convenient. They combine absorbent material and a waterproof cover in one piece.

Each type has its pros and cons. Choose based on your needs and preferences.

Determining The Right Quantity

Determining the right quantity of cloth diapers for your baby can be challenging. The number of cloth diapers you’ll need varies based on several factors. Let’s delve into the key considerations to help you make an informed decision.

Factors To Consider

Several factors influence the number of cloth diapers your baby needs. Understanding these factors will guide you in making the right choice.

  • Laundry Frequency: How often you plan to wash diapers.
  • Storage Space: The amount of space you have for storing clean and dirty diapers.
  • Budget: The amount you are willing to invest in cloth diapers.
  • Diaper Type: Different types of cloth diapers have different absorbency levels.

Age And Usage Patterns

A baby’s age and usage patterns play a crucial role in determining the number of cloth diapers required.

[wpdatatable id=1 table_view=regular]

Newborns require more frequent diaper changes. This means you will need a higher quantity of cloth diapers. As your baby grows, the frequency of diaper changes decreases. Thus, the number of cloth diapers you need also decreases.

By considering these factors and understanding your baby’s age and usage patterns, you can determine the right quantity of cloth diapers to keep your baby comfortable and dry.

Newborn Stage

The newborn stage is a special time for parents and babies. Babies need frequent diaper changes due to their delicate skin and frequent feeding. Understanding how many cloth diapers a newborn should have can help parents stay prepared and comfortable during this stage.

Frequent Changes

Newborns typically need their diapers changed every 2-3 hours. This frequency is due to their small bladder capacity and frequent feedings. Wet diapers and bowel movements are common, making frequent changes essential to avoid diaper rash.

In a day, you might change your newborn’s diaper about 10-12 times. This means you will need a good supply of cloth diapers to keep up with their needs.

Ideal Number Of Diapers

To determine the ideal number of cloth diapers for a newborn, consider these factors:

  • Washing Frequency: How often do you plan to wash the diapers?
  • Drying Time: How long it take for the diapers to dry.
  • Backup Supply: Having extra diapers for emergencies.

Here is a basic guideline for the ideal number of cloth diapers:

[wpdatatable id=3 table_view=regular]

These numbers ensure you have enough clean diapers available while others are being washed and dried. Having a sufficient number of cloth diapers can make the newborn stage smoother for both parents and babies.

Infant Stage

The infant stage is a critical period for parents using cloth diapers. Babies in this stage grow rapidly and have unique needs. Understanding these needs helps in deciding how many cloth diapers to have on hand.

Growth And Changes

During the infant stage, babies grow quickly. They may outgrow their clothes and diapers faster than expected. This means frequent changes in diaper size and type.

Newborns usually require 12-15 diaper changes daily. This high frequency is due to their small bladder and frequent feedings. It’s essential to have enough diapers to accommodate this demand.

Here is a table to illustrate the number of diaper changes needed during the infant stage:

Age (Months) Diaper Changes per Day

0-3

12-15
3-6 10-12


Adjusting The Quantity

Adjust the number of cloth diapers based on your baby’s growth and changes. For a newborn, having around 24-36 cloth diapers is ideal. This quantity allows for a comfortable rotation between washing and drying.

For infants aged 3-6 months, you might need fewer diapers. Around 20-24 cloth diapers should suffice. This adjustment is due to the reduced number of diaper changes per day.

Consider these key factors when deciding on the quantity:

  • Washing frequency: How often you plan to wash diapers.
  • Drying time: Time it takes for diapers to dry.
  • Baby’s growth rate: Rapid growth may require more frequent updates in size.

By considering these factors, you can ensure you always have enough cloth diapers for your infant.

Toddler Stage

As your baby grows into a toddler, their diaper needs change. They become more active and begin to show signs of potty training readiness. This stage is crucial for both parents and toddlers as it marks a transition period.

Potty Training

During the toddler stage, many parents start potty training. This means your child will gradually use fewer diapers. It’s important to have a good mix of cloth training pants and regular cloth diapers. Training pants help toddlers feel wetness, encouraging them to use the potty.

Reduced Need For Diapers

As potty training progresses, the need for diapers reduces. Toddlers might only need diapers during naps and nighttime. Having 15-20 cloth diapers should be enough during this stage. This number allows for fewer changes and less frequent washing.

Laundry Routine

Understanding the laundry routine is crucial when using cloth diapers. It ensures your baby always has clean diapers ready. A well-planned routine helps maintain hygiene and convenience.

Washing Frequency

Washing cloth diapers frequently is key. Ideally, wash them every 2-3 days. This prevents stains and odors. It also keeps your diapers in good condition.

Here’s a simple wash routine:

  1. Rinse the diapers in cold water to remove waste.
  2. Wash with a cloth diaper-safe detergent in hot water.
  3. Rinse again to ensure all detergent is removed.
  4. Dry the diapers. Air drying is best, but a dryer on low heat works too.

Following this routine ensures your diapers stay clean and last longer.

Backup Supply

It’s wise to have a backup supply of cloth diapers. This ensures you don’t run out while washing a batch. Aim for at least 24-36 diapers for a newborn. Older babies may need fewer.

Here’s a quick reference table:

Age Diapers Needed
Newborn 24-36
3-6 months 20-30
6-12 months 18-24
12+ months 14-20

Having a sufficient backup supply ensures you are never caught without a clean diaper.

Budget Considerations

Choosing cloth diapers for your baby can be both economical and eco-friendly. But how many cloth diapers should a baby have? Let’s explore the budget considerations. Understanding the costs can help you decide the right number of cloth diapers to buy.

Cost Comparison

Cloth diapers may seem expensive at first. A single cloth diaper costs between $15 and $25. Disposable diapers cost less upfront. A pack of 100 disposable diapers costs around $30. But disposable diapers need to be bought again and again. Cloth diapers are reusable. This makes them a one-time investment. Over time, cloth diapers save money.

Long-term Savings

Using cloth diapers saves money in the long run. Babies use around 2,500 to 3,000 diapers in the first year. Using cloth diapers reduces the need to buy new diapers constantly. Cloth diapers last through multiple children. This means you save even more. Families with more than one child see even higher savings.

Additional Tips

Choosing the right amount of cloth diapers for your baby can be tricky. But having a few additional tips can make the process smoother and more efficient. Here are some practical tips to help you manage your cloth diaper stash effectively.

Storage Solutions

Proper storage keeps your cloth diapers organized and clean. Use a dedicated diaper pail or wet bag to store used diapers until wash day. Keep clean diapers in a dry, cool place to prevent mold and mildew. Consider a diaper caddy for easy access during changes. Label different compartments for various diaper types and sizes. This way, you always know where everything is.

Managing Wear And Tear

Cloth diapers can wear out over time if not cared for properly. Rotate your diaper stash to ensure even usage. This helps extend the life of each diaper. Follow the manufacturer’s washing instructions to avoid damaging the fabric. Avoid using bleach or fabric softeners, as they can degrade the material. Inspect your diapers regularly for signs of wear and tear. Replace any worn-out elastics or snaps to maintain functionality. Keeping your cloth diapers in good condition ensures they last longer and remain effective.

Frequently Asked Questions

👉 How Many Cloth Diapers Do I Need?

A newborn typically needs 20-24 cloth diapers. This allows for frequent changes. As they grow, fewer diapers are needed.

👉 How Often Should I Change Cloth Diapers?

Change cloth diapers every 2-3 hours. This helps prevent rashes and keeps the baby comfortable.

👉 Can I Use Cloth Diapers At Night?

Yes, you can use cloth diapers at night. Opt for more absorbent options or add inserts for extra protection.

👉 Are Cloth Diapers Cost-effective?

Yes, cloth diapers are cost-effective. They save money in the long run compared to disposable diapers.

Conclusion

Choosing the right number of cloth diapers is essential. Consider your baby’s needs and washing routine. Most families find 20-24 diapers sufficient. Remember, having extras can be helpful during busy days. Cloth diapers are eco-friendly and cost-effective. They also keep your baby comfortable.

With proper planning, you can easily manage cloth diapering. When deciding “how many cloth diapers should a baby have,” it’s important to consider factors like washing frequency and backup supply. Your baby will stay happy and dry. Thank you for reading.