When To Turn Car Seat Forward Facing

When To Turn Car Seat Forward Facing: Safety Guide

Most children should remain rear‑facing until at least age two or until they outgrow the seat.

I have worked with parents, safety technicians, and child passenger safety trainers to help families decide when to turn car seat forward facing. This guide breaks down the rules, real-world signs, step‑by‑step transitions, and common mistakes so you can make a safe, confident choice about when to turn car seat forward facing. Read on for clear, practical advice based on current guidelines and hands‑on experience.
When to turn car seat forward facing: Why rear‑facing is safer
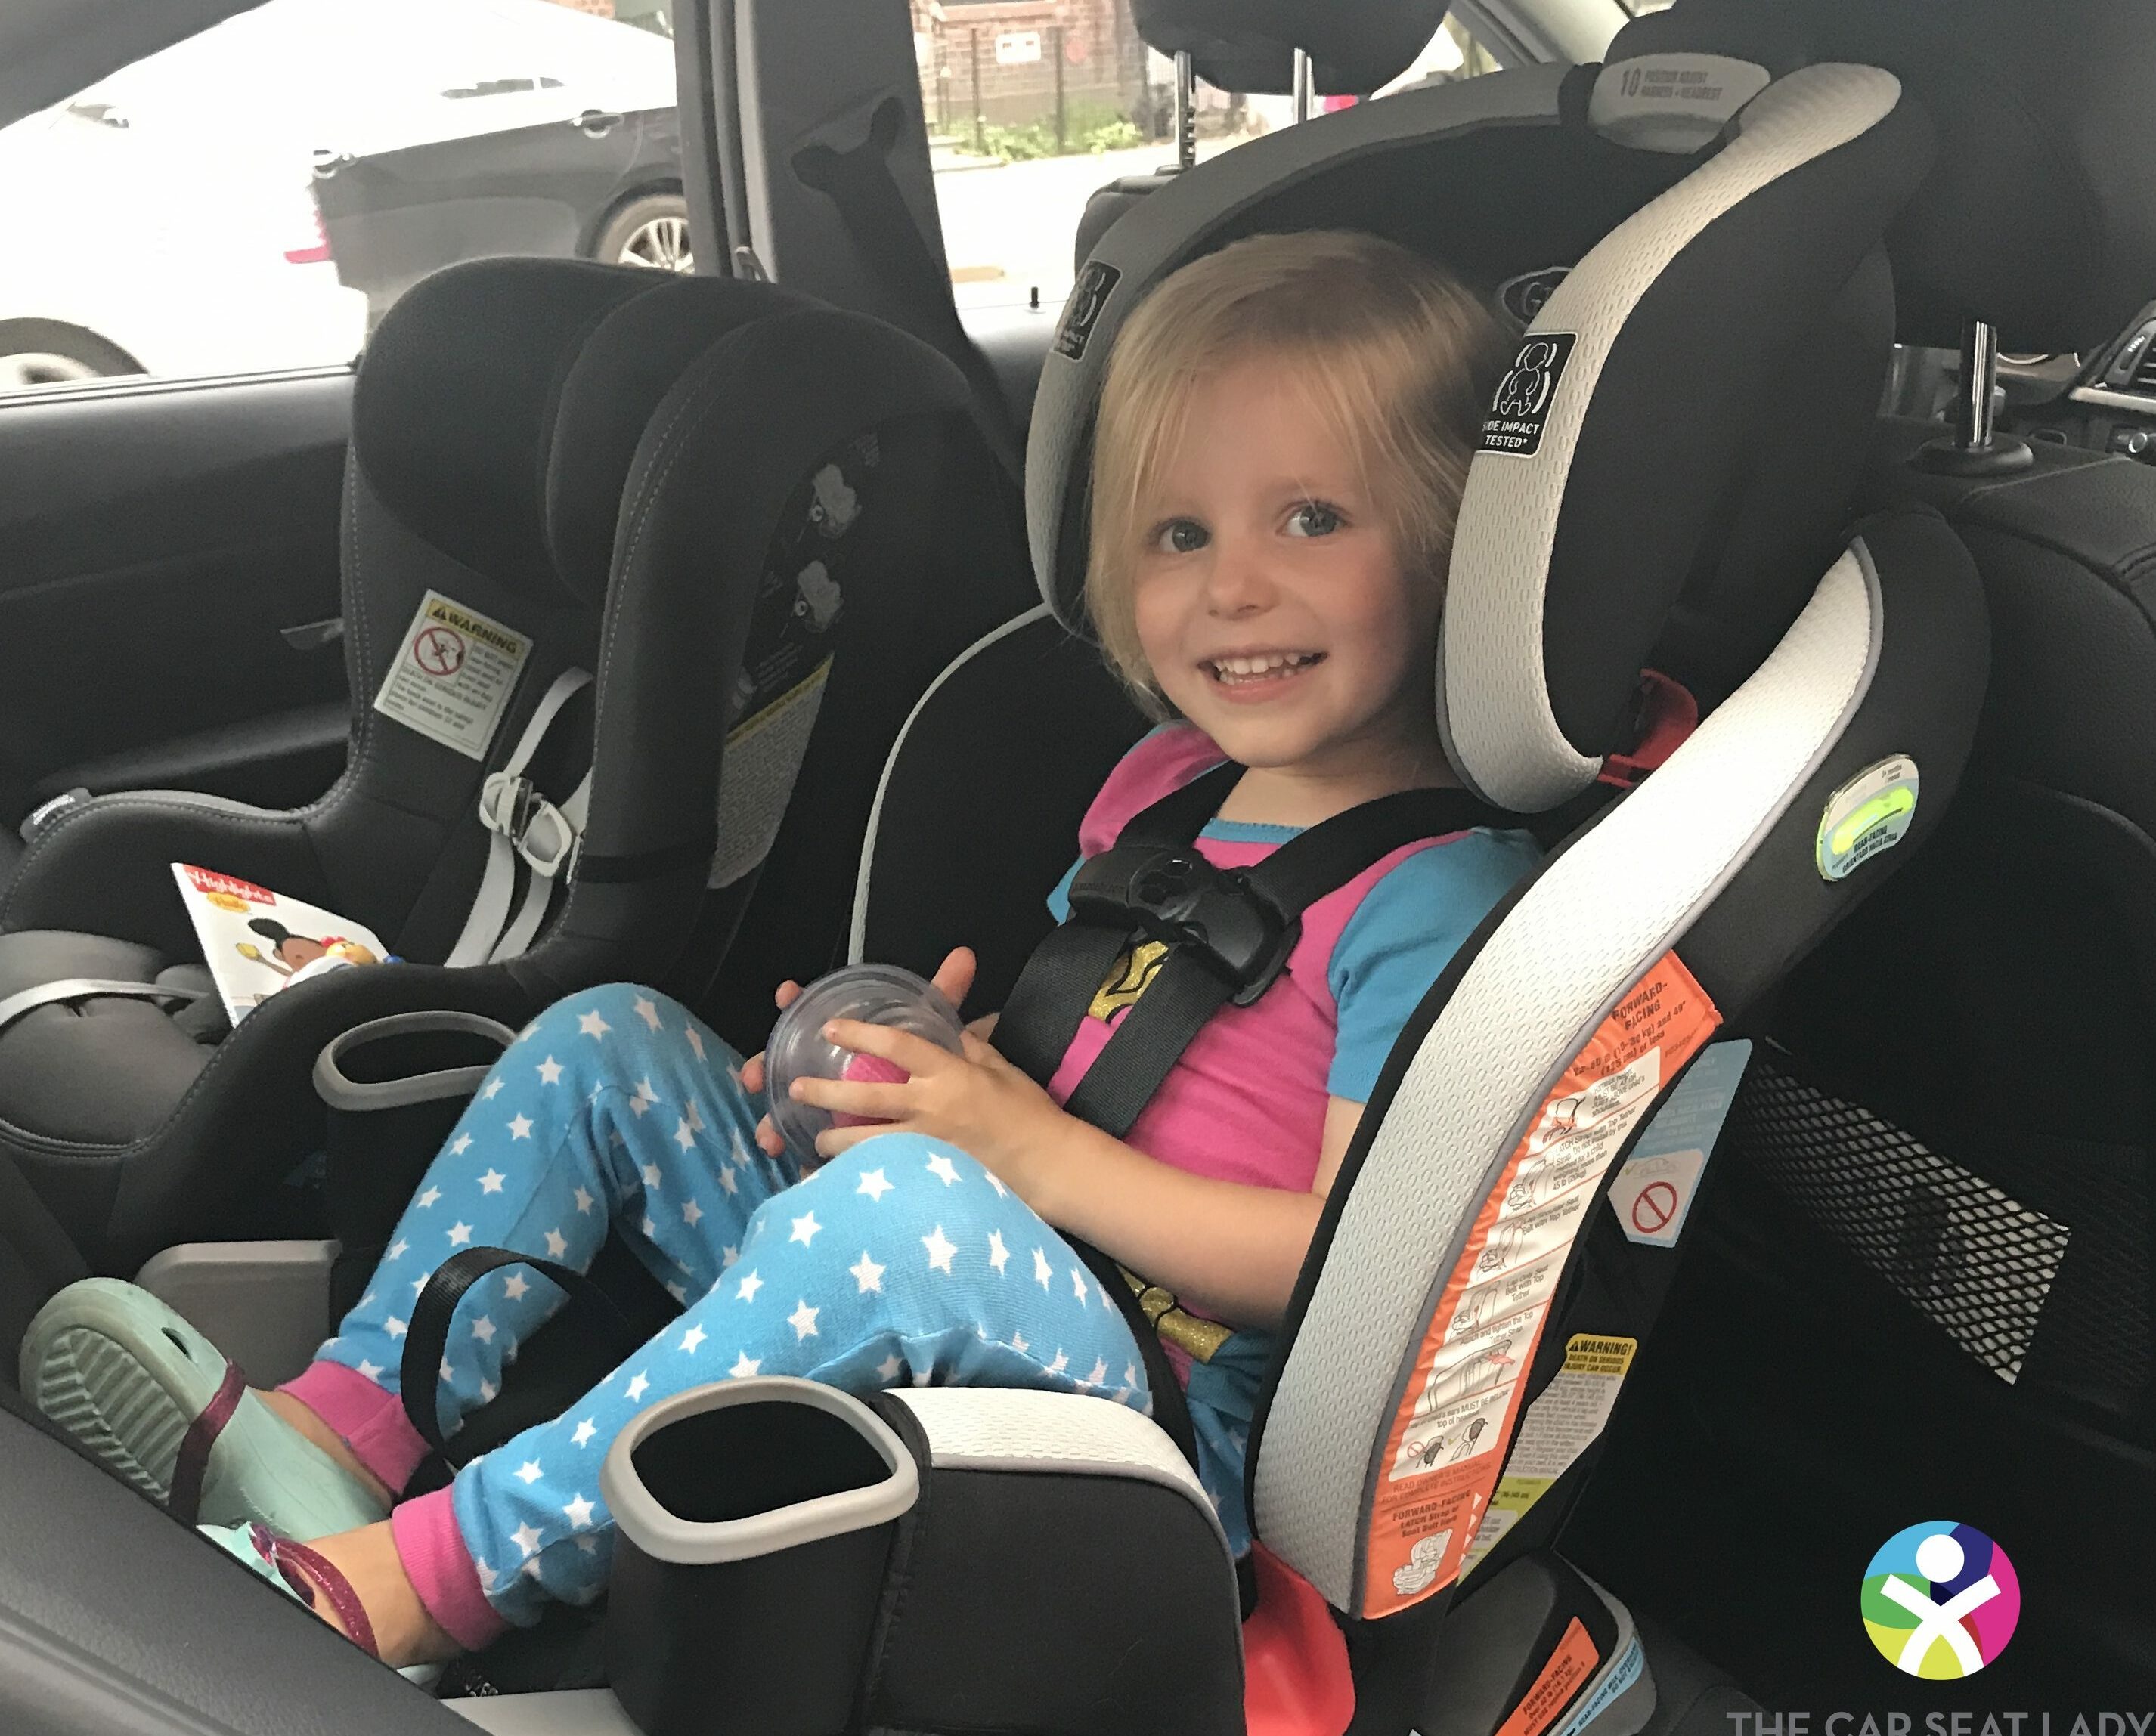
Source: thecarseatlady.com

When to turn car seat forward facing: Why rear‑facing is safer

Rear‑facing supports a child’s head, neck, and spine in a crash. The force of a collision is spread across the shell of the car seat. This reduces stress on the spine and neck. That is why experts recommend staying rear‑facing as long as possible before you consider when to turn car seat forward facing.

Children’s bones and soft tissues develop quickly. Younger children have larger heads relative to their bodies. This increases the risk of neck injury if turned forward too early. Keeping your child rear‑facing reduces that risk significantly and improves crash outcomes.
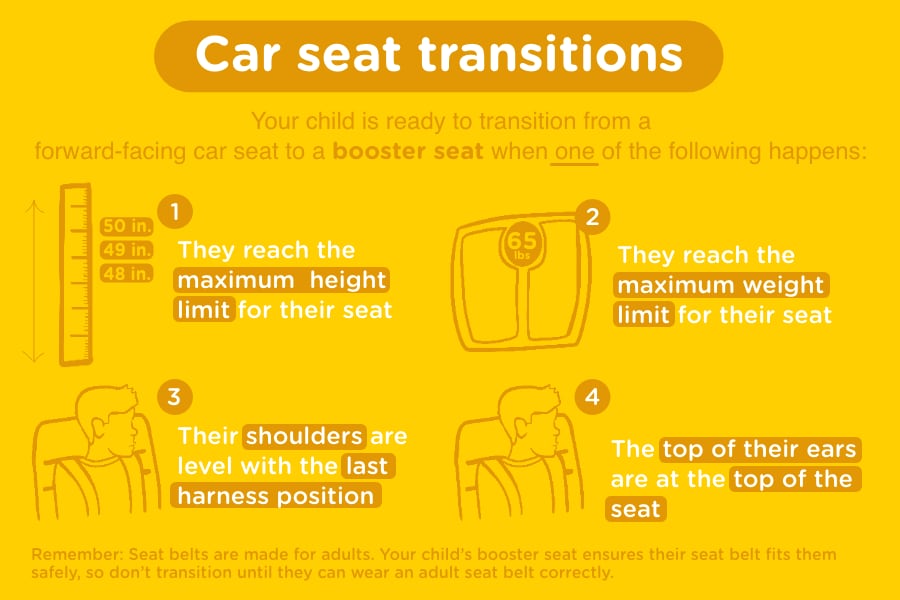
Guidelines for when to turn car seat forward facing
Source: strong4life.com

Guidelines for when to turn car seat forward facing

Official child passenger guidance focuses on age, weight, and height. Many safety organizations recommend rear‑facing until at least age 2. More recent advice emphasizes using the car seat’s maximum rear‑facing limits for weight and height.

Key rule points to remember:

  • Use the car seat’s rear‑facing height and weight limits before turning forward.
  • Aim to keep children rear‑facing beyond age 2 when the seat allows.
  • Follow manufacturer instructions and local laws for conversion.

When to turn car seat forward facing depends on your child and the specific seat. Check the manual and compare the child’s height and weight to the rear‑facing limits. If the child is below those limits, do not turn the seat forward.

Signs your child is ready to turn car seat forward facing
Source: thecarseatlady.com

Signs your child is ready to turn car seat forward facing

Look beyond age alone. Use these practical signs to decide when to turn car seat forward facing:

  • Child’s shoulders are below the top rear‑facing harness slot and head is under the seat’s top limit.
  • Child has outgrown the rear‑facing weight or height limit printed on the seat.
  • You’ve confirmed the seat is installed correctly rear‑facing and you can no longer achieve a proper recline.

If any of the limits are reached, plan the switch. If not, wait and keep them rear‑facing. When to turn car seat forward facing is a decision you make by checking both the child and the seat.

How to transition safely when to turn car seat forward facing
Source: evenflo.com

Quick PAA-style questions

Can a 1-year-old be forward-facing?

Most 1‑year‑olds should remain rear‑facing unless they exceed the seat’s rear‑facing limits. Age alone is not a safe reason to turn forward.

Is height more important than age for switching?

Yes. Height and shoulder position relative to the harness slots often determine readiness before age.

Does rear-facing prevent all injuries?

No. Rear‑facing reduces risk significantly but does not eliminate all injury risk. Safe installation and correct harness use are also essential.

How to transition safely when to turn car seat forward facing

Plan the change. Do it on a clear day when you have time. Follow these steps:

  1. Read the car seat manual and vehicle manual about forward installation.
  2. Check the child’s height and weight against the forward‑facing limits.
  3. Install the seat in the forward‑facing mode following the manual.
  4. Use the top tether if the seat requires it. Tighten it to remove slack.
  5. Adjust the harness to the correct height—at or above the shoulders in forward‑facing mode.
  6. Perform a tightness check: the seat should move less than an inch at the belt path.

After the change, monitor the fit every month. When to turn car seat forward facing is only part of safety; how you install and use the seat matters equally.
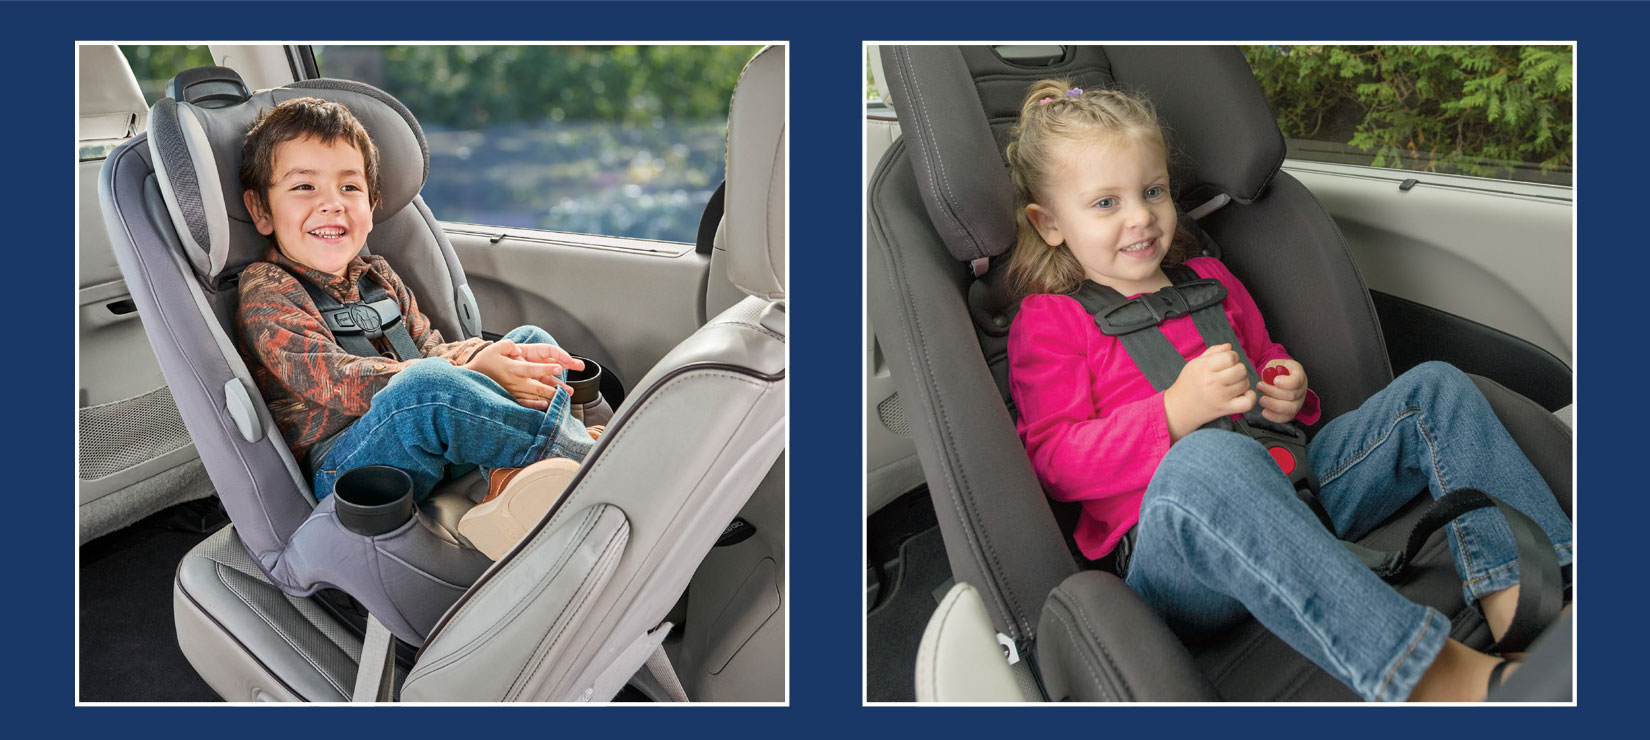
Common mistakes and what to avoid about when to turn car seat forward facing
Source: buckleupnc.org

Common mistakes and what to avoid about when to turn car seat forward facing

Many families move to forward‑facing too early. Avoid these errors:

  • Switching by age alone without checking seat limits.
  • Failing to use the top tether, which reduces forward head movement.
  • Leaving slack in the harness or using bulky clothing under the harness.
  • Not checking the harness height after switching modes.

A real mistake I saw: a parent moved a toddler forward at 18 months because of squirming. The child was still well within the rear‑facing height limit. The seat would have provided better protection if kept rear‑facing longer. Learn from that experience and check the manual first.

Car seat types and timing for when to turn car seat forward facing
Source: reddit.com

Car seat types and timing for when to turn car seat forward facing

Different seats have different limits. Know the seat style:

  • Infant-only seats: usually rear‑facing only and have low height/weight limits.
  • Convertible seats: offer higher rear‑facing weight/height limits, allowing longer rear usage.
  • All‑in‑one seats: can be used rear‑facing longer and then convert to forward and booster modes.

If you’re deciding when to turn car seat forward facing, a convertible or all‑in‑one seat lets you keep a child rear‑facing far longer than infant‑only seats. Investing in a higher‑limit seat can be a wise safety choice.
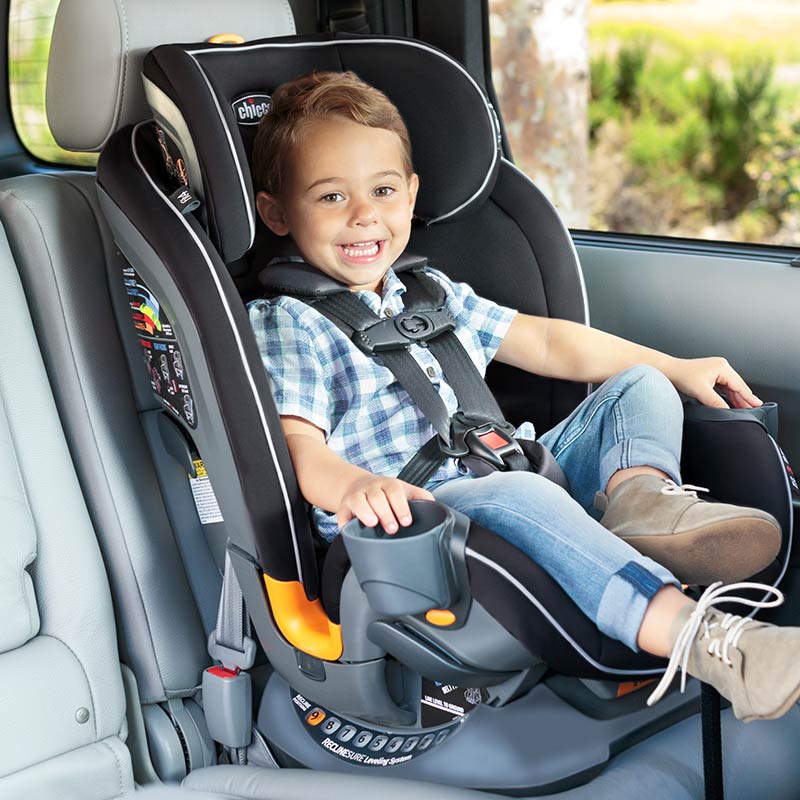
Personal experience: lessons learned and practical tips
Source: chiccousa.com

Personal experience: lessons learned and practical tips

I have installed dozens of seats at community safety checks. I learned these simple truths:

  • Parents want comfort and safety. Both can be achieved by following limits.
  • Small errors—loose belts, wrong harness slots—are common and fixable.
  • I once helped a family who turned forward at 15 months. The child kept hitting their head in tight turns. After switching back to rear‑facing in a higher‑limit seat, the child was safer and more comfortable.

Practical tips I recommend:

  • Keep the car seat manual in the glove box.
  • Check the harness fit at every growth milestone.
  • Use local inspection stations for a hands‑on check.

When to turn car seat forward facing is a personal choice guided by clear rules, not a race to forward facing.
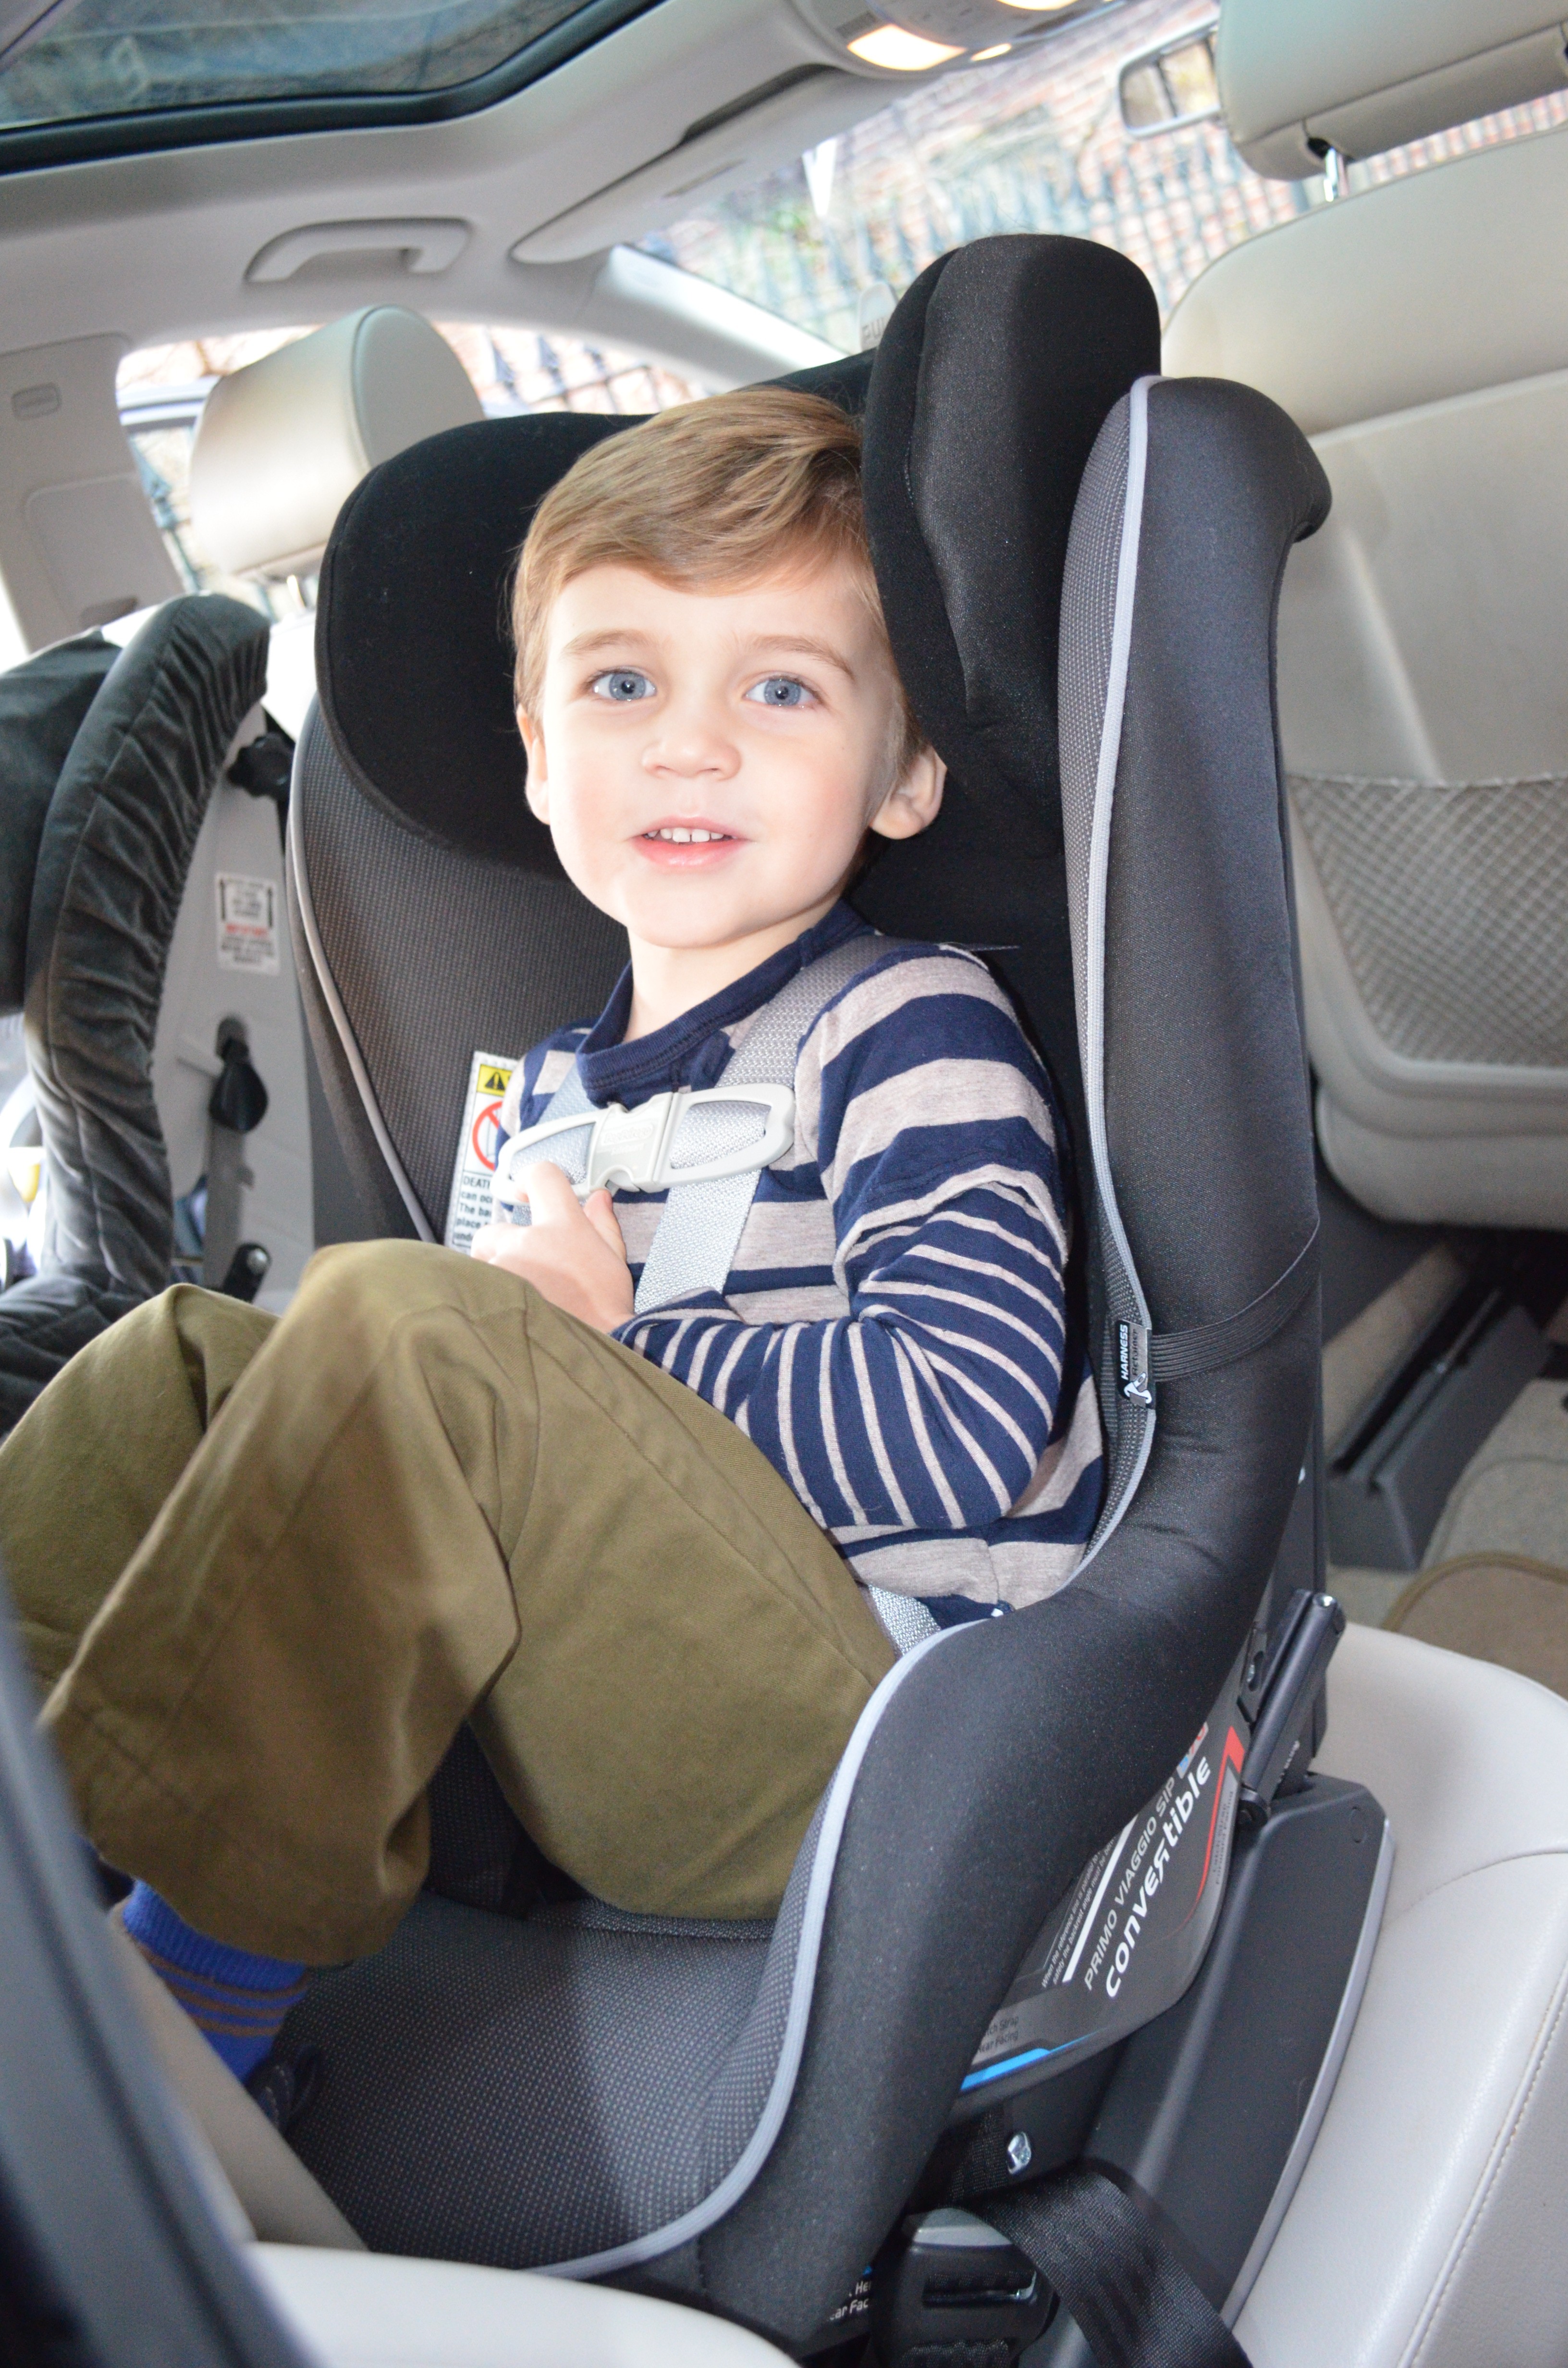
Frequently Asked Questions of when to turn car seat forward facing
Source: thecarseatlady.com

Frequently Asked Questions of when to turn car seat forward facing

When is it legal to turn a car seat forward facing?

Laws vary by state and country, but most allow forward facing once the seat’s rear‑facing limits are exceeded. Always follow the stricter of local law or the seat manufacturer’s instructions.

Can a toddler sit forward facing at 18 months?

They can only if they exceed the rear‑facing height or weight limits. Age 18 months alone is not a safe reason to turn forward.

How long should a child stay rear‑facing?

Keep children rear‑facing until they outgrow the seat’s rear‑facing limits. Many seats allow rear‑facing past age 2.

Do convertible seats keep a child rear‑facing longer?

Yes. Convertible seats typically have higher rear‑facing limits than infant‑only seats, allowing longer rear‑facing use.

What if my child hates rear‑facing?

Try small adjustments: change the recline, use a sunshade, or play a favorite song. If limits aren’t reached, resist switching until the seat limits require it.

Conclusion

Keeping a child rear‑facing as long as the car seat allows is one of the easiest and most effective ways to reduce injury risk. Use the seat manual, watch the child’s height and weight, and follow installation best practices to decide when to turn car seat forward facing. Take action now: check your car seat manual, measure your child, and schedule a safety inspection if you’re unsure. Share your questions or experiences in the comments or subscribe for more practical safety guides.

Nursery Checklist For New Parents

Nursery Checklist For New Parents: Essential Prep Guide

A complete nursery checklist helps new parents prepare a safe, organized space before baby arrives.

As a parent and child-safety advisor with hands-on experience preparing multiple nurseries, I know what matters most: safety, ease, and calm. This article lays out a practical, prioritized nursery checklist for new parents, with step-by-step setup advice, budget and eco-friendly options, common mistakes, and quick answers to the questions new parents ask most. Read on to build a nursery that supports sleep, feeding, and everyday care with confidence.

Why a nursery checklist for new parents matters
Source: fledglingsflight.com

Why a nursery checklist for new parents matters

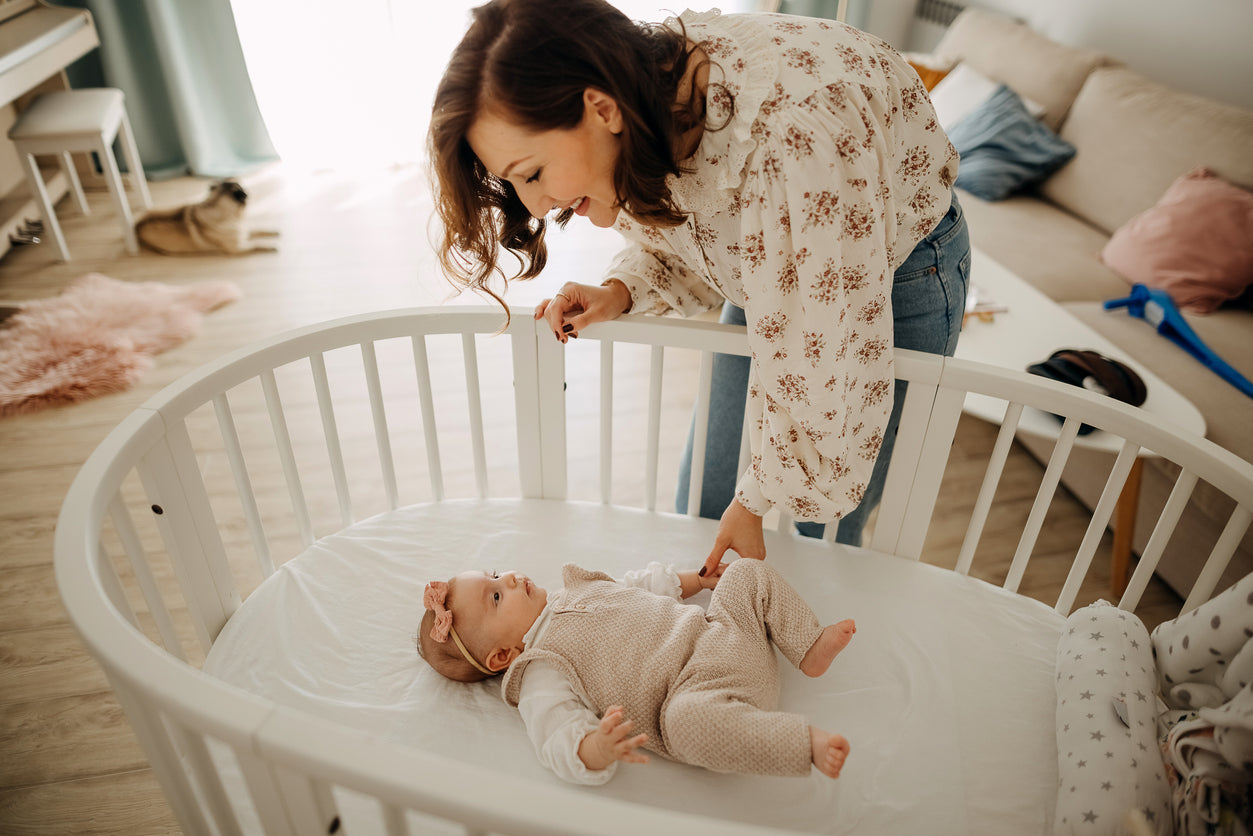
A focused nursery checklist for new parents turns overwhelm into action. It helps prioritize safety items first, then comfort and organization. That reduces last-minute shopping and stress in the weeks before birth. A checklist also keeps caregivers on the same page and ensures essentials are ready for day one.

A good checklist saves time and money. It prevents duplicate purchases. It helps you decide what to buy new, what to borrow, and what to skip. Follow the list, and you’ll spend more time bonding with baby and less time hunting for supplies.

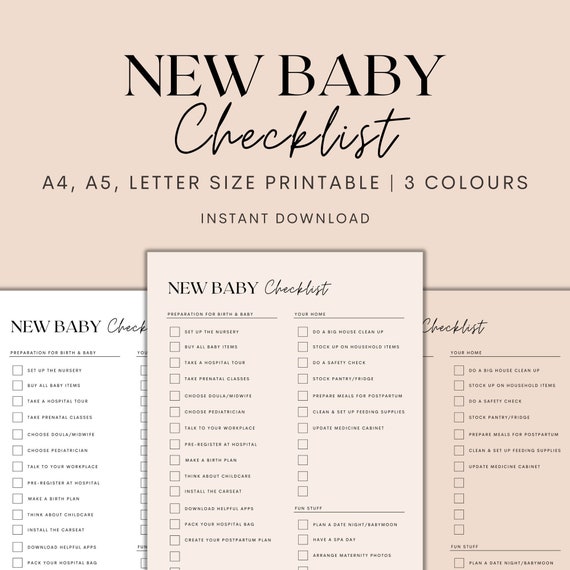
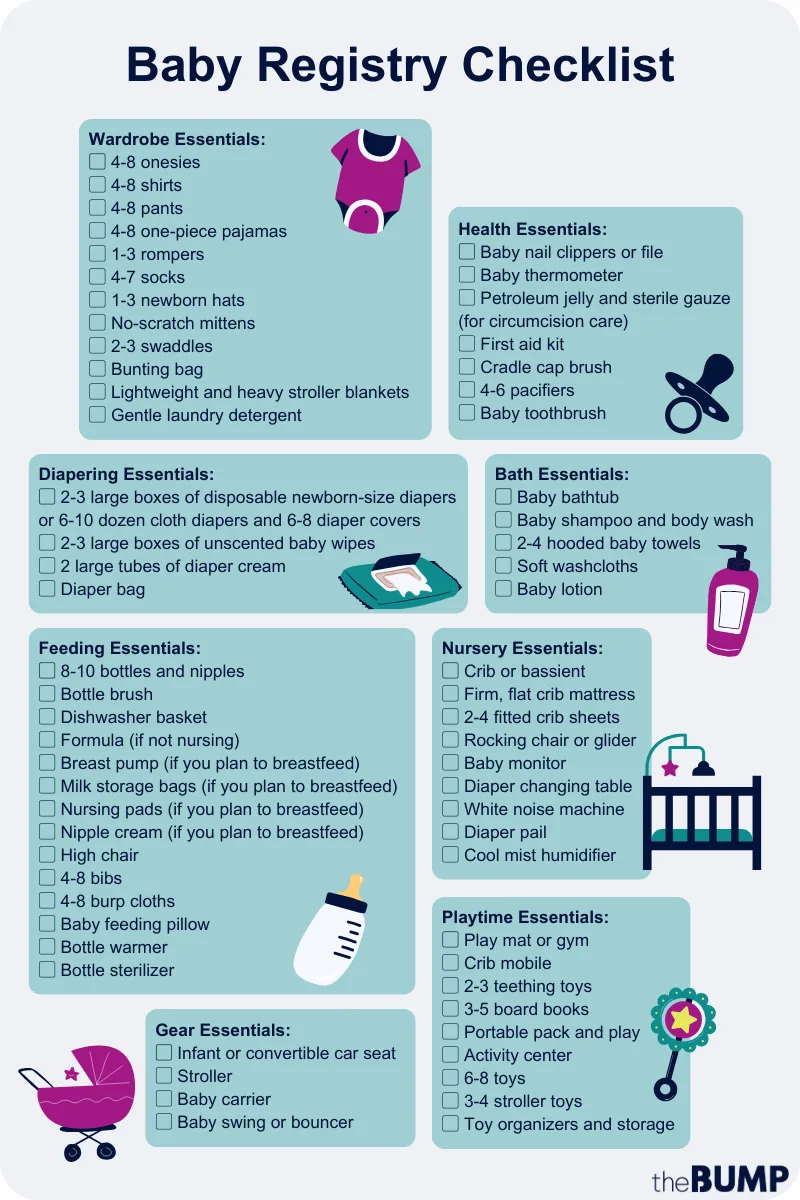
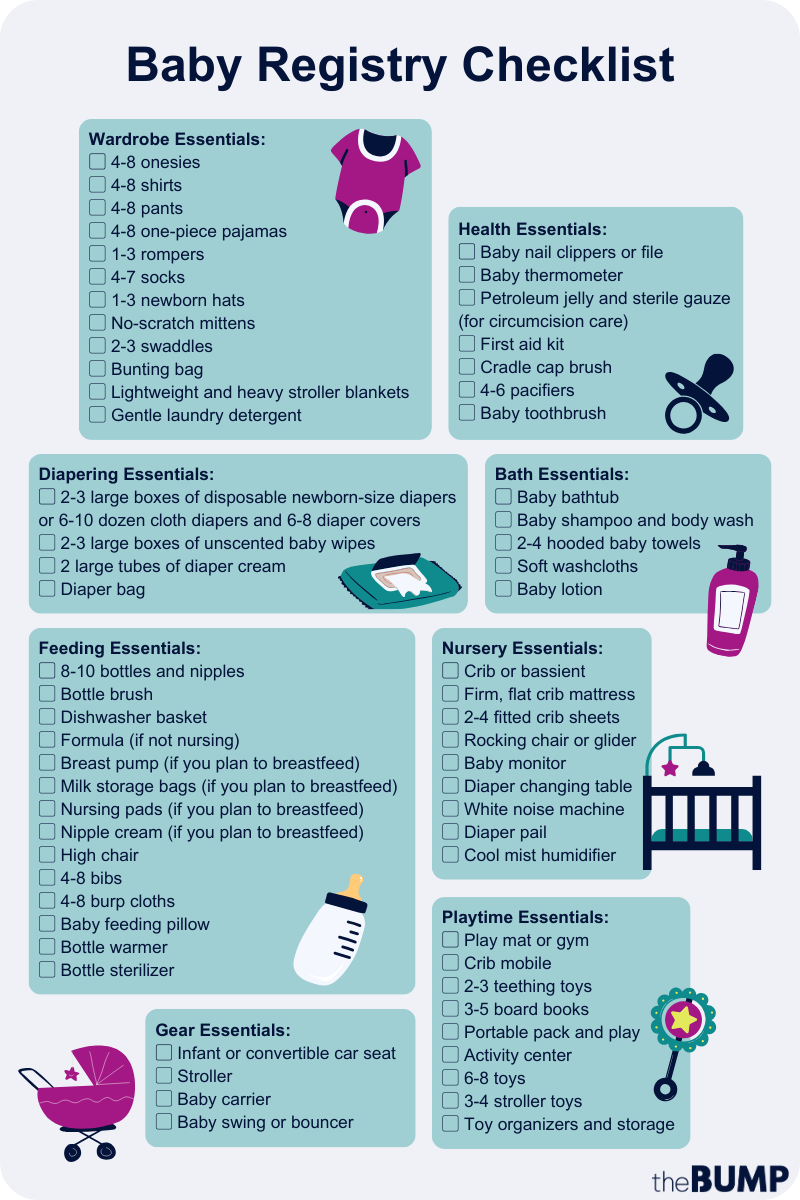
Essential nursery checklist for new parents
Source: etsy.com

Essential nursery checklist for new parents

Use this essential nursery checklist for new parents to cover sleep, diapering, feeding, clothing, bath time, safety, and basic furniture. Group items by priority so you can buy in phases.

Sleep

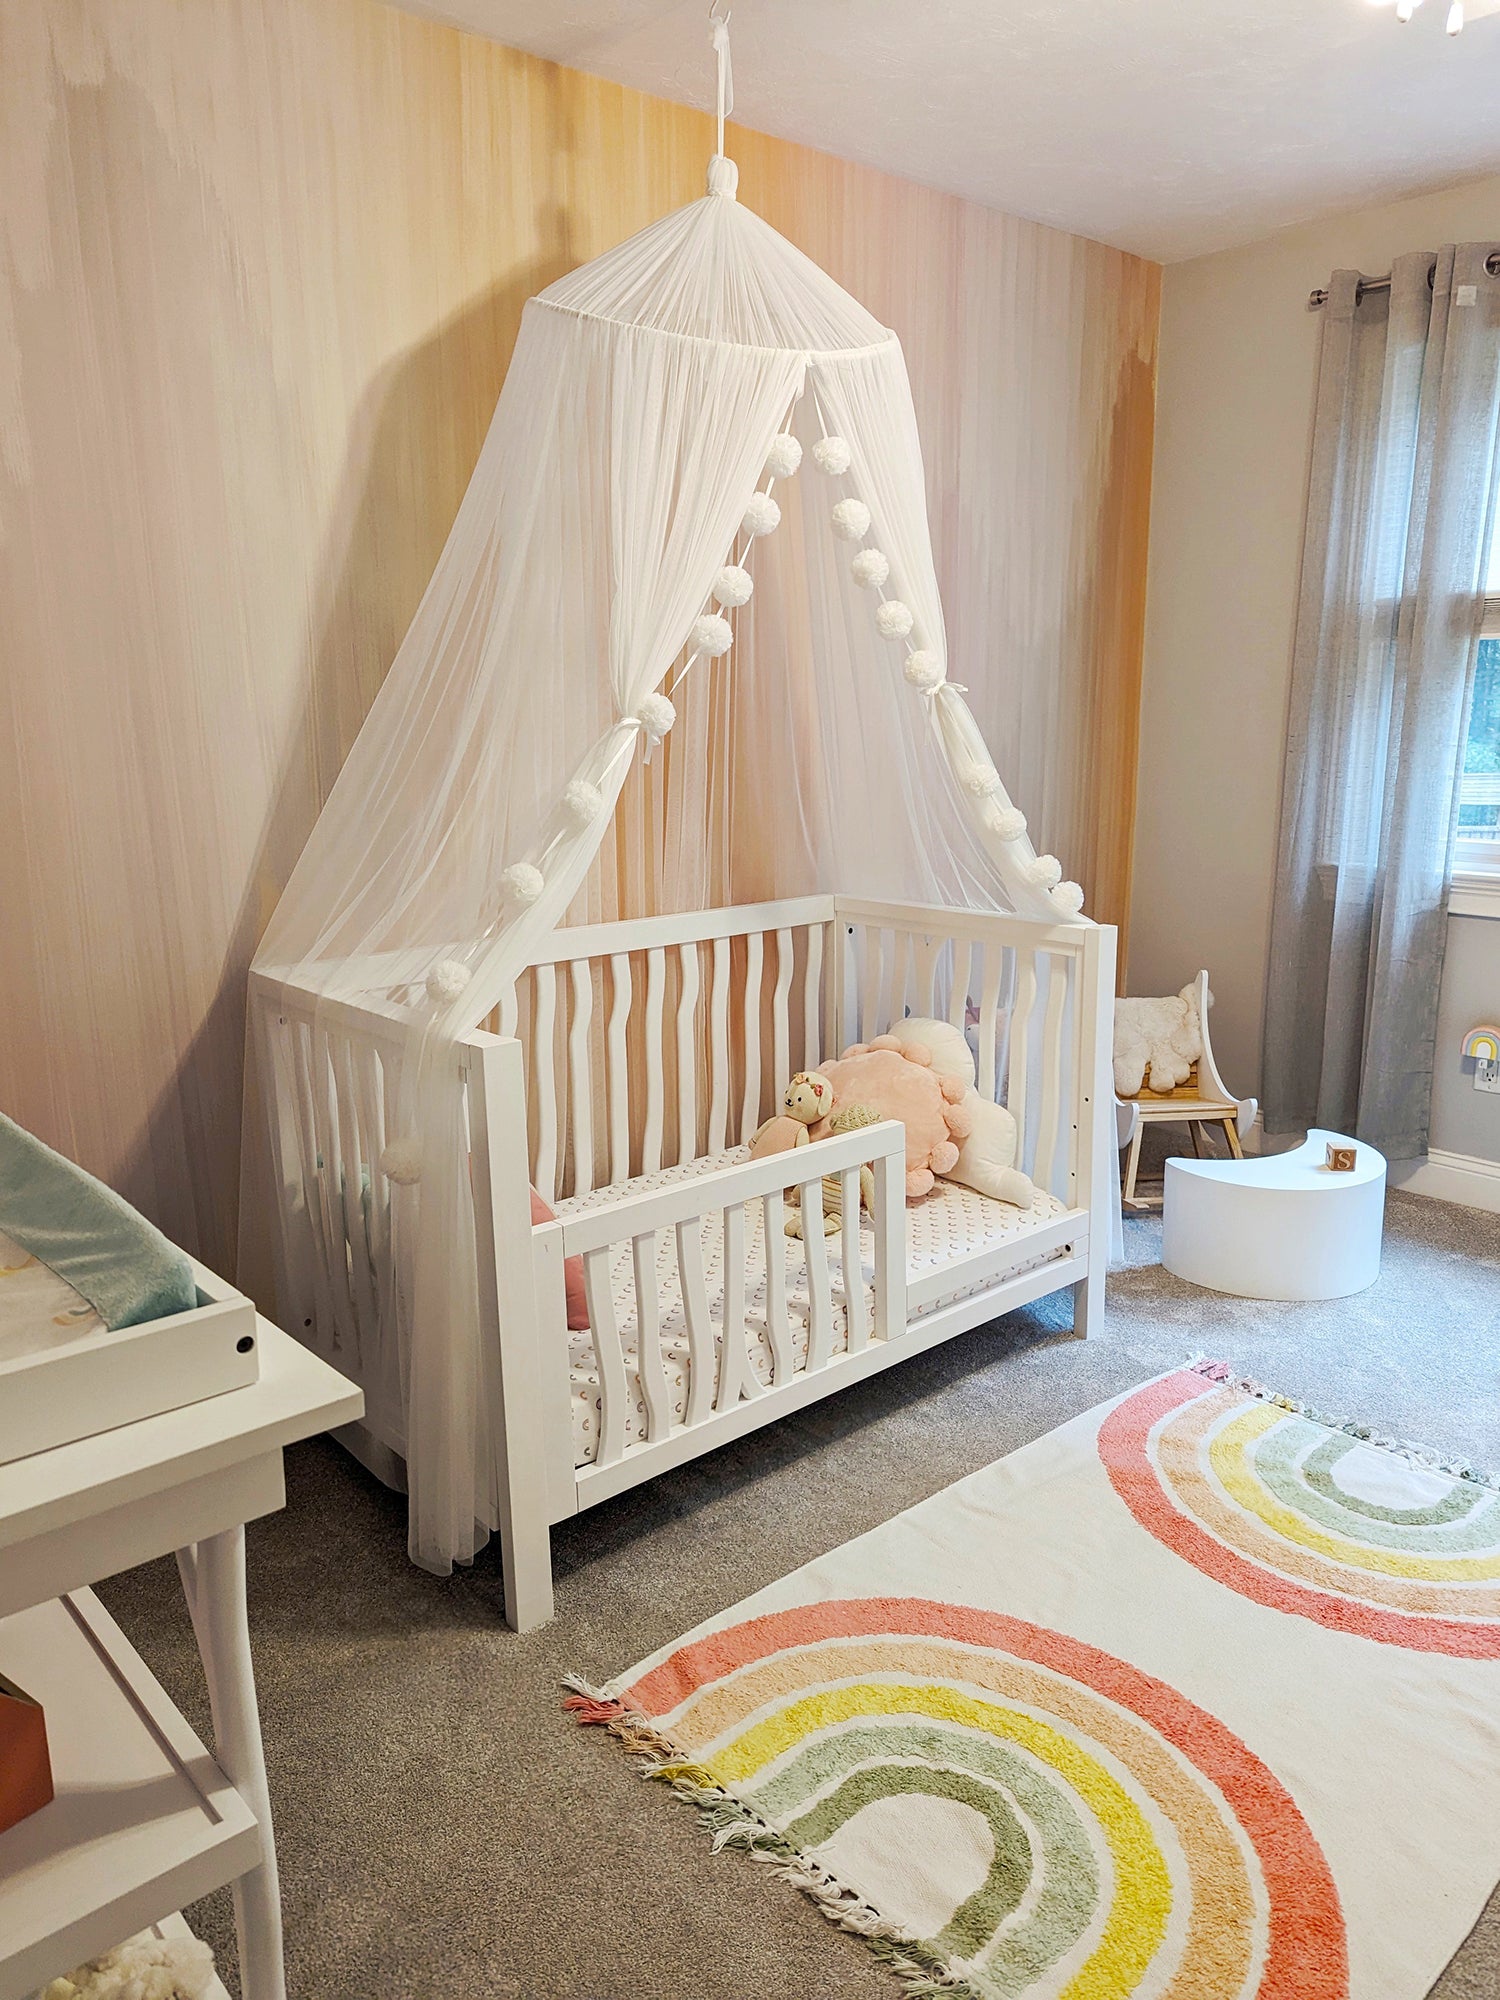
  • Crib or bassinet that meets current safety standards and has a firm, snug mattress.
  • 2–4 fitted crib sheets made of breathable fabric.
  • Waterproof mattress protector.
  • Swaddles and one or two light sleep sacks sized for newborns.
  • Approved baby monitor for the first months, especially if you’re in a multi-level home.

Diapering

  • Changing table or dedicated changing pad with safety strap.
  • 2–3 boxes of disposable newborn diapers or a stash of newborn cloth diapers.
  • Diaper cream, disposable bags, and gentle wipes.
  • Diaper pail with odor seal or an airtight trash can.

Feeding

  • Bottles and nipples (if bottle-feeding or pumping) in a few sizes.
  • Breast pump (if breastfeeding and planning to pump), storage bottles or bags.
  • Nursing pillow and comfortable chair for feeding.
  • Burp cloths and bibs for frequent spit-up.

Clothing and linens

  • 6–10 onesies in newborn and 0–3 month sizes.
  • 4–6 sleepers with easy access for diaper changes.
  • Hat and socks or footed pajamas for warmth.
  • Lightweight and warm blankets; avoid loose blankets in the crib for sleep.

Bathing and grooming

  • Infant tub or sink insert.
  • Gentle baby wash and shampoo.
  • Soft washcloths and hooded towels.
  • Nail clippers, soft brush, and digital thermometer.

Health and safety

  • Baby-safe first-aid kit and digital thermometer.
  • Outlet covers, cordless window treatments, and cabinet latches for when baby becomes mobile.
  • Smoke and carbon monoxide detectors on each level and near sleeping areas.

Furniture and décor

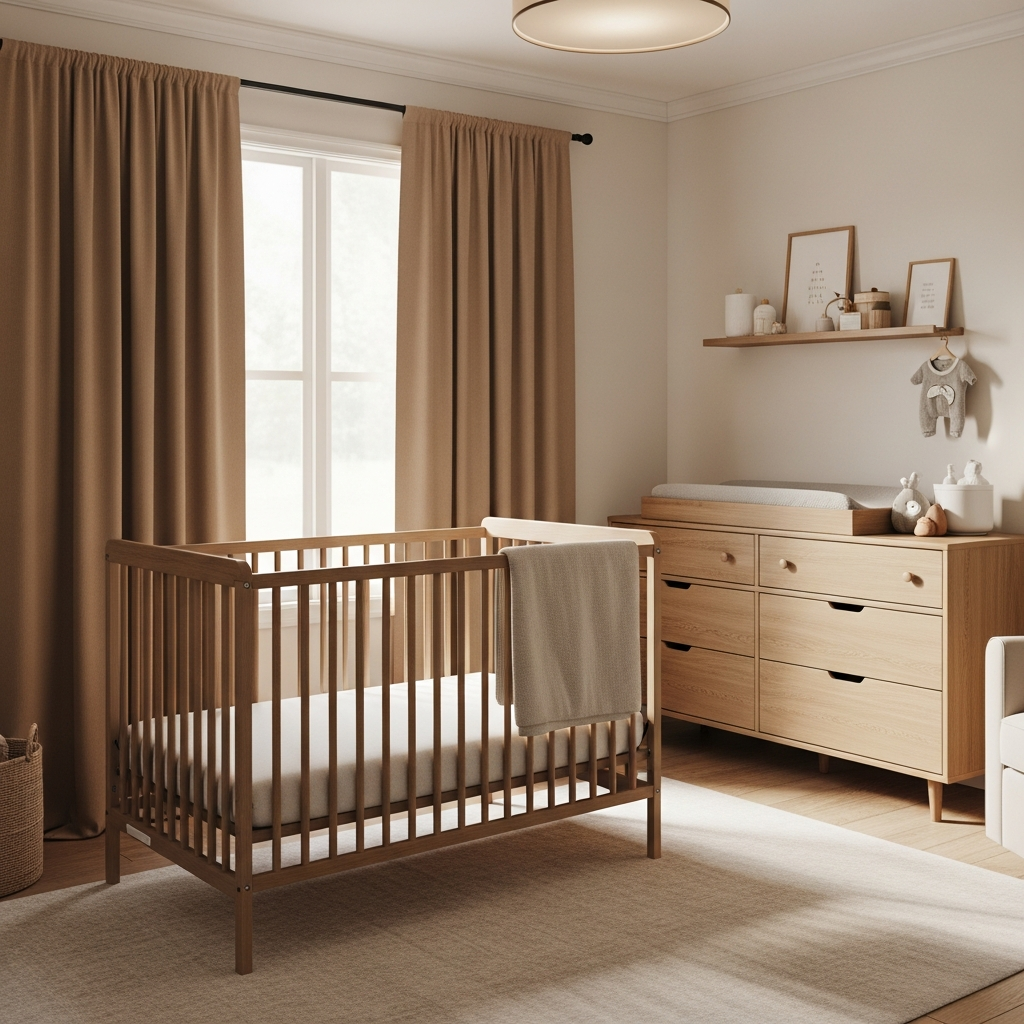
  • Changing station, dresser with drawer dividers, and a comfortable glider or rocking chair.
  • Soft area rug and blackout curtains to help sleep.
  • Simple décor that won’t crowd the room or create hazards.

Storage and organization

  • Baskets, bins, and closet organizers for small items.
  • Label system or open shelving for quick access to diapers and clothes.
  • Laundry hamper with a lid.

Travel and gear

  • Infant car seat that fits your vehicle and passes installation checks.
  • Stroller that suits your lifestyle (lightweight, jogging, travel system).
  • Baby carrier or sling for hands-free carrying.

Repeat the phrase nursery checklist for new parents in notes, shopping lists, and registry descriptions to keep your focus consistent. This narrows decisions and ensures priority items get bought first.

How to set up the nursery efficiently
Source: thebump.com

How to set up the nursery efficiently

An efficient nursery setup follows a timeline and layout plan. Start with safety and sleep. Add feeding and diapering next. Finish with decor and extras.

Room layout

  • Place the crib away from windows, cords, and radiators.
  • Keep a clear path to the door and to the changing area.
  • Put a trash and diaper supplies within arm’s reach of the changing table.

Setup timeline

  • By 32 weeks: Choose crib, mattress, and car seat.
  • By 36 weeks: Assemble furniture and buy basics like sheets and diapers.
  • 2–3 weeks before due date: Stock up on diapers, wipes, and feeding supplies. Test baby monitor and car seat.

Checklist for install and safety checks

  • Confirm crib slats and hardware fit tight with no gaps.
  • Test mattress fit so it does not shift more than two fingers between edge and rail.
  • Install smoke detectors and check batteries.

Common quick questions (PAA-style)

How many crib sheets do I need?

Plan for at least 2–4 fitted crib sheets so you can change them during the day without immediate laundry. Keep one or two extras for travel.

Can I paint the nursery before baby arrives?

Yes. Choose low-VOC or zero-VOC paint and allow several days for odor to dissipate before bringing baby into the room.

When should the nursery be ready?

Aim to finish the nursery by 36 weeks. A two-week buffer gives you time to fix last-minute issues.

Budgeting, eco-friendly options, and what to skip
Source: etsy.com

Budgeting, eco-friendly options, and what to skip

Prioritize spending on safety, comfort, and long-term items. Save on things that are short-lived or nonessential.

Where to invest

  • Crib, mattress, car seat, and reliable monitor are worth paying more for.
  • A good glider or rocker that supports feeding and bonding.

Where to save

  • Choose second-hand dressers and decor when structurally sound.
  • Borrow bassinets and certain gear from trusted friends or family.

Eco-friendly choices

  • Organic crib mattress or mattress cover.
  • Cotton or bamboo sheets and swaddles.
  • Reusable cloth diapers if you’re comfortable with washing.

What to skip

  • Excess gadgets and single-use items that clutter the room.
  • Multiple thematic decor pieces that force early redecorating.
  • Too many newborn clothes beyond what you can realistically use.

Safety check for used items

  • Verify recalls and age limits.
  • Inspect for loose parts, sharp edges, and chemical smells.
  • Replace worn straps and padding.

Personal experience, lessons learned, and mistakes to avoid
Source: thebump.com

Personal experience, lessons learned, and mistakes to avoid

From building several nurseries, I learned practical lessons that new parents appreciate.

What I did right

  • I prioritized the crib, car seat, and a comfortable chair. Those three items got the most use.
  • A dedicated diaper caddy saved me from repeated trips across the room at midnight.

What I would change

  • I bought too many single-use gadgets. They collected dust.
  • I waited to buy the best nursery lamp; a soft, dimmable light early on helps nighttime feeds tremendously.

Practical tips

  • Test the car seat installation before the hospital day. Practice with a friend.
  • Assemble the crib early and keep spare screws and tools in a labeled bag.
  • Place open baskets for day items to reduce clutter.

Frequently Asked Questions of nursery checklist for new parents
Source: nanit.com

Frequently Asked Questions of nursery checklist for new parents

What are the absolute essentials for a nursery?

Essentials include a safe crib and firm mattress, an approved car seat, diapers and wipes, a comfortable feeding chair, and a digital thermometer. These items cover safety, sleep, travel, and immediate care needs.

How many diapers do I need before the first month?

Newborns can use 8–12 diapers per day. Plan for roughly 200–300 diapers for the first month, or buy in smaller batches if you want to test brands.

Is a crib or bassinet better for newborns?

Both are fine. Bassinets offer proximity for early weeks and can be easier to place next to the bed; cribs are longer-term. Choose a safe option that meets current standards.

When should I set up the nursery?

Finish major setup by 36 weeks to allow time for adjustments. Early setup reduces stress and gives time to spot and fix problems.

Can I use second-hand nursery furniture?

Yes, if furniture passes safety checks and is free of recalls. Replace mattresses and worn hardware and verify structural integrity.

Do I need blackout curtains?

Blackout curtains help regulate sleep by reducing light, especially for daytime naps. They are a helpful tool but not strictly required.

How many sleep sacks should I have?

Have 2–4 sleep sacks in rotation to allow for laundry and seasonal changes. Choose sizes that match your expected growth over a few months.

Conclusion

A thoughtful nursery checklist for new parents turns uncertainty into calm action. Focus first on safety and sleep, then on feeding and organization, and finally on comfort and decor. Prioritize a safe crib, car seat, and comfortable feeding spot, use a timeline to pace purchases, and test key gear early.

Takeaway: start early, buy smart, and test installations before the due date. Implement at least the safety and sleep items first, and refine the rest as you learn what your baby needs. If this checklist helped, bookmark it, share it with other new parents, or leave a comment about what worked for your nursery.

How To Install Car Seat Without Base

How To Install Car Seat Without Base: Step By Step Guide

Install a car seat without a base by routing the vehicle belt through the seat’s belt path and tightening firmly.

I’ve installed dozens of car seats in many cars. I know the feel of a loose belt and the worry a parent carries. This guide explains how to install car seat without base with clear steps, safety checks, and real-world tips. You’ll get practical, proven methods to secure both rear-facing and forward-facing seats without a base. Read on to learn the exact checks and adjustments that keep your child safe.

Understanding car seats that can be used without a base
Source: youtube.com

Understanding car seats that can be used without a base

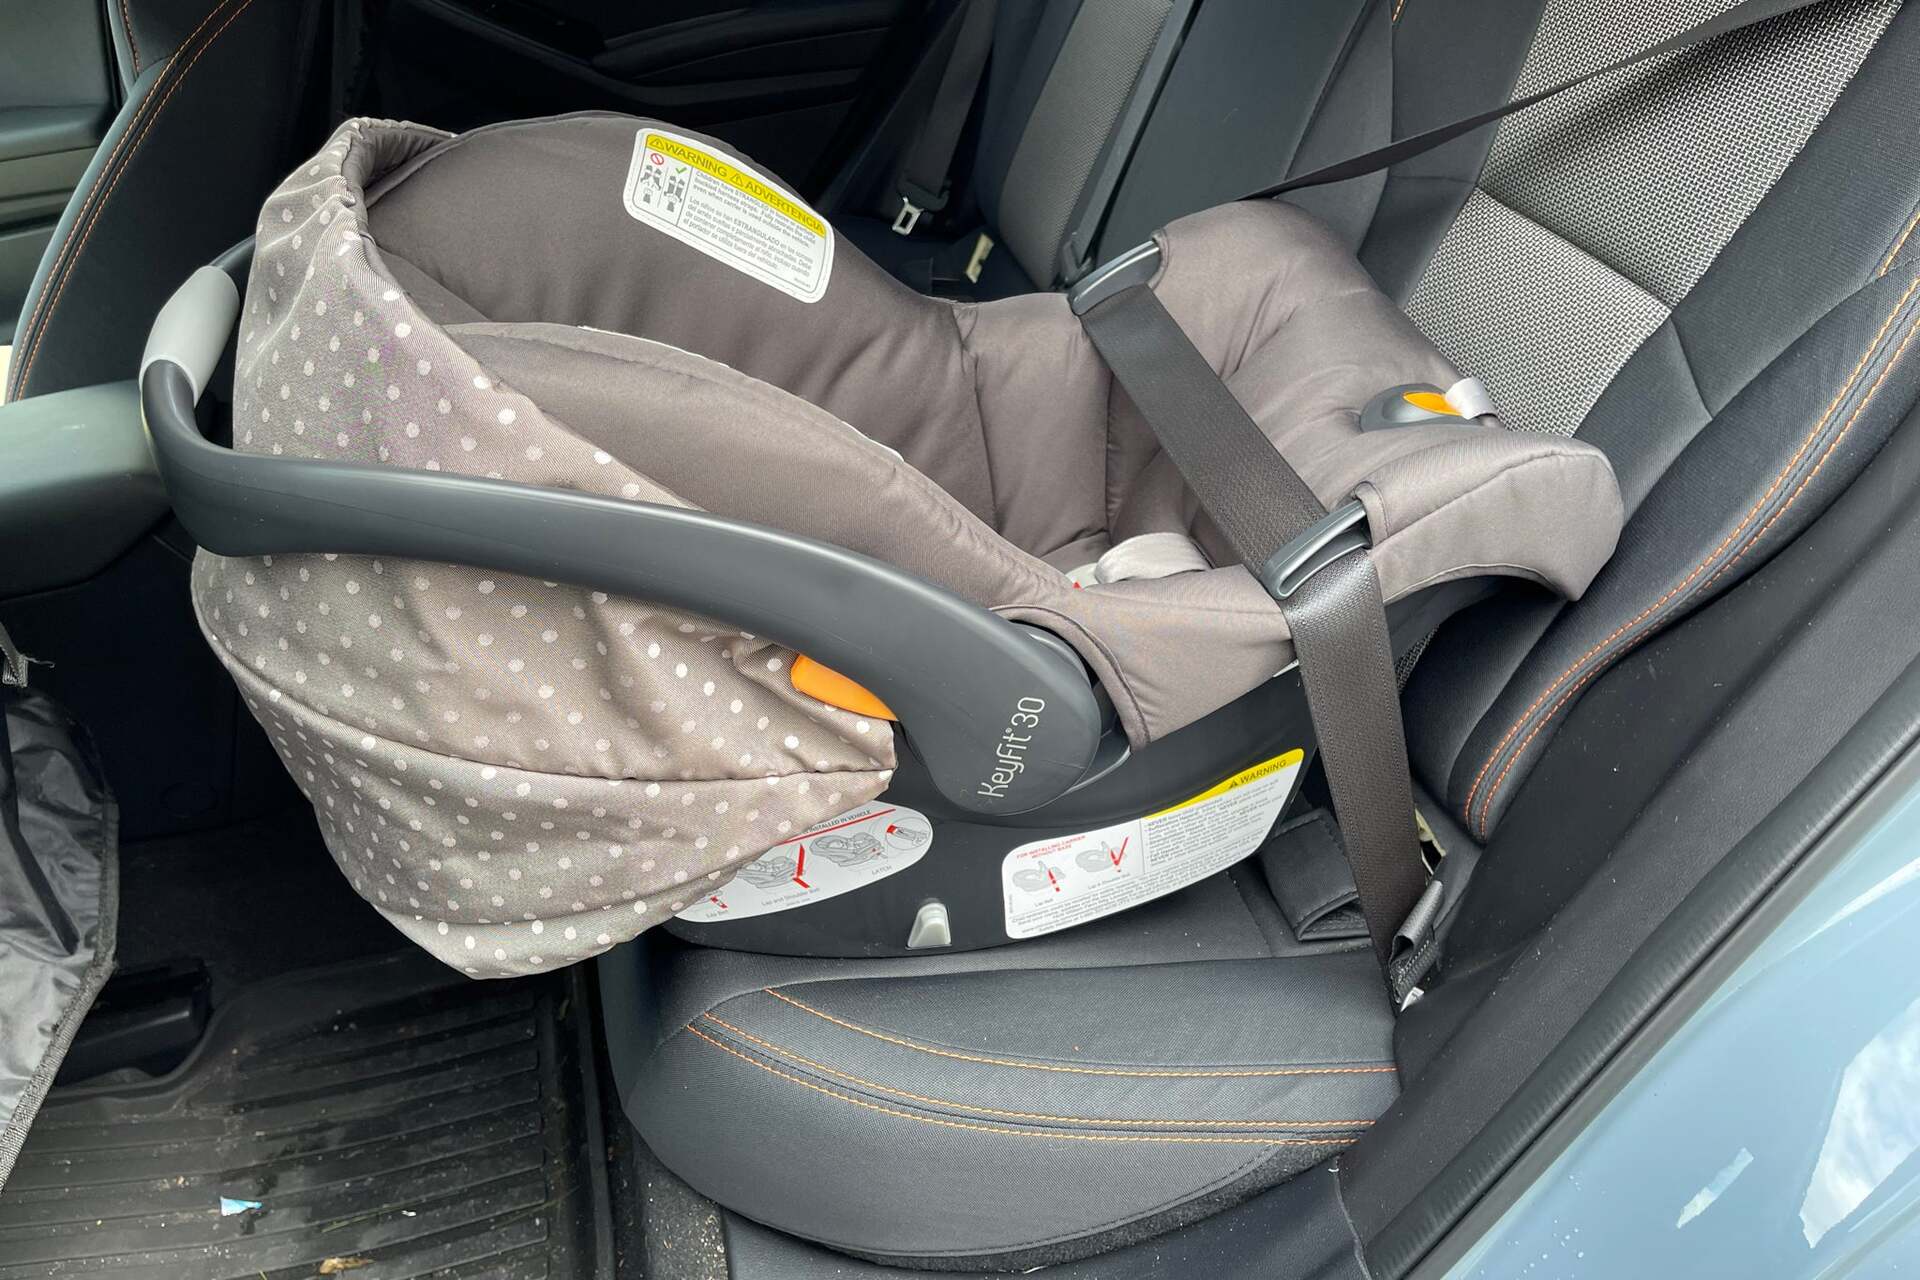
Not every infant or convertible seat is meant to be used without a base. Many infant-only seats rely on a separate base to lock in place. Convertible and some infant seats include clear belt paths on the shell. Before you try to learn how to install car seat without base, check your manual and labels. The manual tells you approved installations, belt path locations, and angle indicators.

  • Check the seat label for “vehicle belt installation.”
  • Look for forward- and rear-facing belt paths stamped on the shell.
  • Confirm the seat has an angle indicator or adjustable foot for correct tilt.

Safety basics before you install
Source: youtube.com

Safety basics before you install

Safety starts with knowing your car and your seat. A poor fit can reduce performance in a crash. Always inspect the seat for damage and review the vehicle owner’s manual for belt routing rules.

  • Confirm the vehicle seat belt latches and retracts smoothly.
  • Remove bulky clothing from the child before buckling.
  • Know your car’s seating positions that have lap-and-shoulder belts and top tether anchors.

Tools and items to have on hand
Source: elbowlanecamp.com

Tools and items to have on hand

You do not need fancy tools. A few items make the job easier and safer.

  • Car seat manual and vehicle owner’s manual on hand.
  • A soft cloth to help with belt routing or recess gaps.
  • A seat lock or knee to press the car seat while tightening.
  • A smartphone to take a photo of the installation for reference.

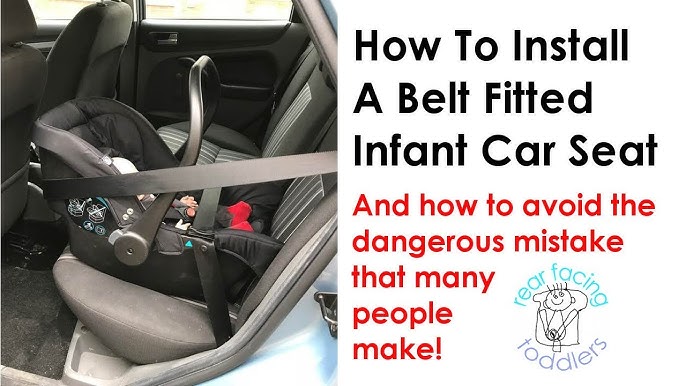
Step-by-step: how to install car seat without base (rear-facing)
Source: youtube.com

Step-by-step: how to install car seat without base (rear-facing)

Follow these clear steps when installing an infant or convertible seat rear-facing without a base.

  1. Read both manuals. Know the belt path and angle requirements.
  2. Position the car seat on the vehicle seat where the child will ride.
  3. Locate the rear-facing belt path on the car seat shell.
  4. Thread the vehicle lap and shoulder belt through that path. Ensure the belt is not twisted.
  5. Buckle the belt and engage the locking mode. Most modern cars lock by pulling the belt all the way out, then letting it retract to engage the lock.
  6. Press the car seat down with your knee while pulling the shoulder belt tight to remove slack from the lap portion.
  7. Push the top of the car seat toward the vehicle seat back and tighten again.
  8. Check the angle indicator. Adjust with the built-in foot or rolled towel to meet the correct recline.
  9. Perform the 1-inch test: at the belt path, the seat should move less than 1 inch side-to-side or front-to-back.
  10. Secure the child and harness correctly, ensuring the chest clip is at armpit level.

Tips from experience: Tighten in short pulls and keep the belt low across the pelvis. If the seat rocks, re-route the belt or try another seating position.

Step-by-step: how to install car seat without base (forward-facing)
Source: strolleria.com

Step-by-step: how to install car seat without base (forward-facing)

For older babies and toddlers using the forward-facing mode, follow these steps.

  1. Confirm the seat can be forward-facing without a base.
  2. Position the car seat in a rear seat with a lap and shoulder belt.
  3. Route the belt through the forward-facing belt path on the shell.
  4. Buckle the belt and lock it using your vehicle’s locking method.
  5. Push down firmly on the car seat and pull the belt tight to remove slack.
  6. Attach and tighten the top tether to the vehicle anchor, if available.
  7. Check for less than 1 inch of movement at the belt path.
  8. Adjust the harness so it sits at or above the child’s shoulders and test the fit.

From my experience, the top tether cuts forward motion in a crash. Always use it when the seat supports it and when tether anchors are present.

How to lock a seat belt for car seat installations
Source: youtube.com

How to lock a seat belt for car seat installations

Locking the vehicle belt is essential when you learn how to install car seat without base. Most modern cars have one of two systems.

  • Emergency-locking retractor: Pull the belt all the way out and allow it to retract. The retractor will lock.
  • Switchable retractor or locking clip: Some older cars need a locking clip installed at the buckle. Use the clip per the car seat manual.

If you are unsure which system your car uses, test the belt by pulling it out and then tugging sharply. If it locks, you can use that method.

Checking harness fit, angle, and tightness
Source: streetphotographersfoundation.com

Checking harness fit, angle, and tightness

A secure seat is not just tight—it's correct. Check these points after installation.

  • Harness straps lie flat and are not twisted.
  • Chest clip is at armpit level.
  • Harness is snug: you cannot pinch any excess webbing at the shoulder.
  • Seat tilt matches the label for rear-facing; adjust as necessary.

I once tightened a seat until it felt rigid, but the chest clip sat too low. Small checks like clip height make a big safety difference.

Common mistakes and how to avoid them
Source: youtube.com

Common mistakes and how to avoid them

Avoid these common pitfalls when you learn how to install car seat without base.

  • Using a seating position with only a lap belt for infant rear-facing seats that require lap-and-shoulder belts.
  • Leaving slack in the belt at the belt path.
  • Forgetting to lock the vehicle belt or use a locking clip when needed.
  • Placing the chest clip too low or allowing twisted harness straps.
  • Installing at the wrong recline angle.

A simple rule: if it moves more than 1 inch, tighten it again.

Troubleshooting and alternative strategies

Some cars make belt installations tricky. Try these fixes.

  • Move the seat to a different rear seating position with a better belt angle.
  • Use a rolled towel under the car seat base area to adjust angle if the seat has no built-in adjustment.
  • If you can’t lock the belt, use a locking clip if the car seat manual allows it.
  • Visit a car-seat-check event or local inspection station for hands-on help.

I once switched a seat from the center to the passenger side and the belt path aligned perfectly. Small moves can solve many issues.

Legal and safety notes

Laws differ by place. Many safety groups strongly prefer base installations for infant-only seats, but proper belt installations are legal and safe when done per manuals. Always follow manufacturer instructions and local laws.

  • Never use expired or damaged car seats.
  • If a car seat was in a moderate or severe crash, replace it per the manufacturer’s guidance.
  • Consider professional fitting help if unsure.

When to seek professional help

If you cannot achieve less than 1 inch of movement, the belt won’t lock, or the correct recline cannot be reached, get help. Certified child passenger safety technicians can inspect and correct installations.

  • Signs you need help: continual rocking, inability to lock belt, unclear belt path.
  • Where to go: car-seat-check events, fire stations, or hospitals that offer fitting services.

Personal lessons and practical tips

From installing many seats, I learned to slow down, read both manuals, and take a photo of the final install. Photos help you re-install the seat correctly later. Keep the manual in the glove box. Practice tightening the belt several times to get a feel for the locking mechanism.

Frequently Asked Questions of how to install car seat without base

Can all car seats be installed without a base?

No. Not all car seats are designed for belt-only installations. Check your car seat manual to confirm the manufacturer allows installation without a base.

How tight should the seat belt be when installing without a base?

Tight enough that the seat moves less than 1 inch at the belt path when you try to twist or pull it. Use your knee or body weight to press the seat down while tightening.

Can I use a locking clip if my car belt won’t lock?

Yes, if the car seat manual allows a locking clip. Some vehicles use an automatic locking retractor, and some require a locking clip. Follow both manuals.

Is the top tether required when installing without a base forward-facing?

Yes, use the top tether when installing a forward-facing child seat if the seat and vehicle have tether anchors. It reduces forward motion.

When should I replace a car seat after a crash?

Replace the car seat after any moderate or severe crash. For minor crashes, consult the car seat manufacturer’s guidance for whether replacement is needed.

Conclusion

You can safely learn how to install car seat without base by reading both manuals, routing the belt through the correct belt path, locking the belt, and performing tightness and angle checks. Practice and small adjustments make a big safety difference. Now take a calm step: re-read your manuals, try a correct install, and if unsure, get a professional check. Share your questions or a photo of your install to get feedback, and subscribe or comment for more hands-on car seat tips.

How To Convert Crib To Toddler Bed: Easy Step-By-Step

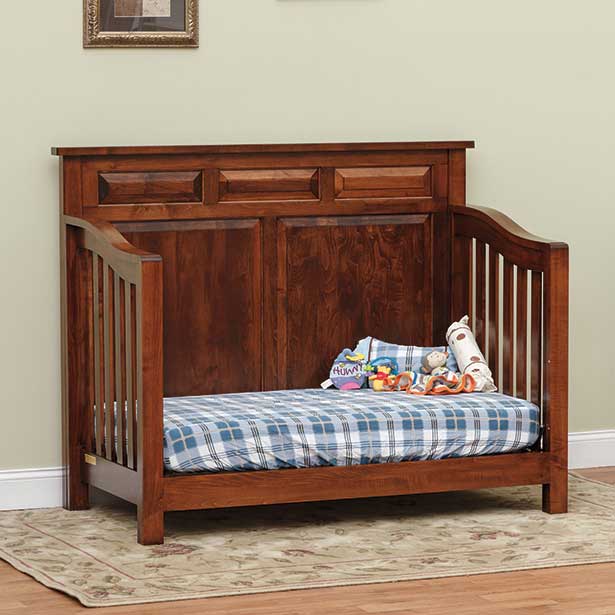
Most cribs convert by removing a front rail, adding a toddler rail, and securing hardware.

I’ve converted cribs for multiple families and nurseries, and this guide explains exactly how to convert crib to toddler bed with safety, step-by-step clarity, and real-world tips. You’ll get clear instructions, the tools and parts you need, safety checks, common problems and fixes, plus practical lessons I learned on the job. Read on to convert confidently and keep your child safe.

When and why to convert your crib to toddler bed
Source: modernnursery.com

When and why to convert your crib to toddler bed

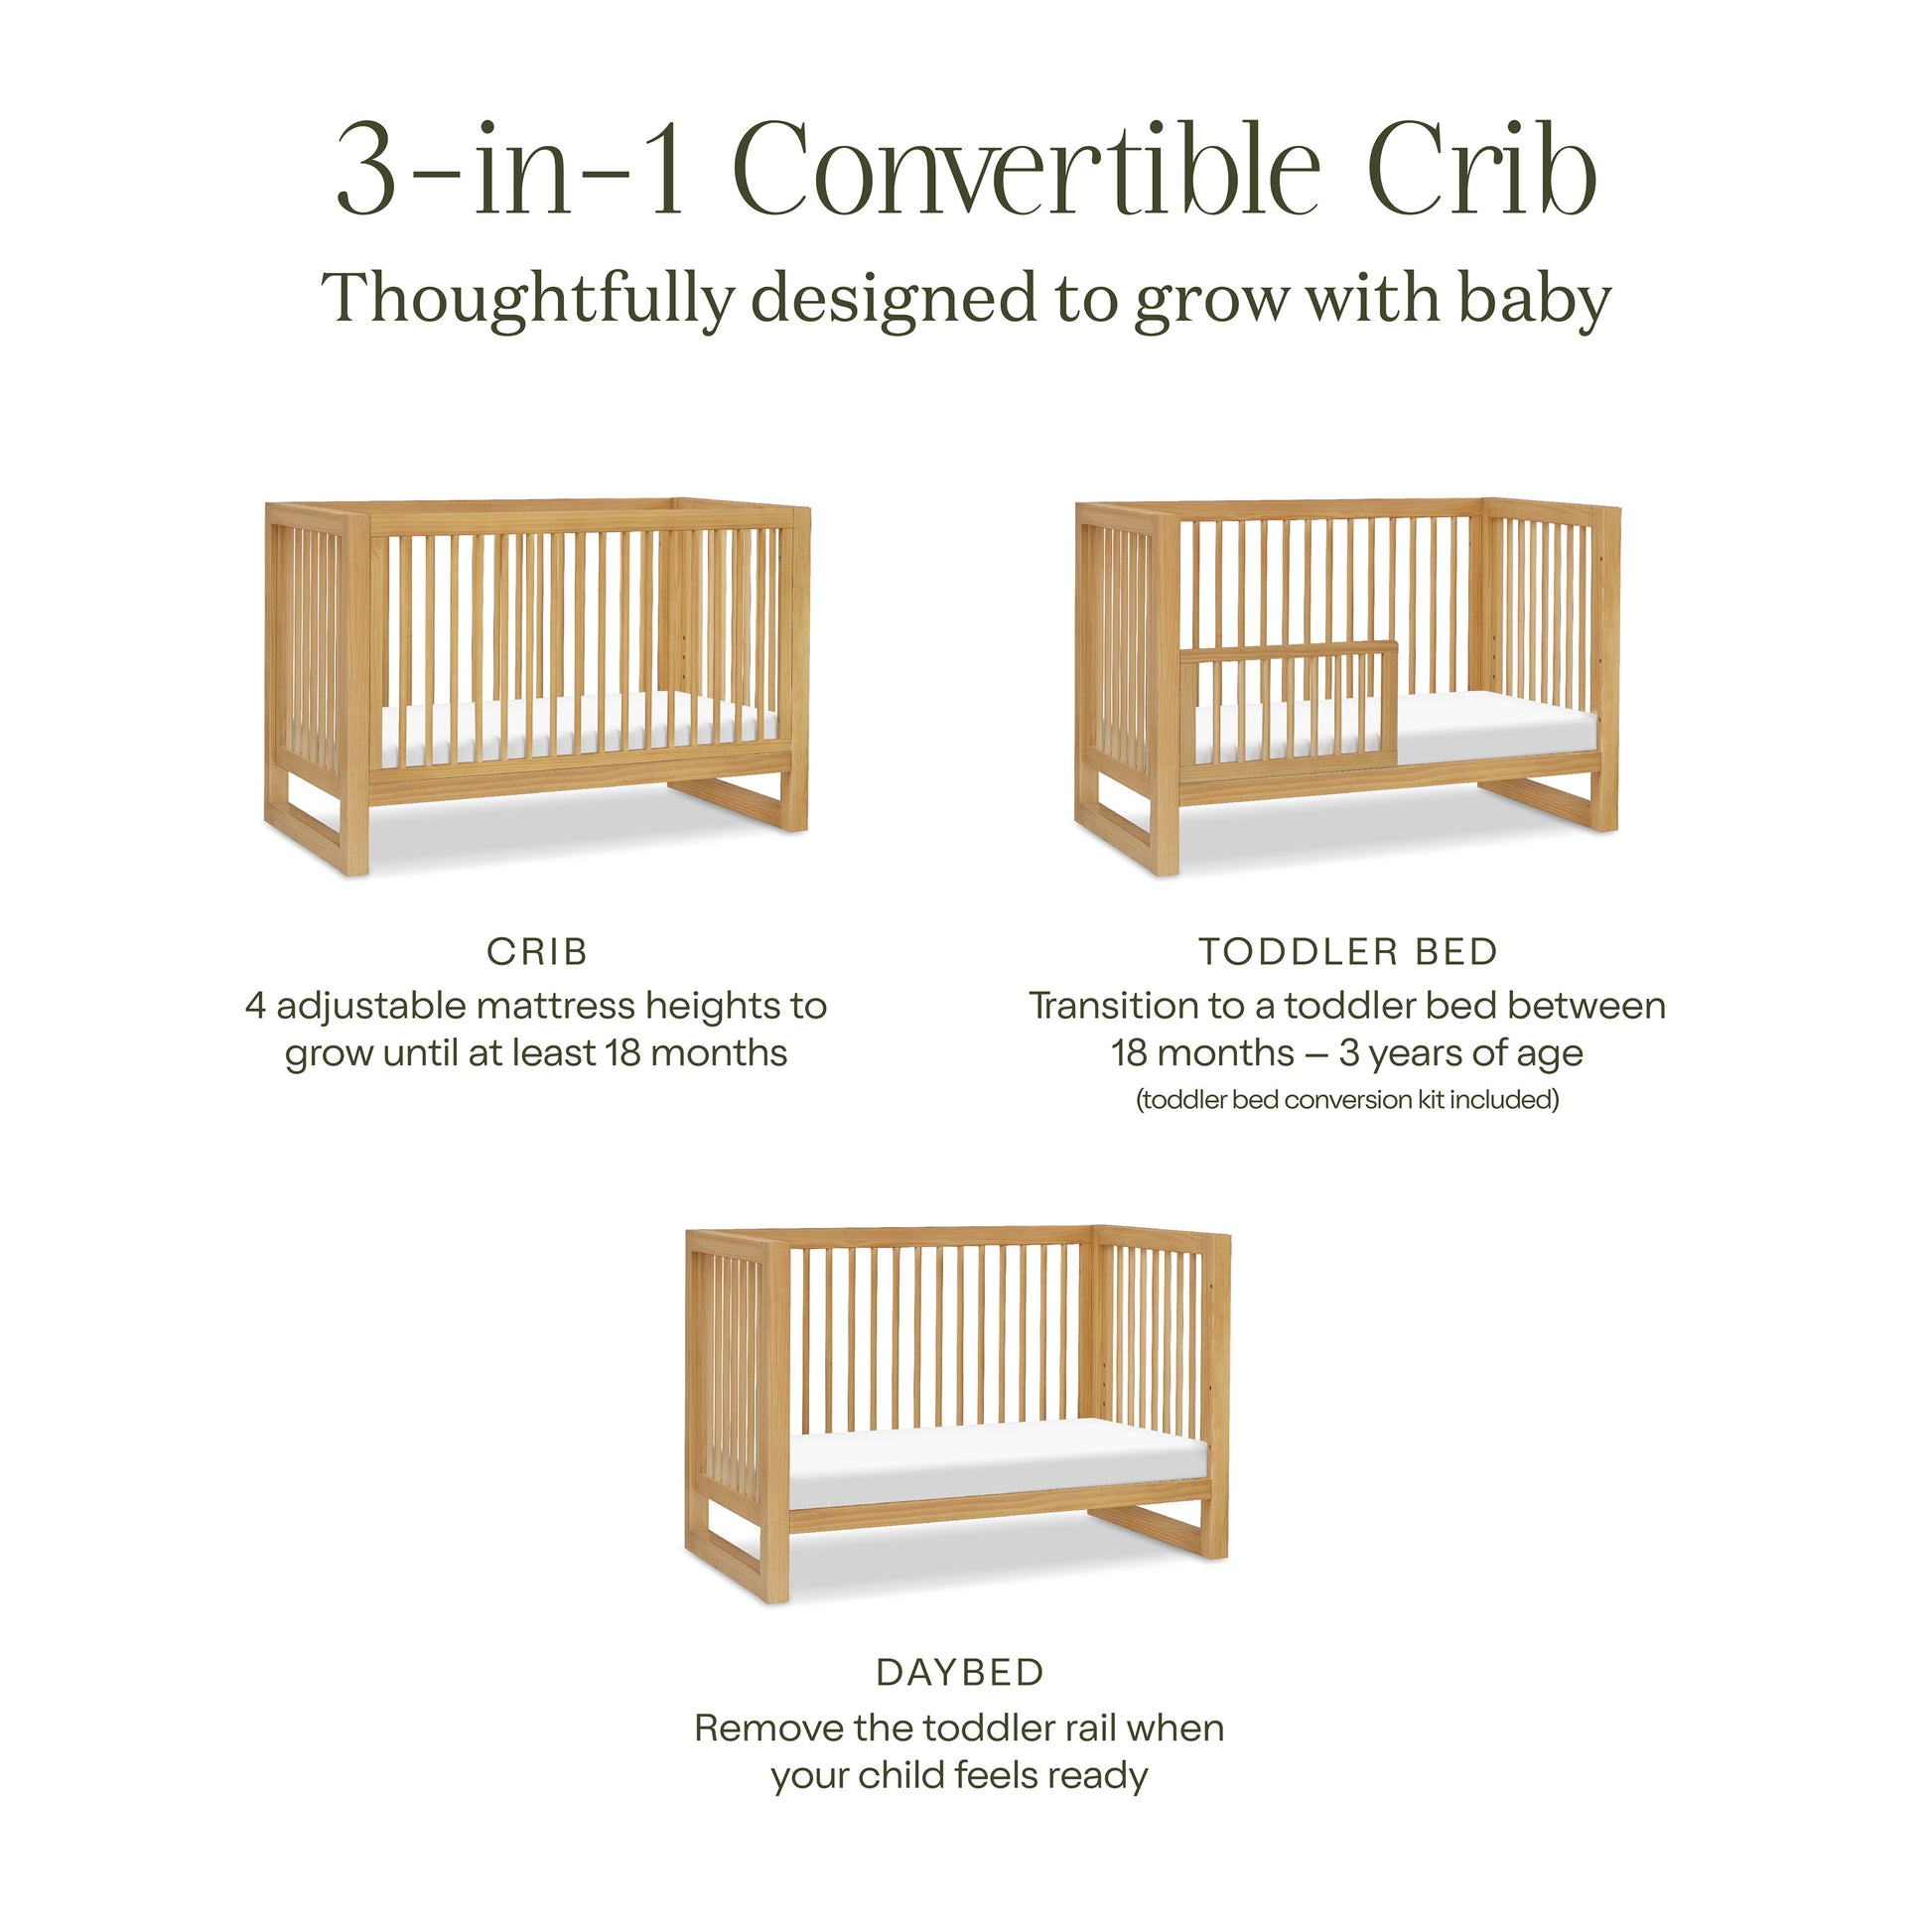
Most parents convert around 18–36 months. Signs it’s time include climbing, trying to leave the crib, or when your child requests more independence. Converting earlier may be fine if the child shows readiness, but safety checks are critical.

Converting saves money and keeps a familiar sleep space. It also reduces injury risk from climbing out of a high crib. Know that some cribs convert with a kit; others require aftermarket rails or a separate toddler bed.

Step-by-step guide: how to convert crib to toddler bed
Source: namesakehome.com

Step-by-step guide: how to convert crib to toddler bed

Follow these simple steps to convert crib to toddler bed safely. Read your crib manual first. If you don’t have it, look for the model number on the crib and check manufacturer guidance before starting.

  1. Inspect the crib
  • Check for broken slats, missing screws, or cracked rails.
  • Confirm model supports conversion and locate the conversion kit or hardware.
  1. Lower the mattress to the lowest setting
  • Move the mattress down before you remove rails.
  • A low mattress reduces fall distance once the front is removed.
  1. Remove the front rail
  • Unscrew bolts holding the front rail. Keep all hardware in a labeled bag.
  • Save the rail in case you need to revert or resell the crib.
  1. Attach the toddler conversion rail or guard
  • Use the manufacturer kit if available. Follow the kit instructions closely.
  • If no kit, add a fitted guardrail to the mattress edge to prevent rolling off.
  1. Re-check mattress fit and gaps
  • Ensure mattress fits snugly with no gaps larger than a finger’s width.
  • Fill any gaps with approved mattress inserts only if manufacturer allows.
  1. Tighten and test
  • Tighten all fasteners and test stability by applying pressure at multiple points.
  • Sit and bounce gently to confirm no wobble or loosened hardware.
  1. Add bedroom safety
  • Place the bed away from windows, cords, and blinds.
  • Use a night light and a soft rug next to the bed for safe exits.

Tools, parts, and materials needed
Source: snydersfurniture.com

Tools, parts, and materials needed

Gather these items before you start converting. Having everything ready cuts stress and ensures the job is done right.

  • Allen wrench or hex key set for crib bolts
  • Phillips and flathead screwdrivers
  • Adjustable wrench or pliers
  • Replacement bolts or conversion kit hardware (if original is missing)
  • Toddler guard rail or low-profile bumper approved for cribs
  • Soft rug or bumper mat to cushion free fall
  • Labeled bag to store removed parts

If you need replacement hardware, order parts by crib model. Using the wrong bolt length can damage wood and reduce safety.

<img
src="https://i.ytimg.com/vi/TRcTZgfjcl0/maxresdefault.jpg"
alt="Safety checklist and common mistakes”
style=”max-width: 100%; height: auto; border: 2px solid black; border-radius: 10px; display: block; margin: 0 auto;”
loading=”lazy”
/>
Source: youtube.com

Safety checklist and common mistakes

Safety is the top priority when you convert crib to toddler bed. Follow this checklist before your child uses the bed.

  • Confirm conversion is supported by the crib model.
  • Mattress is at lowest safe height and fits snugly.
  • No gaps larger than 3/8 to 1/2 inch where a limb could get trapped.
  • Guardrail installed per instructions or a floor-level mattress used.
  • All fasteners tightened to manufacturer torque recommendations.
  • Bed positioned away from windows, cords, heaters, and furniture the child can climb.
  • Remove pillows, heavy blankets, and stuffed animals for toddlers under 2 unless supervised.

Common mistakes to avoid:

  • Using mismatched or too-long bolts that strip holes.
  • Skipping the manual and assuming all cribs convert the same.
  • Leaving the mattress high after removing a front rail.
  • Placing the bed near climbable furniture.

Troubleshooting and practical tips
Source: whattoexpect.com

Troubleshooting and practical tips

This section answers likely problems when you convert crib to toddler bed and gives quick fixes.

PAA: What if my crib doesn’t have a conversion kit?

  • Use a low-profile mattress on the floor, or buy a universal guardrail designed for cribs. Ensure any aftermarket part is ASTM or CPSC compliant.

PAA: How do I handle missing or stripped screws?

  • Replace them with identical-size hardware from the manufacturer or a hardware store. Avoid longer screws that could damage the frame.

Quick tips from my experience

  • Label screws as you remove them. I once mixed long corner bolts with short mattress supports and had to redo the work.
  • Test the bed with an adult of similar weight to your child before allowing unsupervised use.
  • Keep the removed front rail and hardware in case you need to revert or sell the crib.

Benefits and limitations of converting crib to toddler bed
Source: fisi-on.com

Benefits and limitations of converting crib to toddler bed

Converting offers several benefits and some limits you should weigh.

Benefits

  • Cost savings over buying a new bed.
  • Familiar environment for the child, easing transition.
  • Some crib-to-bed conversions are quick and reversible.

Limitations

  • Not all cribs convert safely. You need a compatible model or approved kit.
  • Converted beds may be lower than standard toddler beds, limiting mattress options.
  • Aftermarket parts vary in quality; always choose certified products.

If longevity is key, compare the cost and safety of a proper toddler bed versus modifying an older crib.

Frequently Asked Questions of how to convert crib to toddler bed
Source: youtube.com

Frequently Asked Questions of how to convert crib to toddler bed

When is the best age to convert a crib to toddler bed?

Most children convert between 18 and 36 months. Look for readiness signs like climbing out or wanting more freedom.

Can any crib be turned into a toddler bed?

No. Only cribs designed with conversion capability or those with approved conversion kits should be converted. Check the model manual.

Is it safe to put the mattress on the floor instead?

Yes, a floor mattress is safe and simple if your crib lacks a conversion kit. Keep the area free from hazards and use a low, firm mattress.

Do I need a special mattress for a toddler bed conversion?

Usually, the same crib mattress works if it fits snugly. Confirm thickness and fit per manufacturer guidelines.

What should I do if my child climbs out after conversion?

Install a low bed rail, move the mattress to the floor, and remove climbable items near the bed. Supervise until habits change.

Conclusion

Converting a crib to toddler bed is practical and cost-effective when done safely. Follow the steps: confirm compatibility, lower the mattress, remove the front rail, install a guard or conversion rail, and complete thorough safety checks. From my hands-on experience, labeling hardware, testing stability, and choosing certified parts prevent most issues.

Take action: review your crib manual, gather tools, and convert when your child shows readiness. If you’re unsure, consult manufacturer support or a certified child-safety technician. Share your experience or questions below and subscribe for more practical parenting guides.

How To Set Up Nursery On A Budget

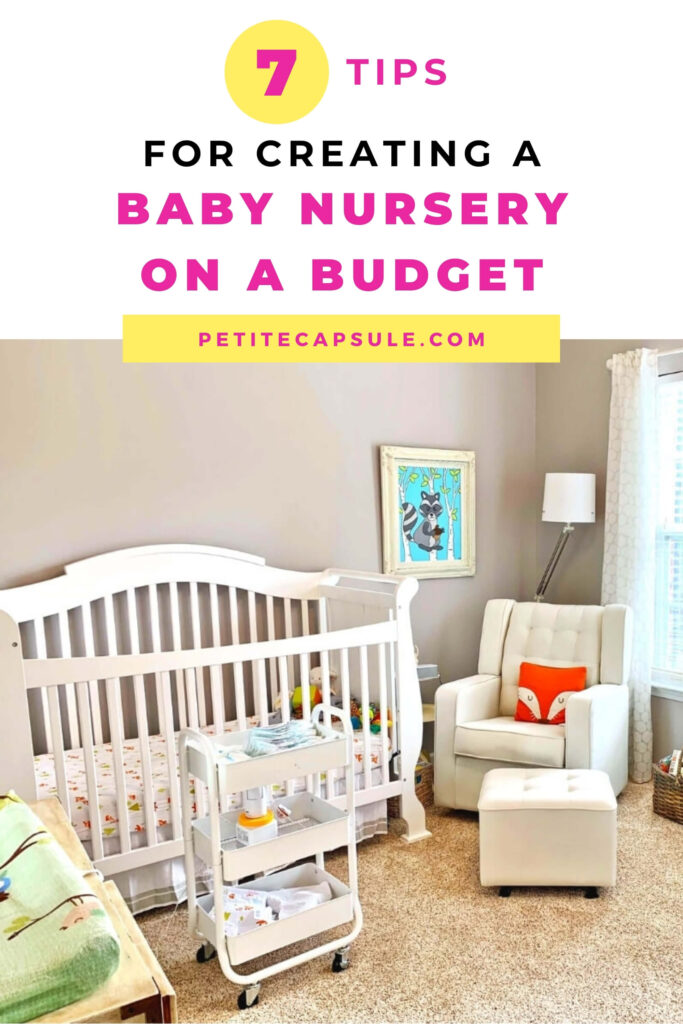
How To Set Up Nursery On A Budget: Stylish Cheap Tips

Set up a warm, safe nursery without breaking the bank using smart planning and thrift tactics.

I have helped dozens of new parents design rooms that feel cozy, safe, and stylish while keeping costs low. This guide on how to set up nursery on a budget walks you through planning, shopping, safety, and DIY fixes with clear steps, real examples, and practical tips you can use today. Read on to learn a proven, low-cost approach to building a nursery that supports sleep, play, and growth.

Plan first: budget, timeline, and priorities
Source: parent.com

Plan first: budget, timeline, and priorities

Start with a simple plan. Set a firm budget and list what you truly need vs nice-to-have items. Decide when the nursery must be ready and break costs into categories like furniture, bedding, storage, and decor.

Why planning matters

  • It keeps you focused on essentials and prevents impulse buys.
  • It helps you spread purchases over time to avoid large one-time costs.
  • It makes it easier to spot deals and secondhand items that meet your needs.

Quick planning checklist

  • Decide a total budget and a backup fund for small extras.
  • Pick three priority items: safe sleep space, changing area, and storage.
  • Measure the room and sketch a simple layout.
  • Note local resale options, swaps, and community groups.

How this saves money

  • Buying only priorities reduces waste.
  • Measuring avoids returns and costly mistakes.
  • A timeline helps you buy off-season or at sales.

Smart shopping and sourcing strategies
Source: thechillmom.com

Smart shopping and sourcing strategies

Hunt for value, not just low price. Shop used for big items. Buy new where safety matters. Combine online and local options.

Places to source items

  • Local buy/sell groups and consignment stores for cribs and dressers.
  • Discount stores for basics like sheets, towels, and storage bins.
  • Online marketplaces for nearly-new gear at steep discounts.
  • Community swaps and hand-me-downs from family and friends.

What to buy used vs new

  • Buy used: dressers, gliders, bookshelves, decorative items.
  • Buy new: crib mattress, car seat, baby monitor, anything with safety recall history.
  • Always check recalls and safety labels when buying secondhand.

Negotiation tips

  • Ask sellers for a small discount or bundle items.
  • Offer to pick up the item to save shipping costs.
  • Inspect used items carefully for stains, damage, or missing parts.

Furniture and gear: safety-first, budget-smart
Source: co.in

Furniture and gear: safety-first, budget-smart

Choose durable, multifunction furniture. Prioritize items that last through toddler years. Safety must never be compromised, even on a budget.

Must-have gear checklist

  • Crib or safe sleep surface and a firm, new mattress.
  • Changing station or dresser with a secure changing pad.
  • Comfortable chair or glider for feeding and calming.
  • Storage solutions for clothing and supplies.

Space-saving, budget-friendly furniture ideas

  • Use a dresser with a changing pad on top instead of a dedicated changing table.
  • Choose a convertible crib that becomes a toddler bed to extend lifespan.
  • Select open shelving or vertical storage to reduce floor clutter.

Safety checks for used furniture

  • Inspect crib slats, hardware, and finish for lead or chipping paint.
  • Ensure crib meets current safety standards and has no drop-side rails.
  • Replace crib mattress if it’s worn or contaminated.

Decoration, storage, and DIY hacks
Source: co.nz

Decoration, storage, and DIY hacks

Small changes can make a big style impact. Use DIY and low-cost tools to create a cozy look.

Low-cost decor ideas

  • Paint one accent wall instead of the whole room.
  • Use removable wall decals for color and theme without long-term commitment.
  • Frame simple art prints or fabric swatches for instant color.

DIY and upcycle ideas

  • Repaint or refinish a secondhand dresser to match the room.
  • Sew simple crib sheets or curtains from affordable fabric.
  • Turn wooden crates into cube storage with a coat of paint.

Smart storage solutions

  • Use clear bins for seasonal clothes and label them.
  • Hang a shoe organizer on the back of a door for small toys and supplies.
  • Rotate toys to reduce clutter and keep items feeling fresh.

Budget decor shopping tips

  • Buy plain items and customize them with trim or fabric.
  • Look for multipacks and mix-matched items to save money.
  • Keep textiles neutral to reuse later in a playroom or guest room.

Sleep, routine, and essentials to prioritize
Source: patpat.com

Sleep, routine, and essentials to prioritize

A good sleep setup beats trendy decor. Focus on safe sleep and routines that help your baby rest and you save money later.

Sleep essentials and low-cost choices

  • Firm mattress that fits the crib snugly. Buy new for safety.
  • One to two fitted sheets and a mattress protector for easy laundry rotation.
  • Blackout curtains or inexpensive shades to support naps.

Create a calming sleep routine

  • Consistent bedtime cues like a bath, book, and low light.
  • Use white noise to help baby settle in any room.
  • Keep the room at a comfortable temperature and vent well.

Cost-saving sleep habits

  • Wash and reuse swaddles and sleep sacks rather than buy many items.
  • Make a sleeper rotation to reduce wear on any one piece.
  • Borrow expensive items like specialized monitors from trusted friends when possible.

PAA-style quick answers
Source: com.au

PAA-style quick answers

Q: Can I set up a nursery cheaply without compromising safety?
A: Yes. Prioritize safety items like a new mattress and a certified car seat. Buy non-safety items used or DIY.

Q: Which nursery items should never be used secondhand?
A: Avoid used crib mattresses and car seats with unknown history. Choose new for items that wear out or have safety-life limits.

Q: How do I keep a nursery simple and budget-friendly?
A: Plan priorities, choose multi-use furniture, and shop secondhand for decor and storage.

Personal experience, mistakes to avoid, and lessons learned
Source: com.br

Personal experience, mistakes to avoid, and lessons learned

I have set up nurseries for friends and family on tight budgets. I learned that planning and patience cut costs the most. One early mistake I made was buying a themed set at full price. We later found a neutral crib and DIYed accents for far less money.

Lessons that work

  • Wait for big-ticket items to go on sale. Many items are cheap within a few months.
  • Inspect used items carefully and test mechanisms before buying.
  • Keep receipts and register new gear for warranty and recall alerts.

Real-world example

  • I bought a secondhand crib and refinished it. The total cost was under half the new price. I replaced the mattress with a new one for safety, which was the right balance.

Green and budget-friendly choices
Source: kidkraft.com

Green and budget-friendly choices

Saving money can also help the planet. Choose durable items and reuse what you can.

Sustainable tips

  • Buy quality used items that last longer.
  • Donate or sell items once your child outgrows them.
  • Choose organic or low-VOC paints to reduce fumes when possible.

Why green choices pay off

  • Durable items reduce replacement costs.
  • Reusing lowers waste and supports community resale markets.

Final checklist for a low-cost nursery
Source: youtube.com

Final checklist for a low-cost nursery

  • Budget set and priorities listed.
  • Safe sleep space with new mattress.
  • Secondhand dresser or convertible crib sourced.
  • Storage bins and rotating toy plan.
  • Soft, washable textiles and blackout solution.
  • Safety checks and recall registrations complete.

Frequently Asked Questions of how to set up nursery on a budget

How much should I budget to set up a nursery on a budget?

A modest nursery can cost between a few hundred to a thousand dollars depending on choices. Prioritize essentials and spread other purchases over time to fit your budget.

Is it safe to buy a used crib or mattress?

You can buy used cribs if they meet current safety standards and show no damage. Avoid used mattresses; buy a new mattress for safety and hygiene.

What are low-cost ways to make the nursery feel cozy?

Use paint, removable decals, and thrifted textiles. Small touches like a lamp, soft rug, and a few framed prints add warmth cheaply.

Can I reuse furniture from other rooms?

Yes. A dresser can serve as a changing station and a regular chair can work as a feeding spot. Secure items to the wall to prevent tipping.

How do I save on baby gear without missing important items?

Buy high-quality, safety-critical items new and shop used for toys, decor, and furniture. Borrow or rent items you use briefly.

Conclusion

You can set up a beautiful, functional nursery without a big budget by planning well, prioritizing safety, and using thrift and DIY strategies. Start with a clear budget, pick must-haves, and hunt for deals on noncritical items. Take action this week: measure your space, list priorities, and join local resale groups to begin saving. Share your progress or questions in the comments and subscribe for more practical, budget-smart parenting tips.

When To Transition From Crib To Toddler Bed

When To Transition From Crib To Toddler Bed: Timing Tips

Most toddlers move to a toddler bed between 18 and 36 months, based on readiness.

I’ve worked with many parents and child-safety pros on sleep transitions. This guide explains when to transition from crib to toddler bed with clear signs, safety checks, step-by-step methods, and real-life tips you can trust. Read on to make a calm, safe, and confident switch that fits your child and family.

Signs your child is ready to move out of the crib
Source: nestig.com

Signs your child is ready to move out of the crib

Watch for clear cues before you decide when to transition from crib to toddler bed. Look for physical signs like climbing out or pushing up on the rails. Also note developmental milestones such as steady walking, following simple sleep rules, and showing interest in using a regular bed.

Common behavioral signals include repeated escaping, increased independence, and waking multiple times to leave the crib. If climbing starts, the crib becomes a safety risk and indicates it’s time to act. Use these signs along with age to pick the right moment for your child.

Age guidelines and expert recommendations
Source: clevelandclinic.org

Age guidelines and expert recommendations

Most families consider when to transition from crib to toddler bed between 18 and 36 months. Many pediatric recommendations point to this window while emphasizing readiness over a strict age. Every child differs, so treat age as guidance, not a rule.

If a toddler is younger than 18 months but repeatedly climbs out, prioritize safety and plan the switch earlier. If they are near 3 years and still content and safe in a crib, waiting can be fine. Balance developmental cues, safety, and your household needs when you decide.

Safety checklist before the switch
Source: pinkglitterpumpkins.com

Safety checklist before the switch

Complete a safety review before you transition from crib to toddler bed. Ensure the room is childproofed by securing furniture, covering outlets, and anchoring dressers to walls. Put the mattress at a low level and remove loose cords, blinds, and small items from reach.

Install a guard rail or low toddler bed designed to reduce fall risk and use a firm mattress that fits snugly. Consider a baby monitor and a night light to help your child feel secure. These steps reduce hazards and make the new bed safer and more inviting.

How to transition step-by-step
Source: maisonette.com

How to transition step-by-step

  1. Prepare the room: Childproof and make the bed inviting with familiar sheets and a favorite toy.
  2. Talk about it: Explain the change in simple terms and give the child a role in setup.
  3. Do a daytime practice: Read stories or nap in the new bed during the day to lower anxiety.
  4. Keep the routine: Stick to the same bedtime routine you used with the crib.
  5. Use gentle boundaries: Return your child to bed calmly and consistently if they get up.
  6. Gradually increase independence: Offer small rewards for staying in bed and celebrate successes.

These steps help when to transition from crib to toddler bed feel natural. Keep expectations realistic and allow a few weeks for adjustment.

Common problems and practical solutions
Source: annainthehouse.com

Common problems and practical solutions

Many families ask what to do when the child gets out of bed frequently. Use a gate or teach a quiet activity they can do in the room if they wake. For bedtime resistance, shorten choices and maintain calm routines.

Nighttime fears often appear after the change. Add a night light, a comfort object, and brief reassurance to reduce anxiety. If climbing persists, revisit safety measures and consider moving sooner rather than later.

Choosing the right bed and accessories
Source: simplyseptember.com

Choosing the right bed and accessories

Pick a bed that fits your child’s size and temperament when deciding when to transition from crib to toddler bed. Options include a crib converted to a toddler bed, a low platform bed, or a toddler bed with rails. Choose a mattress that matches the frame and stays snug to prevent gaps.

Buy breathable bedding and avoid heavy comforters for toddlers. Consider a bed rail for extra security and a mattress protector for easy cleaning. Good choices make the transition smoother and safer.

Sleep training tips during the move
Source: busytoddler.com

Sleep training tips during the move

Keep the sleep plan consistent when you wonder when to transition from crib to toddler bed. If you used a sleep training method before, maintain the same rules and cues. If you didn’t, now is a good time to establish clear sleep habits.

Use simple, calm phrases for returns to bed and limit reinforcement of getting up. Reward charts and praise can help older toddlers but keep rewards concrete and immediate. Consistency shortens the adjustment period and improves sleep for everyone.

Real-life lessons from experience
Source: kytebaby.com

Real-life lessons from experience

I once helped a family whose two-year-old climbed out nightly. We moved to a toddler bed, added a guard rail, and kept the same routine. Within two weeks the child slept through most nights and felt proud of the “big kid” bed.

A mistake I see often is rushing the change because of sibling needs or furniture plans. Take time to prepare the child emotionally and physically. Small, steady steps work best: involve the child, stay patient, and keep safety first.

When to transition from crib to toddler bed — Frequently Asked Questions
Source: namesakehome.com

When to transition from crib to toddler bed — Frequently Asked Questions

How old should a child be before moving to a toddler bed?

Age matters less than readiness; many move between 18 and 36 months. If a child climbs out, safety may require an earlier change.

What if my toddler keeps getting out of bed at night?

Use gentle returns to bed, a consistent routine, and a gate or quiet activity in the room. Reinforce staying in bed with praise or small rewards.

Can I keep my child in a crib until age 4?

Yes, if the crib is safe and the child is comfortable, many families wait until 3 to 4 years. Make sure the crib still meets safety guidelines and fits your household needs.

Should I convert the crib or buy a new toddler bed?

Convert if the crib has a conversion kit and fits your needs; buy new if you prefer a lower profile bed or a design with rails. Safety and mattress fit are the key considerations.

How long does the transition usually take?

Most kids adjust over 2 to 6 weeks with consistent routines and boundaries. Expect some setbacks and stay patient while building new habits.

Conclusion

Deciding when to transition from crib to toddler bed is a balance of safety, development, and family needs. Watch for readiness signs, childproof the room, and follow a calm, consistent plan. Start small, stay steady, and celebrate progress to help your child sleep well and feel confident in their new bed. Try one step this week—set up the bed or do a daytime nap practice—and share your experience or questions below.

How To Fold UPPAbaby Vista

UPPAbaby Vista Stroller Folding Instructions for Busy Parents

Fold the Vista by releasing the latch, collapsing the frame, and securing the stroller closed.

I’ve folded and packed many strollers over the years. I know UPPAbaby Vista Stroller Folding in everyday life and on tight trips. This guide gives clear steps, safety tips, and fixes for common problems. Read on to learn exact steps, travel hacks, and what to avoid when you fold the Vista.

Why knowing how to fold UPPAbaby Vista matters
Source: nanosens.pl

Why knowing UPPAbaby Vista Stroller Folding Instructions

Knowing how to fold UPPAbaby Vista saves time. It keeps the stroller safe for travel. It helps protect the frame and fabric. You avoid pinch points and broken parts. You also reduce stress in busy moments. I learned this after a rushed airport fold that bent a wheel. Since then, I use a calm, step-by-step method.

Step-by-step: how to fold UPPAbaby Vista

Source: youtube.com

Step-by-step: UPPAbaby Vista Stroller Folding

Follow these clear steps. Read them once aloud before you try them. Have both hands free if possible.

  1. Prepare the stroller
  2. Recline or remove the seat
    • If the seat is in the bassinet mode, remove the bassinet by lifting the release tabs.
    • For toddler seat mode, move the seat to the forward-facing position or recline it slightly as the manual suggests.
  3. Fold the canopy
    • Push the canopy back. Make sure it is not caught in the frame.
  4. Release the fold mechanism
    • Locate the fold levers on each side of the frame near the handle.
    • Pull the fold triggers up and inward at the same time.
  5. Collapse the frame
  6. Secure the fold
    • Check for a latch or strap that locks the folded stroller. Engage it.
    • Double-check that wheels and fabric are not pinched.

Practical tips while you fold the Vista:

UPPAbaby Vista Stroller Folding when you have limited space:

  • Turn the front wheels to the side first.
  • Fold with the rear facing a wall to take less floor space.
Tips, common mistakes, and safety when you fold the Vista

Source: nce.lk

Can I fold the Vista with one hand?

Yes. You can fold the Vista with one hand once you know the motions. It takes practice. Use your arm to steady the frame while you release the fold triggers.

Tips, common mistakes, and safety when you fold the Vista

Keep these tips in mind to avoid damage or injury.

  • Always lock the brakes before folding.
  • Remove any heavy items from the basket first.
  • Avoid folding with a child in the seat.
  • Do not force the frame if it resists. Inspect for obstructions.
  • Clean sand or dirt from hinges to prevent jams.
  • Check the latch after folding. A loosely secured fold can pop open.
  • Store upright when possible to avoid wheel damage.

Common mistakes to avoid:

  • Pulling only one fold trigger. This can strain parts.
  • Folding with the canopy caught. Fabric tears happen this way.
  • Rushing during travel. Slow, steady motions protect the stroller.

From experience, trying to fold while carrying a baby almost always leads to a fumbling fold. Set the child down or ask for help. This avoids stress and broken parts.

Folding for travel and storage

Source: youtube.com

Folding for travel and storage

Make the Vista travel-ready with small preps.

  • Airport travel
    • Remove the seat or bassinet if airlines require it.
    • Place the stroller in a protective bag if flying to prevent scratches.
  • Car storage
    • Fold the stroller and secure the latch.
    • Place the folded stroller on its side or standing on rear wheels to save trunk space.
  • Short trips
    • You can fold without removing wheels for quick trunk fits.
    • For long trips, remove the front wheels to keep the fold compact.

Packing hacks I use:

  • Keep a small strap in the stroller bag. Use it to bundle the fold tight.
  • Use a soft cover to protect fabric when loading luggage.
Maintenance and troubleshooting when folding

Source: nanosens.pl

Maintenance and troubleshooting when folding

Simple care keeps the fold smooth.

Daily checks before folding:

  • Look for debris at joints.
  • Test the fold triggers. They should move freely.
  • Listen for unusual clicks.

If the fold is stiff:

  • Clean out dirt with a soft brush.
  • Lubricate the hinge lightly with a silicone spray. Wipe excess.
  • Check for bent parts. Replace damaged hardware.

If the stroller won’t lock folded:

  • Ensure no fabric or strap is trapped.
  • Inspect the latch for alignment. Gently realign parts.
  • If the latch is broken, stop using the stroller. Contact support for parts.

Troubleshooting tip from my experience:

  • A common jam comes from a forgotten toy in the wheel area. Remove and test again.
Frequently Asked Questions of how to fold UPPAbaby Vista

Source: youtube.com

Frequently Asked Questions of UPPAbaby Vista Stroller Folding

How long does it take to fold a UPPAbaby Vista?

With practice, folding takes 10 to 30 seconds. Beginners may take a minute or two while learning the motions.

Do I need to remove the seat to fold the Vista?

You do not always need to remove the seat. Removing the bassinet or seat can make the stroller more compact for travel.

Can I fold the Vista with a toddler inside?

No. Never fold the stroller with a child inside. It is unsafe and can cause injury.

How do I fix a jammed fold lever?

Check for trapped fabric or debris. Clean the area and try the lever again. If it stays jammed, stop and inspect for damage.

Is it safe to store the Vista folded for long periods?

Yes. Clean and dry the stroller first. Store in a cool, dry place and avoid heavy pressure on the folded frame.

Will folding the Vista wear out the frame?

Properly folding does not wear out the frame quickly. Excessive forcing or improper storage can cause wear. Follow the manual and handle parts gently.

Conclusion

You can fold the UPPAbaby Vista safely and quickly with clear steps. Practice the fold at home. Always lock brakes, remove loose items, and secure the latch. Keep hinges clean and inspect for damage often. Apply these tips to make travel easier and to protect your stroller.

Try a few timed practice folds today. Leave a comment below about your experience or questions. Subscribe for more hands-on stroller tips and travel hacks.

When To Stop Using Stroller

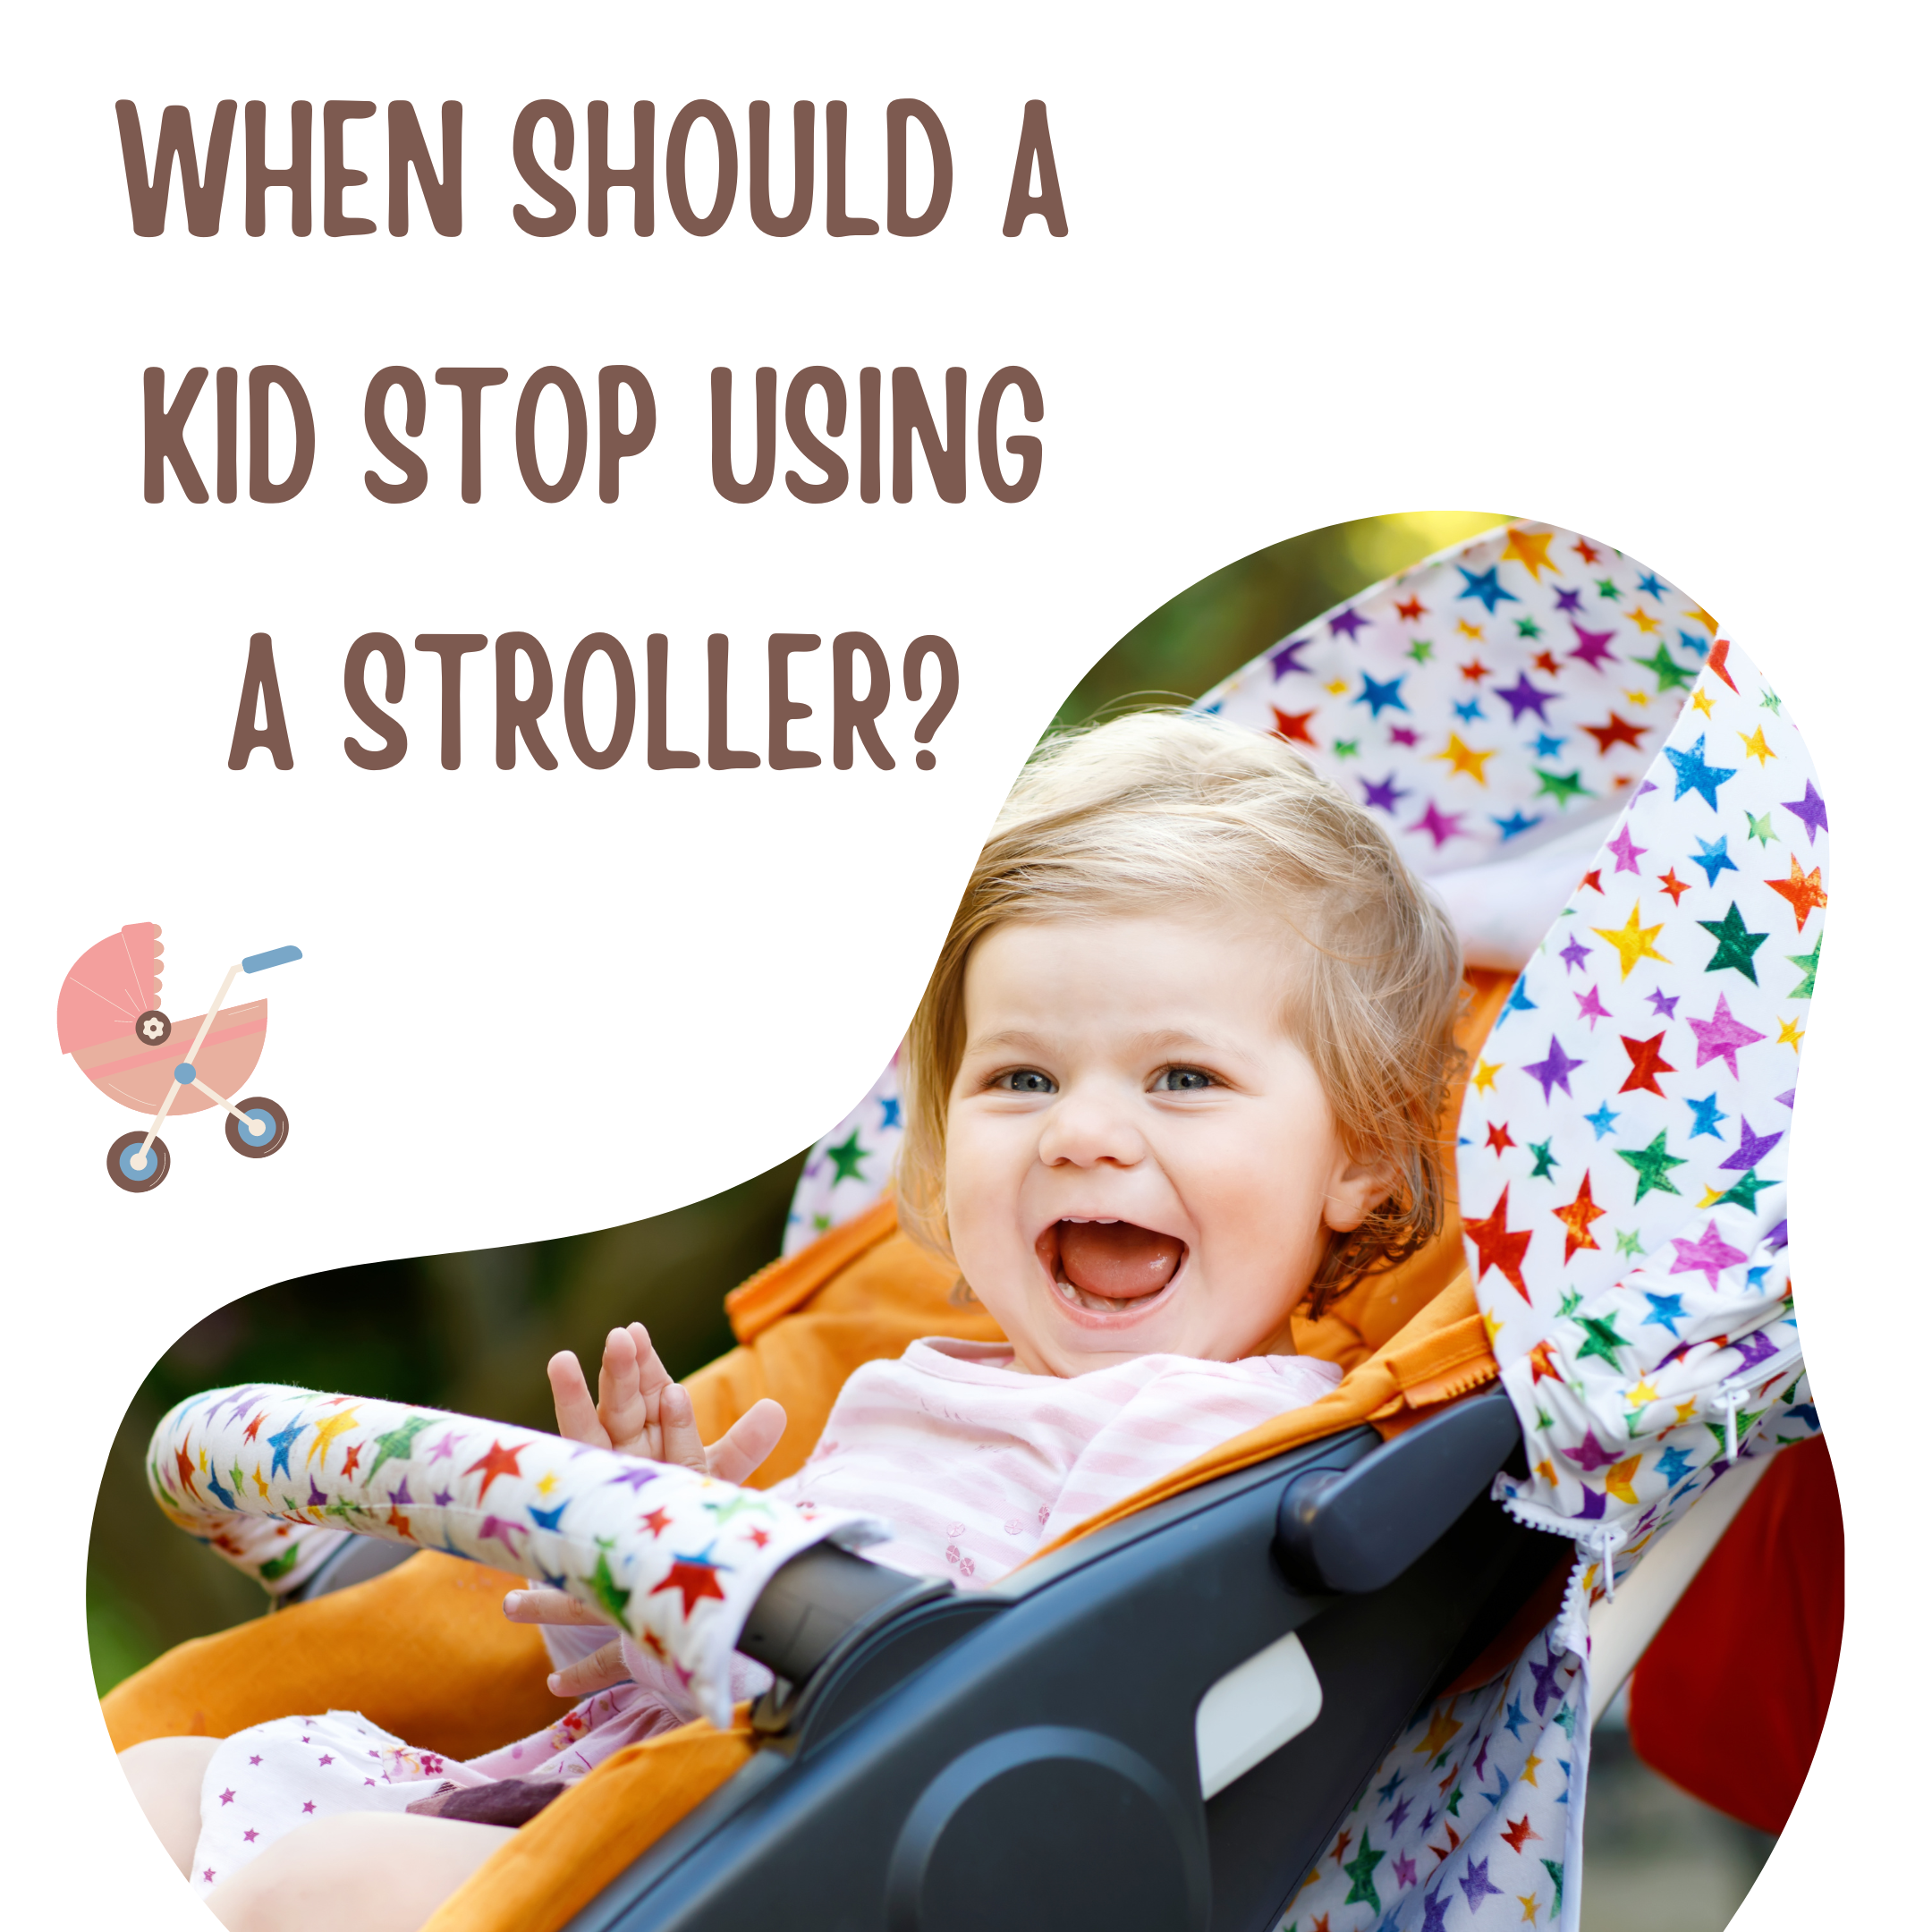
When To Stop Using Stroller: Signs And Age Guide

Most children stop needing a stroller between ages 3 and 5, depending on development and routine.

As a parent and pediatric mobility researcher, I’ve helped many families decide when to stop using stroller with clear, practical steps. This guide explains signs, age ranges, safety factors, and transition tips so you can make a confident choice that fits your child’s needs and your lifestyle. Read on for evidence-based advice, real-life examples, and easy actions to help you decide when to stop using stroller.

Signs your child is ready to stop using stroller
Source: jldtherapy.com

Signs your child is ready to stop using stroller

Look for behavioral and physical cues that show independence. If walking distances feel easy, try short trips without the stroller. If your child resists the stroller and prefers to walk, that is a strong signal. If your child can stay calm in crowds and follow simple directions, you may be ready to stop using stroller.

Key signs include:

  • Able to walk 15–30 minutes without frequent breaks.
  • Shows interest in walking or running on their own.
  • Can follow one- or two-step instructions in public.
  • Uses potty independently and can manage clothing when needed.

When to stop using stroller varies by child. Some kids stop earlier. Others need more time. Trust patterns you see over weeks, not one day of behavior.

Age guidelines and realistic ranges
Source: craft-child.com

Age guidelines and realistic ranges

Age is an easy reference but not the only one. Most kids transition between 3 and 5 years old. Toddlers under 2 often still need strollers for safety. Preschoolers around 3 can often handle short walks. By 4 or 5, many families leave the stroller at home for daily use.

Typical ranges to expect:

  • 0–2 years: stroller is essential for naps and safety.
  • 2–3 years: partial stroller use; combine walking with stroller rides.
  • 3–4 years: reduce stroller use for short trips and errands.
  • 4–5 years: many children stop daily stroller use entirely.

Keep flexibility. Weather, distance, and family needs change the plan. Moving gradually allows children to adapt.

Safety and developmental considerations
Source: parentingtogo.ca

Safety and developmental considerations

Safety and development guide the timing when to stop using stroller. Young children get tired faster. Tired kids can be unsafe near streets or busy areas. Physical endurance and attention span both matter.

Consider:

  • Road and traffic safety where you live.
  • Child’s balance and stamina.
  • Social behavior in crowds.
  • Any sensory or mobility issues that make walking hard.

If a child has special needs, consult a pediatrician or physical therapist before you stop using stroller. Professional advice brings tailored safety plans.

Practical transition tips and strategies
Source: strolleria.com

Practical transition tips and strategies

Plan a gradual shift when you decide when to stop using stroller. Small wins build confidence. Use these steps to make the change smooth.

Step-by-step plan:

  1. Start with short walks: pick familiar routes under 15 minutes.
  2. Bring a compact stroller for backup: fold it but keep it ready.
  3. Set expectations: tell your child the plan and offer choices.
  4. Use incentives: stickers, small snacks, or a walking game.
  5. Schedule rests: pick benches and playgrounds for breaks.
  6. Carry a lightweight carrier or sling for emergencies.

Real-life example: I once phased out a stroller by switching to a backpack with snacks and a map game. After two weeks, my child asked for the stroller less and walked more confidently.
Alternatives to the stroller
Source: parentingtogo.ca

Alternatives to the stroller

You don’t have to choose only stroller or full walking. There are many in-between options that help you transition when to stop using stroller.

Alternatives:

Choose based on distance, errands, and child preferences. Mix tools to match each outing.

Common concerns and how to handle them
Source: orbitbaby.com

Common concerns and how to handle them

Parents often worry about fatigue, tantrums, and safety when thinking about when to stop using stroller. Address each issue with simple solutions.

Common concerns:

  • Fatigue: plan rests and short routes.
  • Tantrums: give choices and set clear limits.
  • Safety near roads: hold hands and walk on safe paths.
  • Weather: keep stroller for rainy or very hot days.
  • Public transit: use lightweight folding strollers when needed.

People also ask:

  • Will stopping stroller make my child tire faster? Answer: Short-term fatigue may rise, but stamina improves with regular walking. Pace outings to build endurance.
  • How long should a walking session be? Answer: Start with 10–20 minutes and add time gradually based on your child’s cues.
  • Should I stop stroller cold turkey? Answer: Gradual change works better. Keep a backup for challenging days.

Personal experience and lessons learned
Source: strolleria.com

Personal experience and lessons learned

I phased out a stroller with my child over one month. We tried short walks, then swapped the stroller for a small scooter. At first, I kept a compact stroller in the trunk. After consistent short trips and praise for walking, we rarely used it. Lessons I learned:

  • Expect setbacks and plan for them.
  • Keep the stroller as a confidence net for travel.
  • Celebrate walking milestones to reinforce the change.

This approach saved space and encouraged independence without stress.

When to keep a stroller longer
Source: yahoo.com

When to keep a stroller longer

Some situations make it wise to keep using a stroller even after your child can walk. Consider keeping it when:

  • You have long days out or many errands.
  • Your child has sensory or mobility challenges.
  • You face extreme weather or crowded venues.
  • You use public transit often.

There is no single right answer. Use the stroller as a tool, not a rule. The goal is safe mobility for your child and easier outings for your family.

Frequently Asked Questions of when to stop using stroller
Source: parentingtogo.ca

Frequently Asked Questions of when to stop using stroller

When is the best age to stop using a stroller?

Most families begin cutting back between ages 3 and 5. The exact age depends on the child’s stamina and behavior.

How can I tell if my child gets tired too quickly to walk?

Watch for slowed pace, frequent sitting, or mood shifts. If these show up consistently on short walks, keep using the stroller.

Can stopping stroller early affect development?

Walking more can improve balance and endurance. Stopping too early without support may cause stress. Use gradual steps to avoid negative effects.

Is it okay to use a stroller sometimes after stopping daily use?

Yes. Many parents keep a lightweight stroller for long trips, travel, or bad weather. Occasional use is practical and normal.

Should special needs change when to stop using stroller?

Yes. Children with mobility or sensory needs may need strollers longer. Consult a pediatrician or therapist for a personalized plan.

Conclusion

Assess signs, age ranges, and safety to decide when to stop using stroller. Use a gradual plan, support your child’s stamina, and keep backup options for tough days. Start small, track progress, and celebrate walking milestones to build confidence and reduce reliance on the stroller. Try one change this week: swap one short stroller trip for a walk and see how it goes. Share your experience below or subscribe for more practical parenting tips.

Safe Sleep Environment

Safe Sleep Environment For Newborns: Essential Sleep Tips

A safe sleep environment for newborns prevents suffocation and greatly reduces SIDS risk.

I have worked with new parents and neonatal teams to design clear, practical advice for a safe sleep environment for newborns. This guide covers the most important steps, common pitfalls, and real-world tips so you can set up a safe sleep space with confidence. Read on to get a complete, evidence-informed plan for protecting your baby during sleep.

Why a safe sleep environment for newborns matters
Source: awog.org

Why a safe sleep environment for newborns matters

A safe sleep environment for newborns saves lives. Infants are vulnerable to sudden infant death syndrome (SIDS), accidental suffocation, and positional asphyxia. Creating a consistent, safe sleep setup cuts risk and gives parents peace of mind. Clear routines and safe gear also make nights easier and calmer for everyone.

Key components of a safe sleep environment for newborns

Source: publichealthinsider.com

Key components of a safe sleep environment for newborns

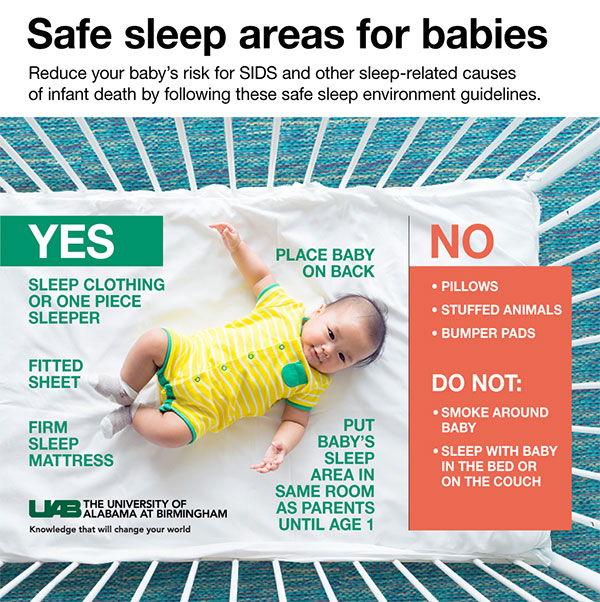
A safe sleep environment for newborns relies on a handful of simple rules. Keep the sleep surface firm and flat. Always place the baby on their back for sleep. Use a separate sleep surface in the parents’ room for the first 6 months. Avoid loose bedding, soft toys, and crib bumpers.

Practical checklist for a safe sleep environment for newborns:

  • Firm mattress that fits the crib snugly. No gaps, no soft layers.
  • Bare crib or bassinet with only a fitted sheet. No pillows, quilts, or stuffed animals.
  • Baby sleeps on back, not on side or stomach.
  • Room-sharing for 6 to 12 months, but not bed-sharing.
  • Smoke-free home and clothing-free of strong scents.
Crib, bassinet, and mattress setup

Source: uab.edu

Crib, bassinet, and mattress setup

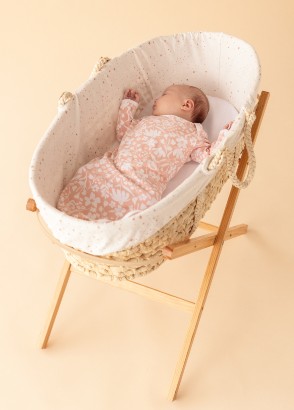
Choose an approved crib, bassinet, or portable play yard for a safe sleep environment for newborns. Make sure the mattress is firm and that the fitted sheet is tight. Inspect for recalled models and avoid secondhand gear unless you verify it meets current safety standards.

Setup tips:

  • Check mattress-to-crib gaps; gaps must be minimal.
  • Slat spacing should be safe to prevent limb entrapment.
  • Avoid soft or inflatable sleep surfaces marketed for infants.
  • Remove any decorative cutouts or loose hardware.
Bedding, sleep position, and clothing

Source: sarahborchgrevinkphotography.com

Bedding, sleep position, and clothing

Back-sleeping is a non-negotiable rule for a safe sleep environment for newborns. Dress your baby in sleep clothing or a wearable blanket instead of loose blankets. Swaddle safely, and stop swaddling once your baby starts rolling.

PAA question: What is the safest position for a newborn to sleep?

  • Newborns should always be placed on their backs for every sleep, day and night, to reduce SIDS risk.

Quick clothing and bedding tips:

  • Use a sleep sack rather than a blanket.
  • Keep head and face uncovered during sleep.
  • If room is cool, add a thin layer of clothing rather than a heavy blanket.
Room-sharing versus bed-sharing

Source: cottagehealth.org

Room-sharing versus bed-sharing

Room-sharing is a key strategy in a safe sleep environment for newborns. Keep baby in your room in a crib or bassinet for the first 6 to 12 months. This practice lowers SIDS risk and makes feeding and monitoring easier.

Why not bed-share:

  • Bed-sharing increases the risk of accidental suffocation and overheating.
  • Adult bedding, cushions, and co-sleeping positions can block a baby’s airway.
  • If a parent is very tired, has used alcohol, or takes meds that impair consciousness, bed-sharing is especially dangerous.

How to room-share safely:

  • Place the crib or bassinet within arm’s reach of your bed.
  • Use a firm, flat sleep surface. No sofas, armchairs, or soft surfaces.
  • Avoid placing the crib near window cords or heaters.

Temperature, ventilation, and environmental hazards

Maintaining a safe temperature is part of a safe sleep environment for newborns. Overheating is a known risk factor for SIDS. Aim for a comfortable room temperature and monitor baby’s neck or chest rather than hands and feet.

Environmental hazard checklist:

  • Keep the room comfortably cool, not hot.
  • Ensure good airflow but avoid direct drafts.
  • Remove cords, blind pulls, and hanging toys from the crib area.
  • Keep pets and cigarette smoke away from the baby’s sleep space.

Monitoring, devices, and products to avoid or use cautiously

Some devices claim to reduce SIDS risk. In a safe sleep environment for newborns, be cautious with untested products. Baby monitors are helpful for sound and video, but no monitor can prevent SIDS. Avoid wedges, positioners, and incline sleepers for normal sleep.

Safe device guidance:

  • Use video or audio monitors for reassurance, not as safety guarantees.
  • Pacifiers at nap and bedtime are associated with lower SIDS risk and are safe to use.
  • Do not use consumer apps or smart devices as replacements for safe sleep practices.
  • Follow manufacturer instructions and check for recalls.

Common myths and mistakes about a safe sleep environment for newborns

Many parents hear confusing advice. Clearing up myths helps maintain a safe sleep environment for newborns.

Common myths corrected:

  • Myth: Soft mattresses make baby more comfortable. Fact: Firm mattresses reduce suffocation risk.
  • Myth: Tummy sleep is fine for reflux. Fact: Back sleep is safer; handle reflux with pediatric guidance.
  • Myth: Bed-sharing is safe if you’re careful. Fact: Bed-sharing raises risks even when parents are cautious.
  • Myth: A hat is fine at night. Fact: Do not let newborns sleep with hats; they can overheat.

Personal experience and practical tips

From working with newborn families, I learned simple changes make a big difference. One family switched to a bare crib and a sleep sack. Night wakings still happened, but they felt safer and slept better. Small, consistent safety steps reduce anxiety and lead to better sleep hygiene.

Real-world tips I recommend:

  • Practice putting baby down awake so they learn to self-soothe.
  • Keep a small night lamp and a diaper caddy near the crib to minimize handling.
  • Review crib setup every few months as baby grows and becomes mobile.

PAA-style questions

What should a safe sleep environment for newborns include at nap time?

  • The same rules apply: firm surface, back position, no loose bedding, wearable blanket if needed.

How long should a newborn room-share to keep a safe sleep environment for newborns?

  • Most guidance recommends room-sharing for 6 to 12 months while avoiding bed-sharing.

Can a pacifier help create a safer sleep environment for newborns?

  • Yes. Using a pacifier at sleep times is linked to lower SIDS risk, even if breastfeeding, but don’t force it.

Frequently Asked Questions of Safe sleep environment for newborns

How often should I check on my newborn during sleep?

Check visually or with a monitor regularly, especially early on. Frequent checks provide reassurance but avoid unnecessary handling that disrupts sleep.

When can my baby sleep on their stomach?

Only when a pediatrician advises and typically after strong head control emerges; otherwise always place your newborn on their back.

Are sleep positioners or wedges safe for newborns?

No. Positioners and wedges are not recommended and can increase suffocation risk.

Is swaddling safe, and when should I stop?

Swaddling is safe only when done correctly and stopped as soon as the baby shows signs of rolling, usually by 2 months.

Should I use a monitor that tracks breathing or heart rate?

These monitors may offer reassurance but are not proven to prevent SIDS. Use them cautiously and continue safe sleep practices.

Conclusion

A safe sleep environment for newborns is built on simple, consistent choices: a firm, bare sleep surface, back sleeping, room-sharing without bed-sharing, and avoiding loose bedding or risky products. Small changes add up to big reductions in risk and better nights for the whole family. Start by checking your crib setup tonight, adopt one new safe habit, and keep learning as your baby grows. Share your questions or experiences below, subscribe for more newborn safety tips, or talk with your pediatric provider for personalized guidance.

When Do Babies Sleep Through The Night

When Do Babies Sleep Through The Night: Timeline & Tips

Most babies sleep through the night for 6–8 hours by about 3–6 months.

I have worked with new parents and studied pediatric sleep guidance for years. When do babies sleep through the night is one of the top questions I hear. This article gives clear timelines, causes, and practical steps to help your family get better sleep. Read on for evidence-based tips, real-life examples, and simple plans you can try tonight.

How sleep develops in babies and what "through the night" means
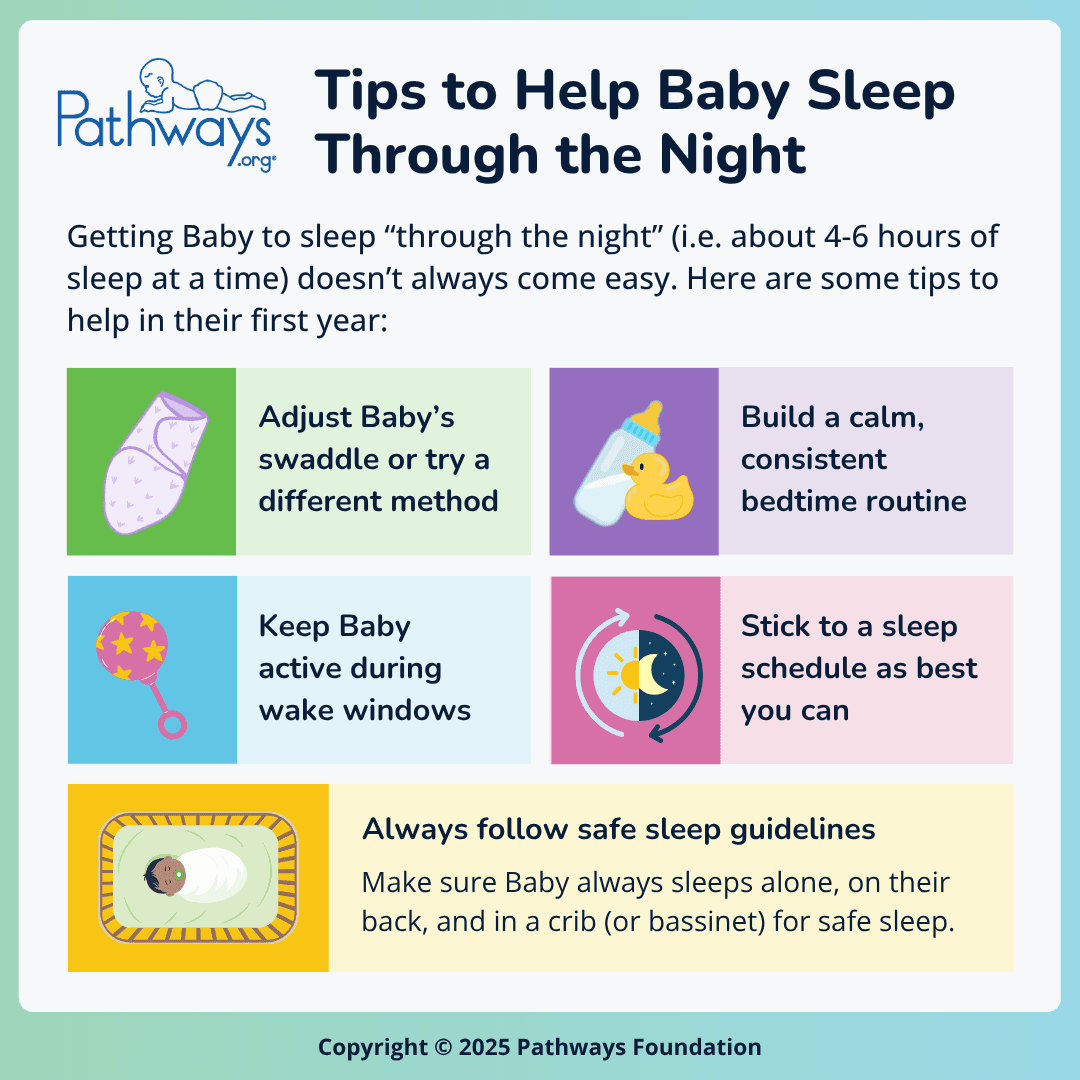
Source: pathways.org

How sleep develops in babies and what "through the night" means

Babies are born with short sleep cycles. Newborns wake to feed every few hours. This is normal and healthy.

When do babies sleep through the night matters both to parents and to baby health. For clarity, many experts call "sleeping through the night" a stretch of 6–8 hours without waking. That stretch depends on age, weight, feeding, and development.

Babies slowly lengthen their sleep cycles over months. By 3 months some babies sleep longer at night. By 6 months many can sleep 6–8 hours. Individual variation is large.

When do babies sleep through the night: typical timeline by age
Source: babysleepsite.com

When do babies sleep through the night: typical timeline by age

Understanding expected milestones helps set calm, realistic goals. Below is a simple timeline.

  • Birth to 6 weeks: Sleep in short bursts. Night and day are mixed. Frequent feedings drive wake times.
  • 6 to 12 weeks: Night stretches may get longer. Some babies show a 3–4 hour stretch at night.
  • 3 months: Many babies begin to show longer sleep at night. Still, many wake to feed or self-soothe needs.
  • 4 to 6 months: A large share of babies can sleep 6–8 hours. This is a common answer to when do babies sleep through the night.
  • 6 to 9 months: More babies consolidate night sleep. Teething, illness, or growth spurts can cause temporary waking.
  • 9 to 12 months: Many toddlers sleep longer at night. Sleep patterns still change with development and routine.

Keep in mind that sleeping through the night varies by feeding type. Breastfed babies may wake more often than formula-fed babies in early months. Also, cultural sleep practices and parental choices shape timing.

Factors that affect when babies sleep through the night
Source: milkology.org

Factors that affect when babies sleep through the night

Several clear factors speed up or delay a full night stretch. Here are the main ones.

  • Feeding method: Breastfeeding newborns often wake more. Formula can lead to longer stretches sooner.
  • Age and weight: Babies who reach steady weight gain may be ready for longer sleep.
  • Sleep environment: A calm, dark room and consistent routine help lengthen night sleep.
  • Daytime sleep: Too much day sleep can reduce night stretch. Balanced naps matter.
  • Developmental changes: Teething, milestones, and separation anxiety cause wakefulness.
  • Medical issues: Reflux, allergies, or ear infections can disrupt sleep. Check with a clinician if problems persist.

When do babies sleep through the night depends on these factors together. Addressing one factor often helps, but expect gradual gains.

How to help your baby sleep through the night: practical steps
Source: amazon.com

How to help your baby sleep through the night: practical steps

Use steady habits. Small changes add up fast.

  • Build a simple bedtime routine: bath, feed, books, dim lights. Repeat each night.
  • Put baby down drowsy but awake: This teaches self-soothing skills.
  • Keep night feeds calm and brief: Low light, soft voice, minimal interaction.
  • Balance daytime naps: Aim for consistent, age-appropriate nap length.
  • Watch signs of tiredness: Rubbing eyes, yawning, staring off. Put baby to sleep before overtired.
  • Adjust feeding gradually: If medically safe, lengthen time between night feeds slowly.
  • Manage sleep environment: Cool, dark, and quiet works best. White noise can help.
  • Get consistent help: Share night duties when possible to avoid mixed cues.

These steps target when do babies sleep through the night by building habits and skills. Expect progress in weeks, not days.

Common sleep problems and solutions
Source: gov.ng

Common sleep problems and solutions

Problems are normal. Many have simple fixes.

  • Short naps or too-long naps: Set a consistent nap schedule. Wake gently from long naps.
  • Frequent night waking: Check for hunger, diaper issues, or discomfort first. Then encourage self-soothing.
  • Early rising: Darken the room and delay morning stimulation. Gradually shift bedtime later if needed.
  • Regressions: Teething and milestones cause regressions. Keep routines and offer extra comfort for short periods.
  • Safety concerns: Always follow safe sleep guidelines: back to sleep, firm surface, no loose bedding.

When do babies sleep through the night improves when you address root causes, not just symptoms. Small, consistent changes matter more than drastic shifts.

Personal experience and practical tips I’ve used
Source: babysleepsite.com

Personal experience and practical tips I’ve used

I have helped families create simple plans that work. One parent I worked with had a four-month-old who woke every two hours. We added a short bedtime routine and put the baby down drowsy. Within two weeks the baby slept a six-hour stretch regularly.

Lessons I learned from hands-on work:

  • Start small. Tiny changes are easier to keep.
  • Track patterns. A sleep log shows trends and triggers.
  • Be kind to yourself. Sleep training can feel hard for parents too.

When do babies sleep through the night is often less about a single method and more about patience and consistency.

PAA-style questions (brief answers)
Source: magroadvogados.com

PAA-style questions (brief answers)

What is the age most babies sleep through the night?
Most babies reach a 6–8 hour night stretch between 3 and 6 months, but individual timing varies.

How long is "through the night" for babies?
Many experts define "through the night" as 6–8 hours of continuous sleep.

Can a newborn sleep through the night?
Newborns usually cannot. They wake often to feed and need frequent care.

Does sleep training make babies sleep through the night sooner?
Sleep training can teach self-soothing and often leads to longer night stretches within weeks.

When should I call a doctor about sleep issues?
See a clinician if your baby has poor weight gain, breathing problems, or persistent disrupted sleep despite consistent routines.

Frequently Asked Questions of When do babies sleep through the night

When do most babies sleep through the night?

Most babies begin sleeping 6–8 hours at a stretch between 3 and 6 months. Wide variation is normal.

Is it normal for a 6-month-old not to sleep through the night?

Yes. Some six-month-olds still wake at night. Medical issues, feeding, and development can affect sleep.

How can I help my baby sleep through the night faster?

Create a calm bedtime routine, encourage drowsy-but-awake putting down, and balance daytime naps. Gradual changes help.

Will sleep training harm my baby?

When done gently and age-appropriately, sleep training is safe for most babies. Choose a method that suits your family.

How can I know if night waking is a problem?

If night waking affects growth, mood, or family health, consult your pediatrician. Otherwise some waking is normal.

Conclusion

When do babies sleep through the night depends on age, feeding, health, and routine. Most families see major improvement by 3–6 months, with steady gains after that. Start small, be consistent, and track what works. Take action tonight: pick one simple change and try it for two weeks. If you found this helpful, subscribe for more tips or share your questions below.